How to conduct electrical wiring under drywall
Features of electrical work
Before we talk about laying wiring under drywall, we turn to PUEWhat does it say about this? In paragraph 2.1.4 (Chapter 2.1 PUE) given the definition of hidden and open wiring:
- Open wiring - laid on the surface of walls, ceilings, on trusses and other building elements of buildings and structures, on poles, etc ...
- Hidden wiring - laid inside the structural elements of buildings and structures (in walls, floors, foundations, ceilings), as well as on ceilings in the preparation of the floor, directly under the removable floor, etc.
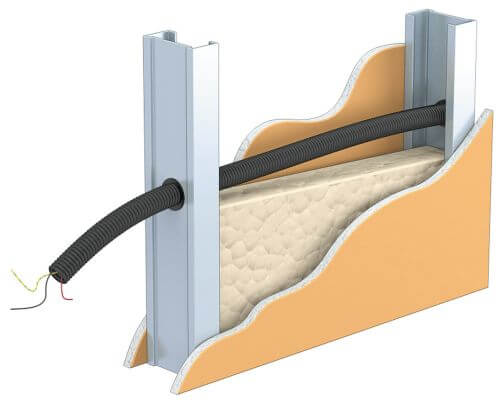
With hidden wiring, the following methods of laying wires and cables are used: in pipes, flexible metal sleeves, ducts, closed channels and voids of building structures.
In our case, if we lay the cable on the ceiling or on the wall, which we sew with drywall, then we select from this point the following: "... laid inside the structural elements of buildings and structures ..." and "... the voids of building structures ...". From this we conclude that such a wiring is hidden.
One of the main points of the PUE which describes the rules for laying wiring under drywall is clause 7.1.38:
"7.1.38. Electrical networks laid behind impassable suspended ceilings and in partitions are considered as hidden electrical wiring and should be performed:
- behind ceilings and in voids of partitions made of combustible materials in metal pipes with localization ability, and in closed boxes;
- behind ceilings and partitions of non-combustible materials * - in pipes and ducts made of non-combustible materials, as well as cables that do not spread combustion. At the same time, the ability to replace wires and cables should be provided. ”
Drywall is a non-combustible material, does not spread combustion, but does not have localization ability, you can see an example of a combustibility test in the following video:
If the rough ceiling is plastered or it is a concrete slab, then the wiring can be laid directly on it, and if the ceiling is made of combustible material, such as wood, then laying in solid metal pipes (not metal corrugations or metal hoses, is mandatory, since they do not have localization ability. Either in PVC pipes or openly, provided that the distance in the light from the cable with a sheath of combustible materials to the combustible structure is not less than 10 mm (PUE 2.1.37.).
As a result, the wiring under the drywall must be laid in corrugated pipes - this method is suitable for all of the above cases and, moreover, the requirements for wiring changeability given in the PUE of clause 7.1.37 are met. Use VVGNG-LS cable - according to PUE it is classified as a cable with a sheath of non-combustible or non-combustible materials. Then, according to Table 2.1.3 of the PUE, it can be laid directly on any surface.
For information, according to the technical characteristics of the products of most manufacturers of PVC corrugated pipes - it does not support combustion when checking wire heated to 650 degrees Celsius.
The connections should be made in junction boxes, but according to the PUE p. 2.1.23 - the connections should be accessible for maintenance and repair. If we sew walls or ceilings with drywall - they will not be available. In this case, you can make connections using welding or crimping. According to GOST 50571.5.52-2011 p. 526.3, it is allowed to make such connections inaccessible for periodic inspection and repair.
The problem electrician-beginners may face is pulling the cable through the corrugation. We recommend immediately watching a video example in which the simplest technology for pulling a wire through a corrugated pipe is provided:
Wire pull options
Depending on how the GKL sheets will be attached to the wall, the installation method is selected. To date, drywall can be attached to a special design from profiles or dispense with the frame by putting sheets on glue yourself. The second option is used extremely rarely and only if the walls in the house are almost perfectly smooth. Most often, it is customary to mount GKL sheets on a specially prepared frame, so the installation instructions for the electrical wiring under the drywall will be provided for this particular option. 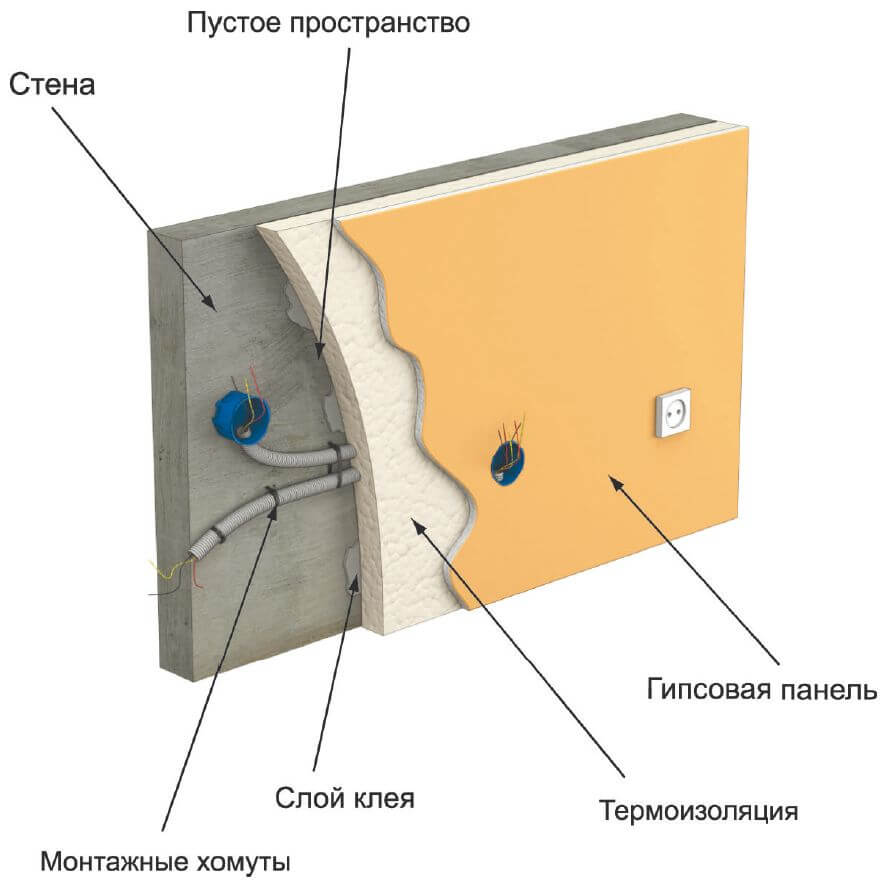
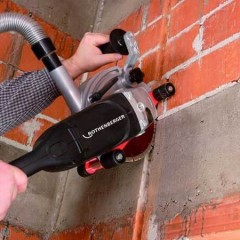
So that you know how to stretch the wire with your own hands, if the gypsum plaster sheets sit on glue, we will briefly explain the essence of electrical work. First you need to do it yourself wall chipping for wiringThen fix the wire in the prepared grooves and plaster all the strobes. When the solution dries, you can proceed to fastening the sheets without a frame. Even superficially familiarizing yourself with this installation option, you can see that in this case it will be much more difficult to conduct electrical wiring under drywall.
Installation instructions
So, we will consider how to do the wiring for drywall do it yourself. We will provide all the technology in the form of step-by-step instructions with photo examples, so that the material is easier to perceive.
Step 1 - Preparatory work
First you need to assemble the structure from the profiles, but do not rush to sew up the frame with GKL sheets, because this will be done at the very end of the electrical work. At the stage of preparatory work, you must determine how the wiring will be carried out: on the ceiling or on the walls. If a suspended or suspended ceiling is created in the rooms, it is easier and more reasonable to conduct the wires along the ceiling and lower them to the “electric points” in the right places (strictly vertically). If only the walls are drywall, and the ceiling itself remains concrete or wooden, then the wire must be pulled along the walls at a level of 10-15 cm from the ceiling. Given this nuance, you should draw up a wiring diagramon which to mark the exact locations of all points: sockets, switches, junction boxes. After that, you need to transfer the scheme to the walls, as shown in the photo below, and proceed to the calculation of materials and directly to the installation.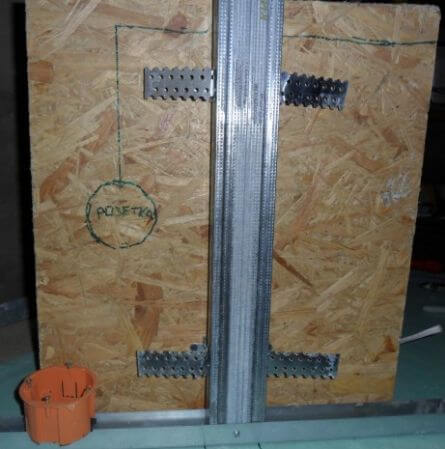
From the materials you need:
- Wire of suitable cross section. It is better to use the non-combustible cable VVGNG-LS, which is suitable even if you decide to conduct electrical wiring under the drywall in a wooden house with your own hands. How to implement it correctly calculation of cable cross-section by power and lengthread in the corresponding article.
- Corrugated pipe, the cross section of which is selected by the cross section of the selected cable.
- Clips for attaching corrugations.
- Dowel nails for mounting the clips themselves.
- Junction boxes made of non-combustible material.
- Sockets and switches.
- Special podrozetniki for drywall.
- Terminal Blocks WAGO for connecting wires.
Of the tools you will need a drill with a special cutter for gating sheets GKL. The diameter of the cutter must match the dimensions of the installation box so that the latter fits securely in the strobes.
Step 2 - Install the junction box
The first thing you need is based on the electrical circuit install junction boxes in each room. This is not difficult to do, just attach the products to the wall or ceiling using self-tapping screws, as shown in the photo below: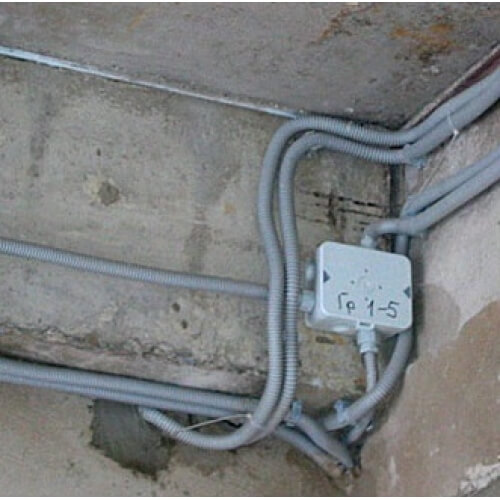

Step 3 - Installing Wiring
After all the materials and tools have been prepared, you can install the wiring under the drywall yourself. To do this, you first need to fix the clips on the marked walls. The distance between the clips should be between 30 and 40 cm. Instead of clips, you can also use plastic clamps. In this case, the wiring will be faster, but it is likely that the corrugation will be damaged on the sharp ends of the metal profile.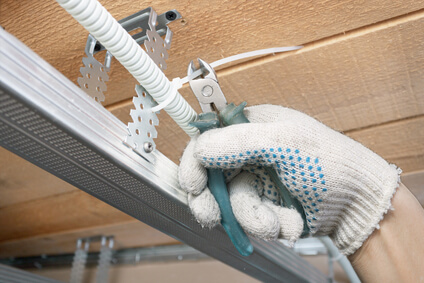
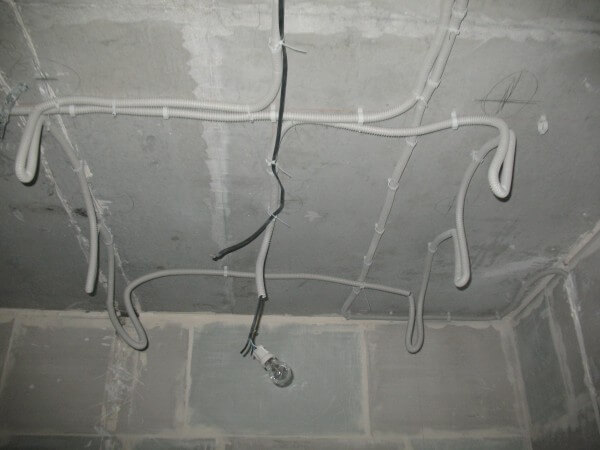 In order to pull the corrugated pipe through the frame from the profiles, it is necessary to drill holes of a suitable diameter in advance or just buy a profile in which special holes are already provided for wiring.
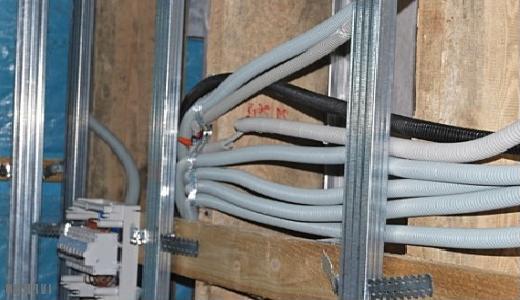
All you need to do when installing the wiring under the plasterboard with your own hands is to carefully route the cable from the junction boxes to future outlets and switches. It is not difficult to do this, the main thing to remember is exactly where the end of the output wire will be located, because the next thing you should do is to sew up the wall with drywall.
Step 4 - Connecting Outlets and Switches
Well, the last stage when laying wiring under the GKL sheets is the installation and connection of sockets with switches. You need to drill yourself using a drill with a special nozzle according to the scheme of the hole in the drywall for the installation of undergrowths.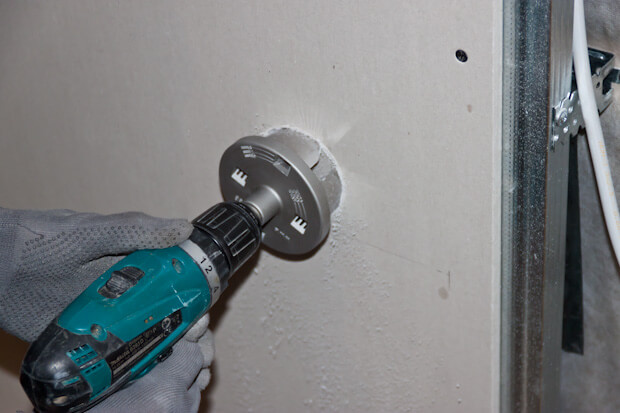 If you calculated everything correctly, after the gating of the sheet, the lead-in wire will be in the right place. Installation of socket boxes in drywall It’s not a big deal. First you have to cut holes in the bottom for the wiring, then pull the wire out and insert the socket into the prepared plug (see photo below). On the right and left are the screws that you must tighten until the special presser foot secures the housing to the gate.
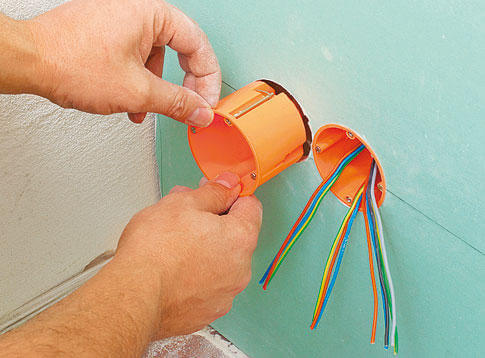
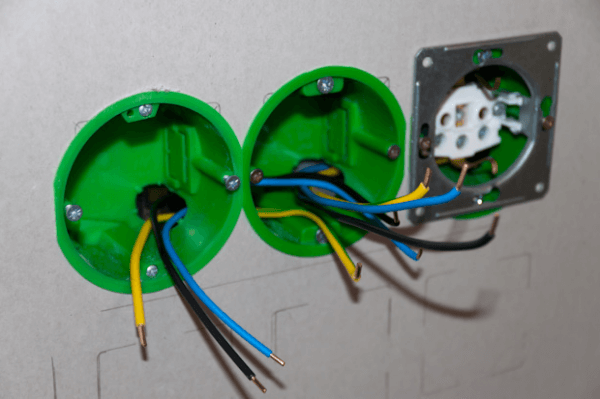 Next, you need to produce it yourself power outlets and switches, which should also not cause difficulties even for a novice electrician.
We draw your attention to the fact that it is better to install light switches and sockets after completing the entire repair so that the putty does not stain new decorative overlays!
What to do if repairs have already been made
Sometimes it happens that GKL sheets are already installed and there is a need to add another outlet or a switch under drywall. In order not to disassemble the gypsum, you can do the following:
- Take a thread with a heavy nut.
- Make a round gate at the installation location of the future outlet / switch.
- From the exposed ceiling (if it has not yet been protected with plaster or the film is not stretched) a thread drops over a new strob. The nut acting as a weight should lower to the level of the hole made.
- The cable is secured to the upper end of the thread using electrical tape.
- From below, the thread stretches until the electric conductor comes out.
Everything is very simple, so if there was a need to hide the wiring under the GKL sheets, we recommend using this technology. By the way, if you decide to make a plasterboard partition in the house, then for ease of installation, you first need to “sew up” one of the walls with sheets, and then proceed to laying the wiring!
That's the whole essence of electrical work. As you can see, there is nothing complicated, the main thing is to carefully stretch the wire between the profiles. We hope that the DIY installation instructions for the gypsum plasterboard were interesting and useful for you!
Also read:

