How to make strobes for wiring - instructions in pictures
Choosing a tool for work
First of all, let's talk about how to make a strob in the wall, considering the most suitable tools and the effectiveness of their use. A review will be provided from the most time-consuming method of gating to a more convenient and quick option.
Chisel and hammer
The old-fashioned way to make a shtrob for electric wiring on your own is to knock it out with a chisel and hammer. The advantage of this option is the complete absence of costs, because in fact, you can wall a wall without a power tool using the tools available in every home. Disadvantages - large losses of time and effort, which is not entirely reasonable in the 21st century.
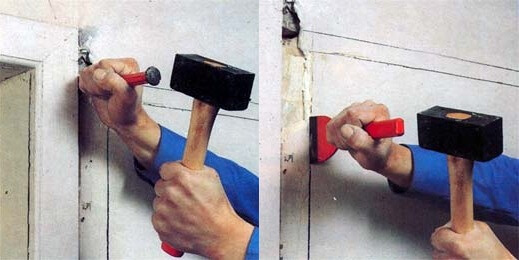 In addition, you will not be able to make a recess under the cable in the brick with a chisel at all. We advise you to refuse this option, because In the following, simpler and more effective methods of wall shredding for wiring in a house and apartment will be listed.
Drill + Chisel
A more effective, but still inconvenient way to create a strob under electrical wiring represents drilling every 1-1.5 cm of holes along the width of the future recess. When the “point” route is ready, as shown in the photo below, you can use the chisel to knock out the jumpers between the holes, resulting in a not quite smooth, but still stroba. The disadvantage of this option, again, is the time cost and low productivity of concrete shredding.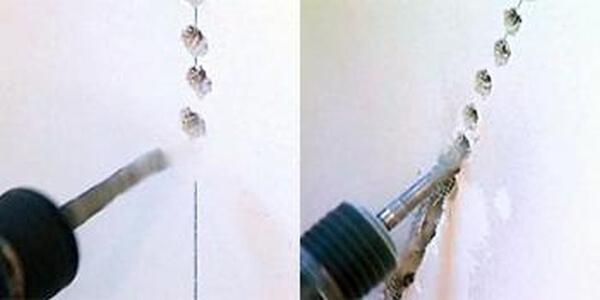
Bulgarian
Approaching closer to convenient power tools that will allow you to quickly grind an even groove, the worst of the best options is an angle grinder (angle grinder), or as it is commonly called in common people - a Bulgarian. If you put a diamond disk on it, the process of breaking the walls under the wiring will become several times faster, in addition, the contours of the grooves will be perfectly smooth.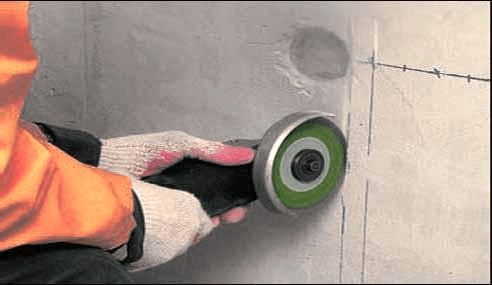
There are really many drawbacks to this option: a lot of dust in the room, the same groove can be made in two approaches (first one edge is cut, then another), the inability to cut the track in the corner, increased noise during operation and it’s also very difficult to make the depth strobes the same along the entire length. The bottom line is to use a grinder to grind a concrete wall only in the most extreme case.
Hammer drill
To make the strob a puncher yourself, it’s enough to choose a suitable nozzle - a blade or a special strober and go along the marked lines in shock mode.The disadvantage of using only a punch - the strobes will be curved, but still at home, the type of power tool is most often used to gouge the walls with your own hands.
By the way, a puncher can not only just pass the walls with a spatula, but also work like a percussion drill - first drill holes along the markings, and then break the partitions with a spatula. Concrete ditching is quick, convenient, and the grooves themselves are more or less even.
Stroborez
Well, the last, most effective option is the use of a special tool that allows you to make concrete shtrobs evenly and without dust. The shtroborez is really very convenient to use, it does not work so noisy and also, thanks to the connection to a construction vacuum cleaner, instantly absorbs all building dust. Today, wall chipping with this tool is the most effective, fast and safe.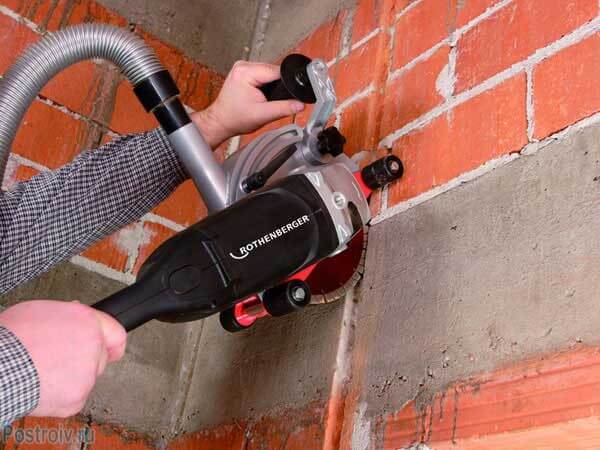 The only, but significant drawback of this option is the very high cost of the power tool, so there is no point in buying it for a one-time repair in the apartment. There are two ways to get out of the situation: rent a wall chaser (this will be inexpensive) or do a chipper yourself. We recommend stopping at the manufacture of homemade tools, especially if there is a grinder, the process will not take more than half an hour.
To summarize
So, among all the listed tools for wall ditching under the do-it-yourself wiring, we recommend stopping at one of two ways:
- Using a chamfer (even if home-made).
- Combination grinder + rotary hammer.
Let us dwell on the latter option. The fact is that if you cut through the borders of the strobes with a grinder, and then punch the core from the inside with a puncher, you can quickly and efficiently create strobes in concrete and brick walls. At home, this option is used very often, therefore, in the absence of the ability to make a chamfer, stop at this option!
I would like to step back a little from the topic and talk about how to say it right: shtrab or shtrob. The fact is that the term in construction is really correctly called shrab, but for some unknown reason, a slightly modified pronunciation has been fixed in the conversation for a long time. On the technical side, both versions of the word mean the same thing, so don’t be surprised if we use both pronunciations later in the article!
Job requirements
Before proceeding to wall chipping, it is necessary to take into account the following norms and requirements according to SP 76.13330.2016 “Electrical devices”, the updated version of SNiP 3.05.06-85 and recommendations of experienced electricians:
- The track should run strictly vertically and horizontally, there should not be any oblique lines.
- It is allowed to turn the route from one “electric point” to another 1 time (for example, from a junction box to an outlet). The more kinks, the more dangerous zones of cable occurrence, because at the bend, the conductor will heat up more.
- The maximum allowable depth of the groove is 26 mm, width is 30 mm, length is not more than 3 meters (referring to the distribution box).
- Leave at least 40 cm away from radiators and gas pipes, 10 cm from the door, and at least 5 cm from the ceiling or floor (but 10 is also better).
- In the panel house, it is forbidden to make cable grooves in the bearing walls. It is strictly forbidden to shatter a reinforced concrete partition, as this can lead to softening of the structure, the appearance of cracks and further adverse effects. Moreover, this prohibits the Decree of the Government of Moscow of February 8, 2005.N 73-PP "On the procedure for the reconstruction of premises in residential buildings in the territory of the city of Moscow". As well as Government Decision No. 508 (Clauses 11.3 and 11.11 of Appendix No. 1).
- If you need post on the floor in a prefabricated house, it is strictly forbidden to make a gate in a floor slab. The only way out of the situation is to fill in the concrete screed and provide a recess for the wires in it. As for the ceiling, its gating is allowed only on the shortest path to the lamp.
- If you want to make the strobe in an inclined ceiling, for example, an attic, the line should run parallel to the junction of the surfaces.
Given all these norms and requirements, you can correctly make a stroba for electrical wiring, so that the latter is safe, durable and easy to maintain. Next, we will talk about how to implement wall chipping with the most popular tool - a wall chaser, by providing step-by-step instructions in pictures!
How to make strobes
So, so that the instructions are understandable even for dummies in electrics, we provide a phased technology that will quickly and correctly grind the walls for wiring in the house and apartment:
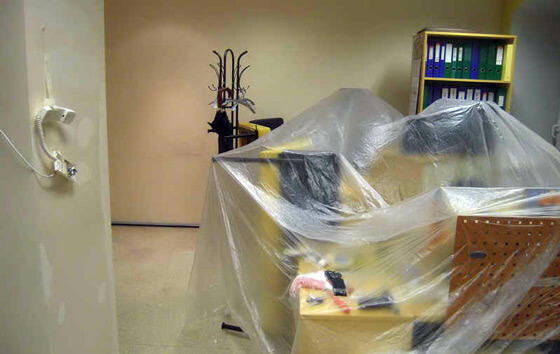
- We protect the rest of the room from dust. To do this, on all doorways, you need to hang a damp cloth from the inside of the working area, which will completely cover the entire opening. Do not rely on closed doors - through gaps on all sides, dust can easily pass through the apartment.
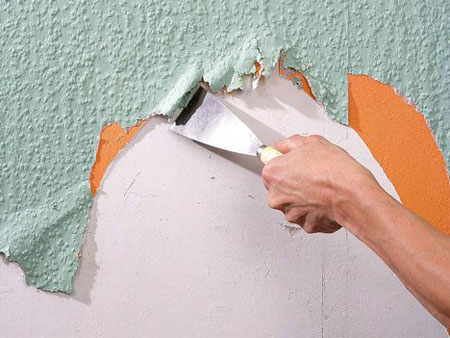
- We clean the surface on the ceiling and walls from pieces of wallpaper, because even small pieces of paper can block the movement of discs and interfere with the normal operation of the stroborez.
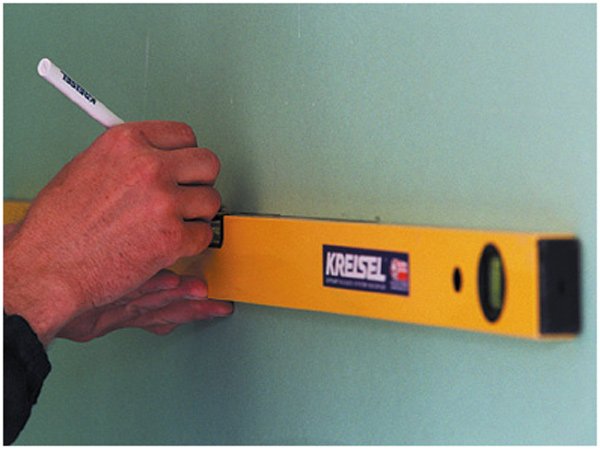
- We transfer the wiring diagram in the house to the walls using a marker and a building level. By the way, you can do DIY laser level, which allows you to quickly and accurately mark out horizontal lines for gating.
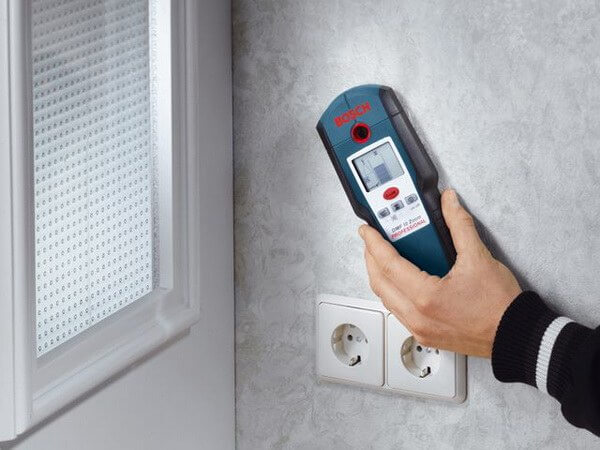
- If you do home wiring replacement, additionally you need to make sure that the old wiring no longer passes under the markup. If you stumble upon a wall when energized, you cannot avoid electric shock, not to mention a short circuit. To find the wire in the wall, you can use a homemade metal detector or a special tester to detect the cable. In the event that you stumble upon an old wiring, it must either be dismantled, or insulated and bypassed by backing at least 10 centimeters to the side.
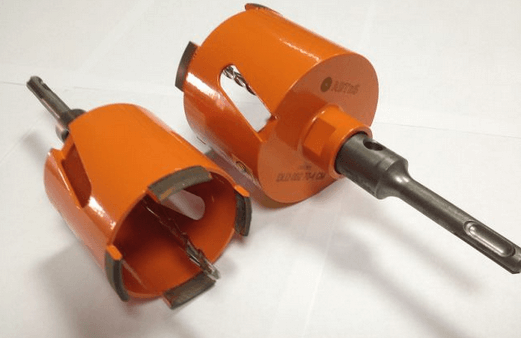
- After that, it is necessary to grind the wall under the wiring according to the marking. This is not difficult, which confirms the video provided above. As for the strob for installing the distribution of boxes and sockets, it is better to make them with a drill with a special nozzle - a crown of a suitable diameter (usually 80 and 65 mm).
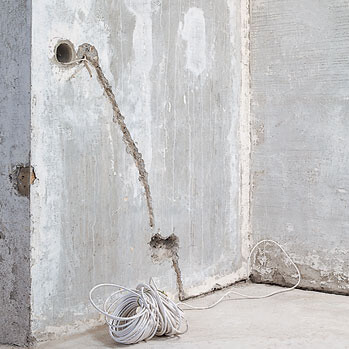
- When the entire network of grooves is gated, we recommend that you capture the picture on the camera so that you can easily find the damage site later, focusing not only on the wiring diagram, but also on the photo.
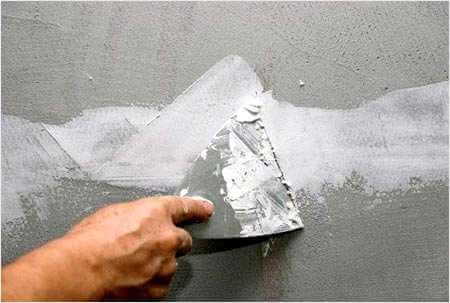
At this, the gating of the walls under the wiring with their own hands ends. All that remains for you is to clean the stub and fix the cable in it with a dowel-clamp, gypsum plaster or alabaster. We talked about this in detail in the article: how to make wiring in the house. We draw your attention to the fact that you need to grate the walls before the plaster, and not after, in order to plaster the entire route in one fell swoop, preparing the surface for wallpapering or tiling.
If the instructions provided seemed complicated to you, you can always call the wizard so that he not only plots the entire network of grooves, but also disconnects the wiring. However, keep in mind that such a pleasure will not be very cheap. To date, the price of a strobing 1 meter of the track can be from 100 to 500, depending on the material of the walls. In addition, a fine for each outlet, switch and junction box will cost you at a cost of 300 per point.As you can see, the prices are not very cheap, and if you hit the amount for the whole house, a rather high price will come out, so it’s better to try to do the gating yourself.
Keep in mind
The instructions provided above are suitable if you want to make a stroba in a monolithic or brick house with the corresponding walls. However, to date, aerated concrete, wooden and plasterboard partitions can be built inside the housing. We will talk about how to construct one of the non-standard wall options ourselves.
When installing wiring in a bathhouse or a wooden house, you will encounter the walls of a log or profiled beam. It is impossible to make strobes in a tree by safety rules, and even this is not advisable, because it’s necessary not to cut the log, but to cut special recesses in it. Such a lesson will be very difficult and take a lot of time, so in the case of wooden walls installation of open wiring.
If it is necessary to lay the cable in a wooden floor, shredding is again impossible here, therefore, it is necessary to consider the option of laying under the boards behind the chipboard, insulation and other layers of the pie. In this case, the cable is laid in pipes with localization ability, that is, metal tubes. In general, wiring in a wooden house is not difficult, but there are a number of nuances. Hidden wiring in combustible walls and ceilings is also possible in metal pipes, but not in corrugation. If you intend to lay wiring in the corrugation in the floor or walls of wood and other combustible materials - you must provide protection with a layer of 10 mm thick from non-combustible material. This may be plaster, alabaster, etc. (PUE 2.1.40, Chapter 2.1) We considered this issue in more detail in the article. https://our.electricianexp.com/en/montazh-elektroprovodki-v-derevyannom-dome.html.
In the walls of drywall, the horizontal and vertical paths also cannot be broken, because hl sheet is very thin and brittle. The cable is simply laid behind the plasterboard partition in the corrugation, between the profiles. The only thing you can do in drywall is to drill holes for sockets and light switches with a crown, as shown in the photo: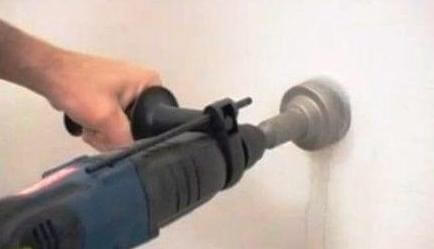
If you need to make a strobe in a tiled floor (for example, in a bathroom or in a kitchen), there should not be any difficulties here, it will be most convenient to use a grinder or a chamfer. Do not hammer the tile with a perforator, as You only damage the material - the tile will crack, after which you will have to completely change the flooring. Do not forget that when working with stone and tile, you need to install a diamond disk, which is designed to work with such material.
Well, the last of the most popular materials is aerated concrete. It is possible to make a shtroba in aerated concrete on your own with a special manual shtroborez, the cost of which does not exceed 1000 (and this is a model from the manufacturer). Using this tool is quite simple, as you can see by watching the video tutorial below.
That's all I wanted to tell you about what it is - ditching the walls for wiring, and how to stitch the path under the cable with your own hands. We hope that this information was interesting and useful for you!
Also read:




Drill, half angle ..it will be no worse than a chipper ...
and with a chisel only an asshole will do, more dust and crooked ..