How to conduct electrical wiring in a wooden house according to the PUE and other standards
Most often, wooden houses are erected in suburban areas. The advantage of these buildings is the low material costs for the construction and high speed construction. The main disadvantage of this solution is the high probability of ignition in the event of an emergency in the wiring. As a result of arcing and short circuits, the walls and ceiling light up easily. Hence the high requirements for cable laying in structures with combustible surfaces in PUE and other NTD. Therefore, let's understand how electrical wiring in a wooden house should be carried out safely, according to GOSTs and PUE.
Requirements
AT PUE wiring requirements for various structures are specified in Chapter 2.1 (paragraphs 2.1.31-2.1.51), table 2.1.3 and chapter 7. When constructing frame buildings, they are guided by the more recent document SP 31-105-2002.
So, the main requirements for installing electrical wiring in a wooden house are:
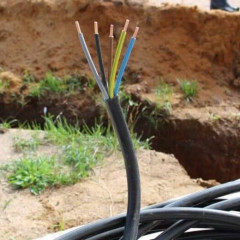
- Conductors must be insulated in non-combustible or non-combustible material, in practice it is used NYM or VVGng-LS.
- The veins must be copper.
- Advantage is recommended to give wiring open wiring in a wooden house, see table 2.1.3 of the PUE for more details.
- Hidden wiring in a wooden house possible (according to the same table. 2.1.3 PUE), but if it is protected from all sides with fireproof material (plaster, alabaster, metal pipes), however, this is the question that causes the most disputes and perplexities. Use metal hose or PVC corrugation in a wooden house is prohibited because they do not have the localization ability in case of fire.
- Carry out correctly calculation of the cross section of conductive cable conductors. We recommend choosing a core thickness with a current margin of 30% (better more than less, but without fanaticism).
- According to the norms and standards, the construction of a wooden house requires the presence of grounding, systems TN-C-S or TN-S, and the lines must be protected by devices such as a circuit breaker and an RCD or a dupole gun.
- If you have a wooden house of frame construction, then according to the above joint venture, you can lay hidden wiring in cavities filled with insulation, etc.
Important! Hidden wiring is not only wiring in the gates under the plaster, but also wiring in the voids of structures, closed with suspended ceilings and cladding.
Main process
The basic wiring process is not complicated. All that is needed is to make a wiring diagram in a wooden house, purchase all components, carry out preparatory work and installation.
After these operations, the finished line is agreed with Gosenergonadzor, and if there are no comments, within 5 days you will be connected to the mains.
Schema creation
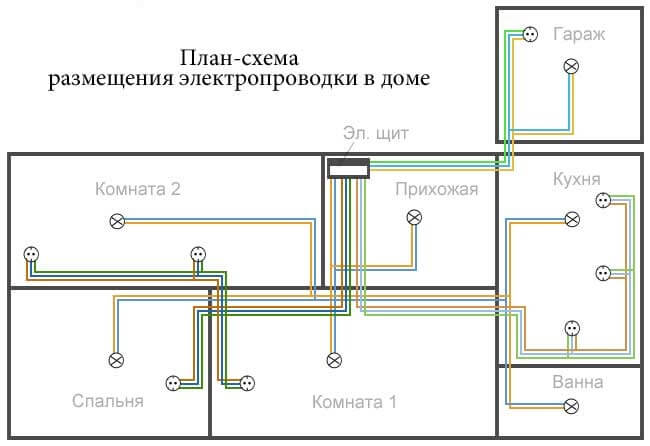
On a special wiring diagram, the exact location of all the elements (from the outlet to the electric meter), the cable passage through the wooden house is noted. Also on the project it is necessary to indicate the exact distance of the wiring near the doorways, ceiling, floor.
We recommend that you use the house plan as a blank for the scheme, as this document respects the exact dimensions of rooms, doorways, windows.
At drawing up the wiring diagram Use the following rules and tips:
- The switchboard is installed in the corridor. The height of the shield should be such that children do not reach it (approximately 1.5 m above the ground).
- Sockets, as a rule, are installed at any height from the floor (GOST, SNiP and PUE do not discuss this moment). Plan your furniture and home appliances first to know where you need to install outlet (otherwise after repair you will have to buy extension cords).
- The recommended mounting height of the switches is 80 and 150 cm. All switches in the house should be at the same height (for aesthetic reasons). When entering the room, the product should be placed on the side of the door handle.
- The line can run both below (20 cm from the floor) and at the top of the wall (20 cm from the ceiling), moreover strictly vertical and strictly horizontal. Turning the track at a right angle.
- Based on the finished scheme, it is necessary to calculate the exact number of elements, then purchase them and proceed with the installation of electrical wiring in a wooden house.
Laying the line from the street to the room
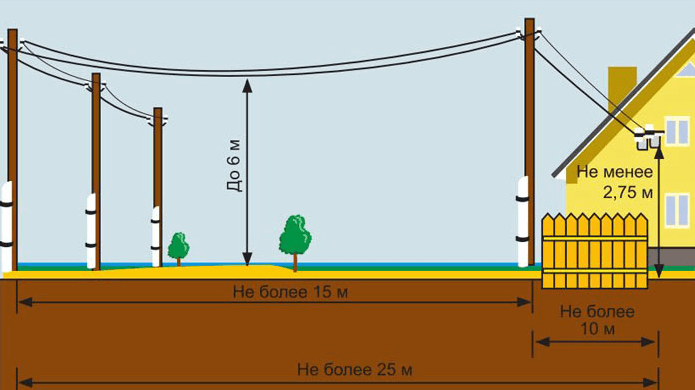
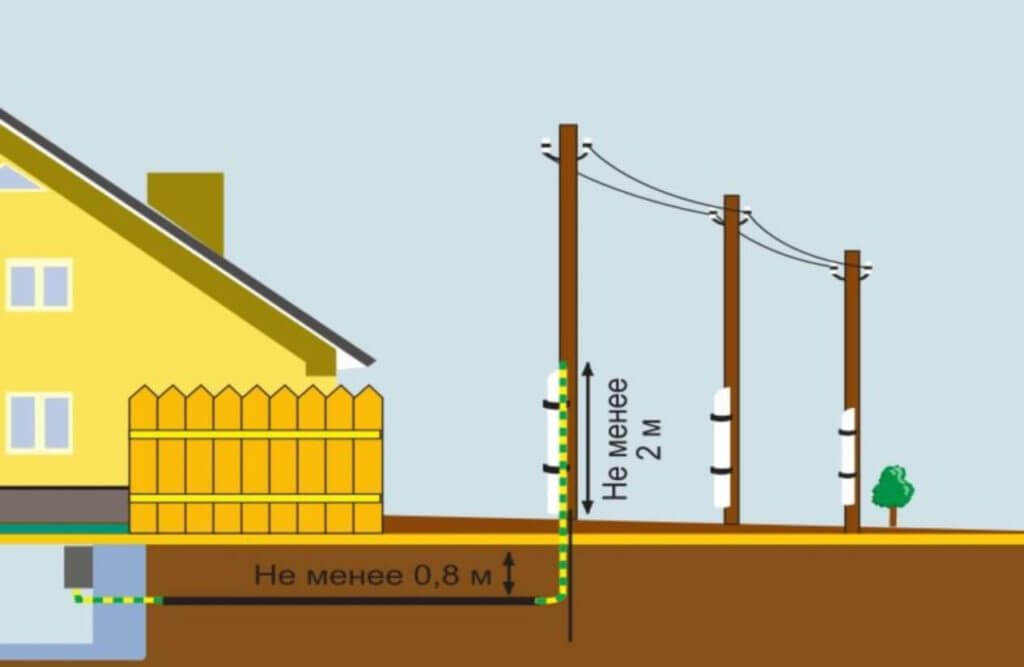
There are 2 ways of outdoor cable laying: air and underground.
The first option is cheaper, but at the same time more likely to undergo accidents (power lines can be damaged by strong gusts of wind or a tree falling on a pole). Also aerial wiring can be set if the distance to the object is not more than 25 meters. If the distance to the house is made of wood, you will have to install an intermediate support yourself (another pillar), which can noticeably “hit your pocket”.
Underground cable routing is a more time-consuming and expensive event, but at the same time it will ensure the long life of your wiring.
About, how to connect electricity to the site, we told in a separate article, which we recommend that you read!
Cable routing in rooms
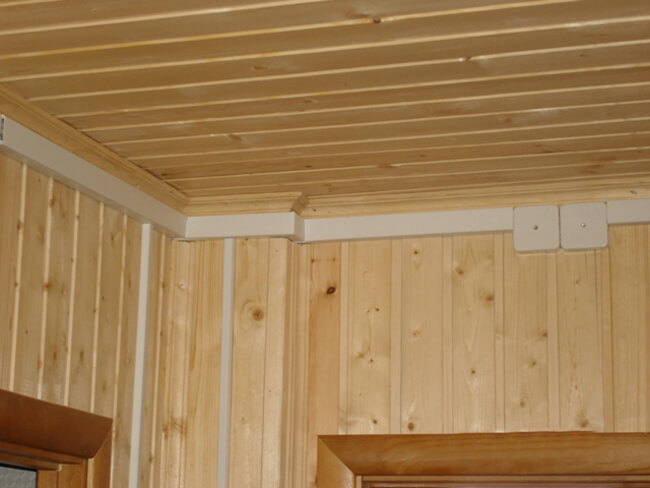
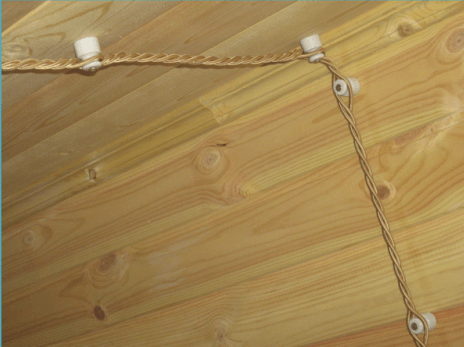
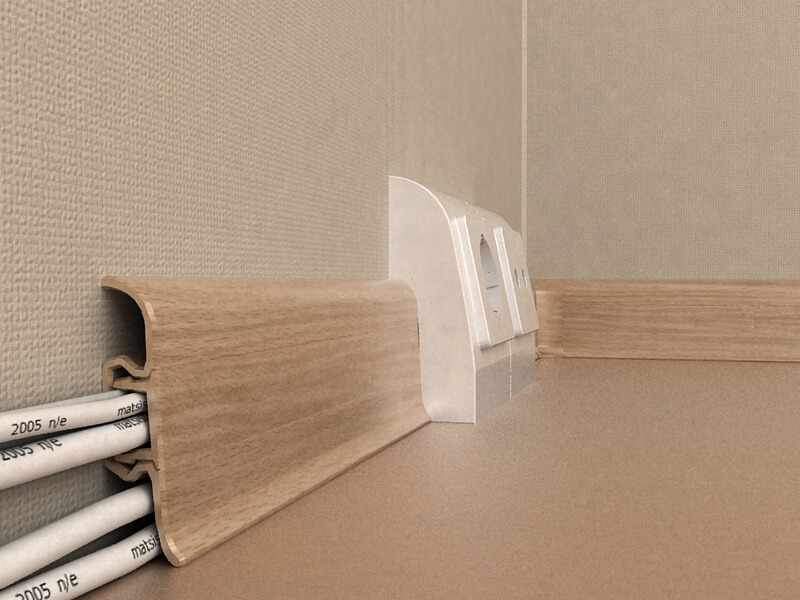
Most often, an open wiring is carried out in a wooden house.There are several ways to install the wiring, namely: in the channels, in the corrugation, on special insulators (rollers) or in the electrical plinth. The photo shows all the options, so you can immediately compare them with each other.
Cable channels - A convenient option for wiring, they are easily fixed, but with the right approach they do not spoil, but complement the interior of a wooden house. By the way, there are channels with a coloring "under the tree."
Advantage electrical wiring in baseboard in that you reduce the number of cable channels on the walls, thereby hiding the wiring from the eyes. This option also reduces the likelihood of mechanical damage to the line, and if you place the sockets at a height of 15-20 centimeters above the floor level, then the wiring will be almost invisible.
At the same time, the switches can be mounted at the desired height by laying the wire in the niche of the doorway, behind the casing in the metal pipe. Then the wiring will not be visible at all. Thus, you will fulfill the requirements of the PUE and your interior will not be affected.
Well meets PUE "retro wiring". That is, you need a twisted cord and ceramic rollers (insulators). This is an antique interior option. But the retro wire is unreasonably expensive, and the need to purchase clips and other accessories will only increase the estimate.
We recommend that you review these video instructions, which will clearly show you all the nuances of installation work:
Wire connection
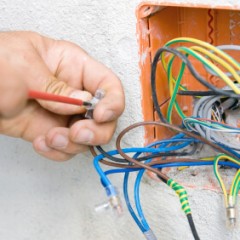
In places of branching the cable to sockets and switches, as well as in the places of connection of two cores, it is necessary install junction boxes. These products are used to fasten several contacts and protect them.
The main wire connection methods in the junction box are:
- connection using vag;
- connection with sizy;
- crimping with sleeves;
- welding;
- soldering.
Important! Wire connection with twist It is forbidden in any structure, because over time, contact weakens and begins to warm.
If you install electrical wiring in a wooden house according to the PUE, it immediately says about the ban on twisting:
PUE 2.1.21. Connection, branching and termination of conductors of wires and cables shall be carried out by means of crimping, welding, soldering or clamping (screw, bolt, etc.) in accordance with applicable instructions approved in the established manner.
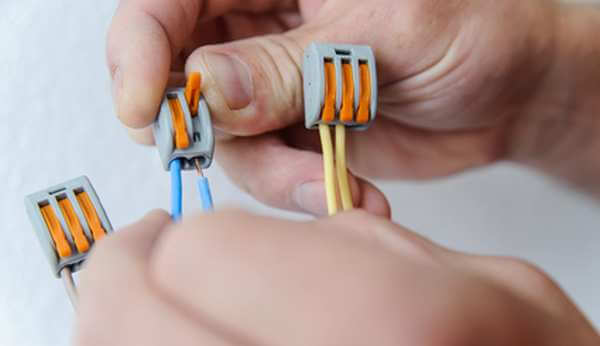
PPEs are insulating caps that are wound onto a strand of wires. They are inexpensive and very practical. It is enough to strip the insulation by 2-3 cm, and twist the bare contacts between each other, and then screw on the cap. About, how to connect wires with grayread in the article we referred to.
WAGO terminal block connection reliable enough. But keep in mind that they are best used in not too powerful connections. When mounting, pay attention to the rated current of the terminal strip and do not use fakes. Connecting powerful appliances such as boilers, dishwashers and boilers should be done with screw terminal blocks, sleeves, welding or soldering, or even better, lay a continuous wire from the shield.
Sleeves, welding or soldering are the best options listed when installing wiring in wooden houses. About, how to crimp wires with sleevesread in our article.
There are also separate publications on the website about soldering and welding wires:
- https://our.electricianexp.com/en/uchimsya-payat-provoda-rassmotrenie-vsex-nyuansov-pajki.html
- https://our.electricianexp.com/en/svarka-mednyx-i-alyuminievyx-provodov.html
Connection of sockets and switches
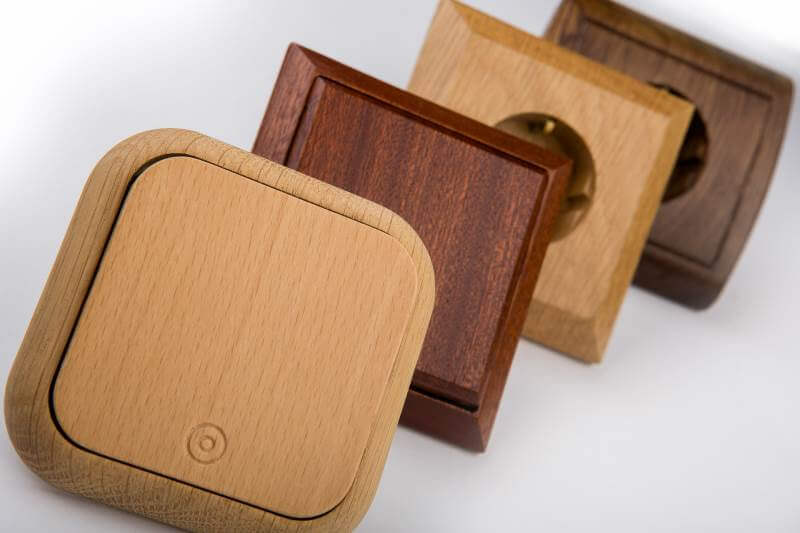
After all wiring has been completed, it is necessary to install switches and sockets.We recommend that you use all wiring accessories in a wood-like design. The difference in cost may not be significant, but in the interior they will look better, you can also pay attention to the line Sockets and switches Schneider Electric and Legrand. The products of these manufacturers will fit into any interior.
Electrical panel assembly
It’s important to choose the correct cable cross-section and lay cable lines, but this will not mean that your wiring in a wooden house is safe. You need to choose the right protection - automatic machines, difavtomaty, RCD, voltage relay And so on. This will save repair costs in case of emergency, as well as protect you and your home.
In case of damage to the insulation of the cables by rodents, protection will work and a fire will not occur.
Therefore need split wiring into groups:
- Lighting
- Sockets
- Powerful appliances
Be sure to protect these groups with individual machines and RCDs. The residual current device must be installed on the circuit from which the water heater, electric boiler, dishwasher and washing machine and other powerful consumers are powered, especially if they are in damp rooms.
Then for a cable with a cross-section of veins of 1.5 square meters. mm (lighting circuit) choose a machine with a rated current of 6-10 amperes, and for 2.5 square meters. mm - 16 amperes.
Group RCDs to sockets or individual consumers must have a leakage current (differential current, aka Id) within 10-30 mA, and the total RCD, it is also called introductory or fireproof, is chosen with a leakage current more than group ones, for example 100-300 mA .
Also, selective RCD is sometimes installed on the input - it differs from the usual by a large response time.The rated current of the RCD must be higher than the current of the machine with which this group is protected, that is, AB at 10A - RCD at 16A, AB at 16A - RCD at 25A.
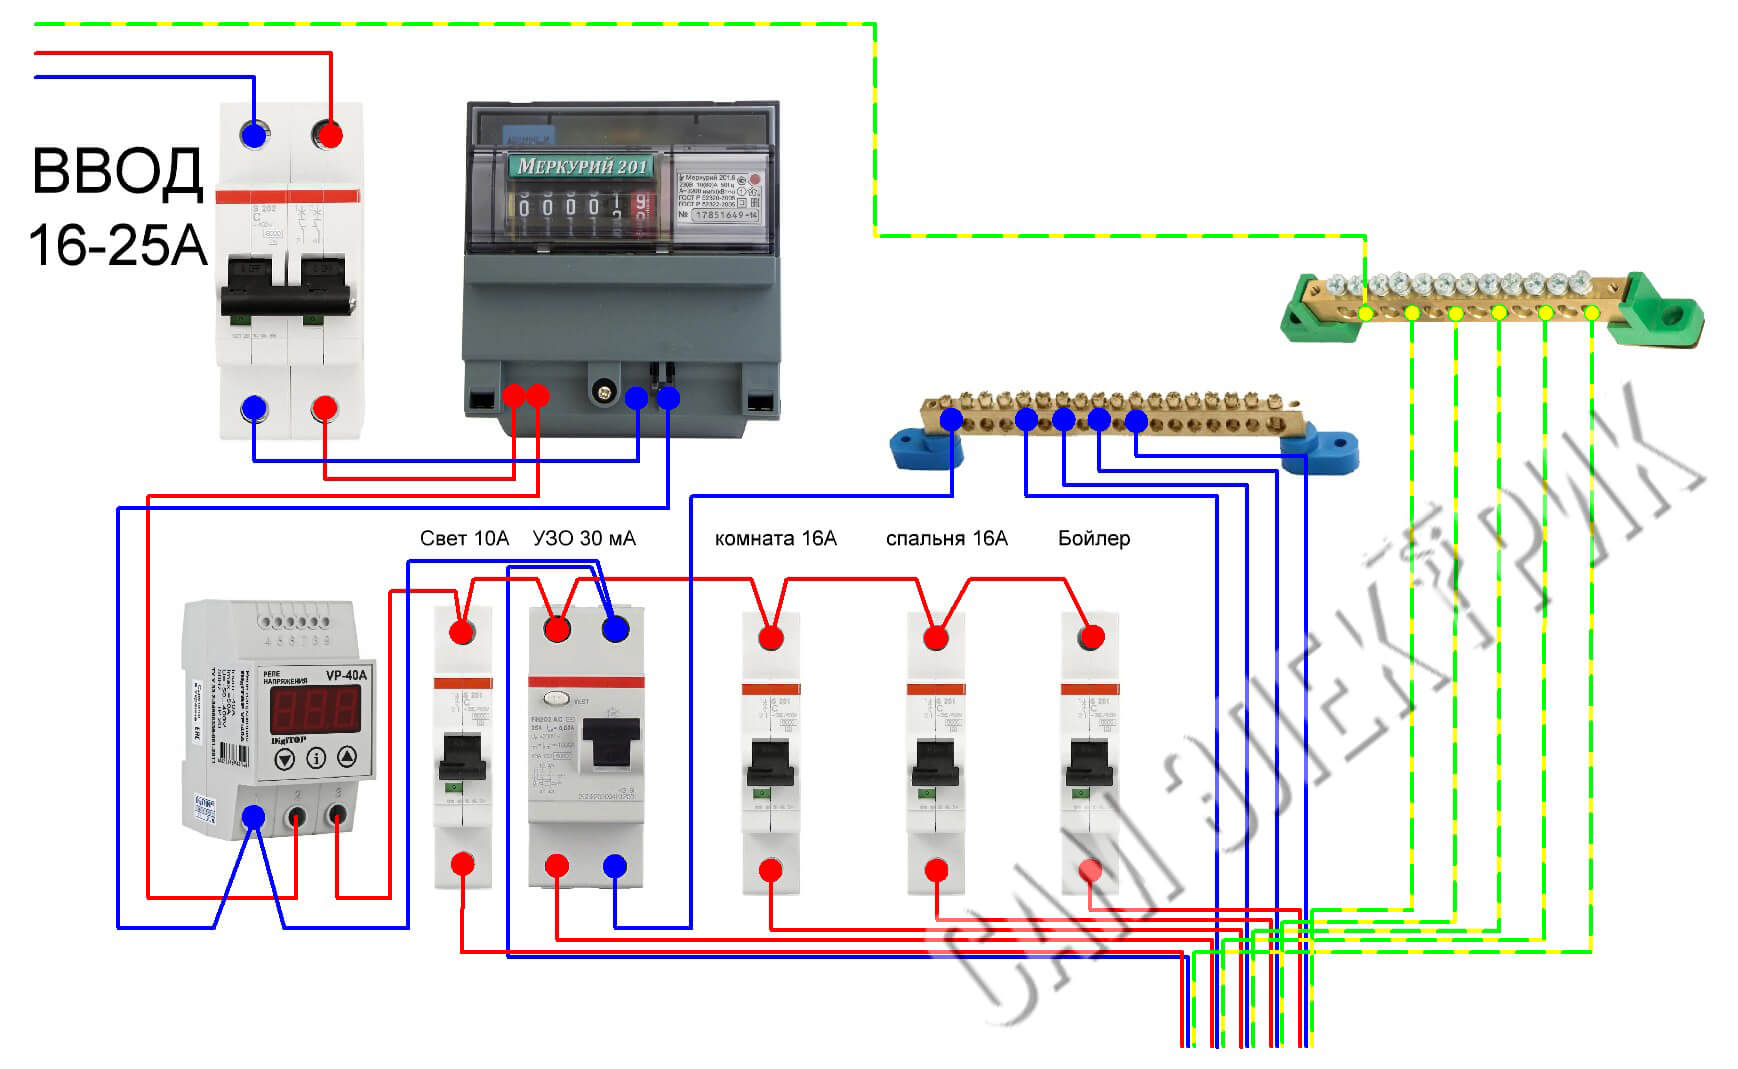
Assembly diagram of a single-phase shield in a wooden house:
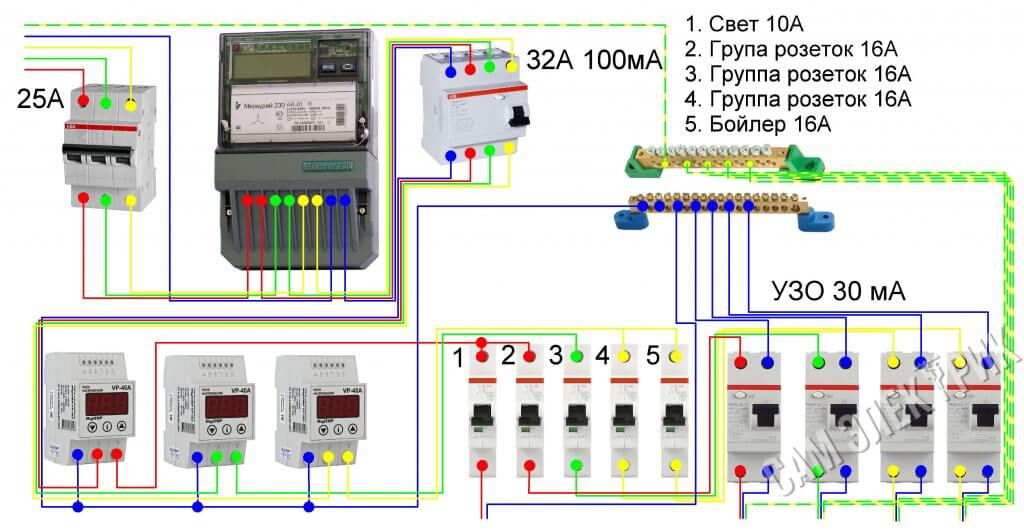
If you spent 3 phases on the site, the distribution board diagram may look like:
After the wiring is completed and the shield is assembled, we recommend that you call an electrician so that he checks everything and possibly eliminates obvious errors. Next, you need to pass the acceptance tests, get the Certificate of admission to connect to the network, and also call the representative of the RES to seal the meter and the opening machine.
That's the whole step-by-step instruction that explains in detail how to do electrical wiring in a wooden house with your own hands. Be sure to perform electrical installation in accordance with PUE and other existing standards. They are designed and assembled on the basis of a large number of accidents that could have been avoided by simply following the rules. We hope that the provided tips and diagrams helped you to carry out the electrical installation yourself, or at least save on some stages of installation.
We recommend that you also read the article:heating a wooden house with electricity!




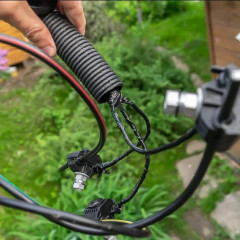

HELLO! I DO NOT COMMENT, AND THE QUESTION: HOW TO COMPARE THE REQUIREMENT FOR WHAT IT IS PROHIBITED IN THE WOODEN HOUSE FOR ELECTRICAL WIRING TO USE PVC-CORFER, AND IN THE PRESENTED EXAMPLE IT IS USED?
Hello! Today, PVC corrugation manufacturers are already doing self-extinguishing, which minimizes the risk of fire. Requirements, unfortunately, are not updated so often, so technological progress has slightly exceeded the standards. In addition, the use of a self-extinguishing corrugated pipe will not be a serious violation of safety precautions if the remaining points were observed correctly.
Twisting by the rules is prohibited, not a word about VAGO and PPE in the EMP. There remains soldering, welding, pressure testing and bolting.
There is not a word about VAGO and PPE in the EMP since these and similar devices are called compresses. It remains to read the PUE: 2.1.21. Connection, branching and termination of conductors of wires and cables shall be carried out by means of crimping, welding, soldering or clamping (screw, bolt, etc.) in accordance with applicable instructions approved in the established manner.
Interesting article