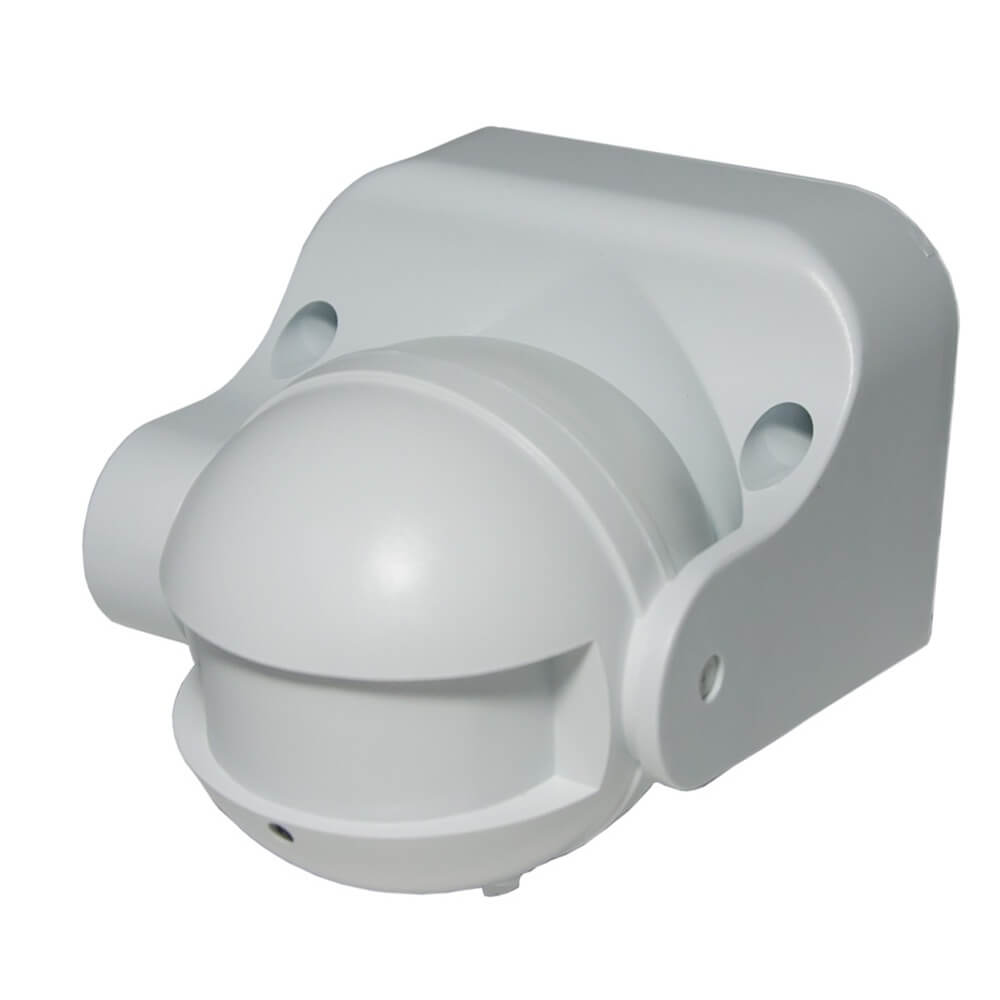
Putting a motion sensor to turn on the light
Motion sensors are an incredibly convenient thing that allows you to control the light in the room or control the opening and closing of doors, and can also notify you about unwanted guests. In this article we will tell you how to make a motion sensor with your own hands at home and consider the scope of the possible use of these devices.
Briefly about sensors
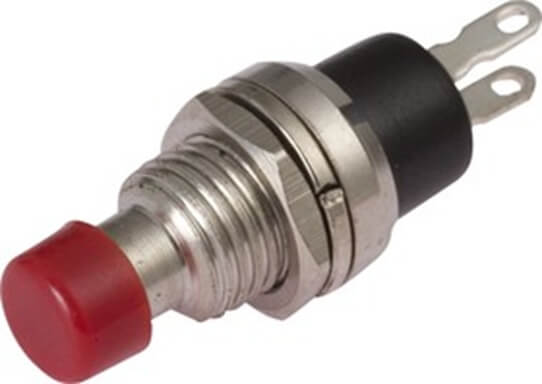
One of the simplest types of sensors is a limit switch or a self-resetting button (without locking).
It is installed at the door and reacts to its opening and closing. Using a simple circuit, this unit turns on the light in the refrigerator. She can equip a pantry or vestibule of a hallway, a door in an entrance, an on-duty LED illumination, use this switch as the alarm system which will notify about opening or closing of a door. Design flaws can be installation difficulties, and sometimes an unpresentable appearance.
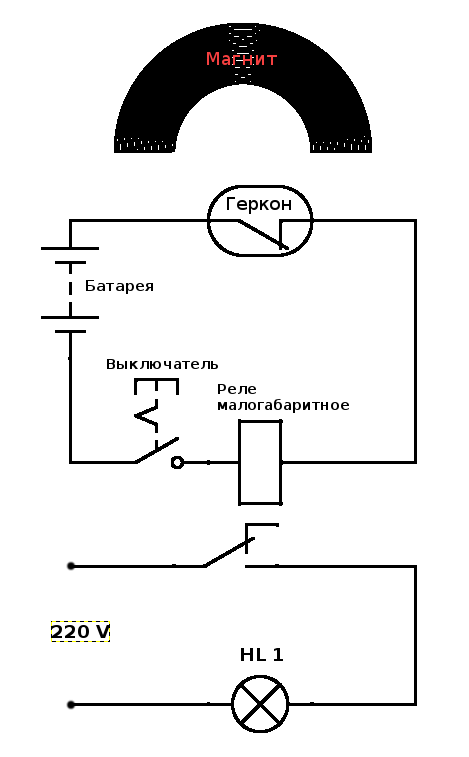 Devices Based reed switch and a magnet can be seen on the doors and windows of protected objects. Their principle of operation is very similar to that of a button. A reed switch can open or connect contacts when a conventional magnet is brought to it. Thus, the reed switch itself is installed on the doorway, and the magnet is hung on the door. This design looks neat and is used more often than a regular button. The lack of devices in narrowly specialized applications. They are not suitable for controlling open areas, areas, passages.
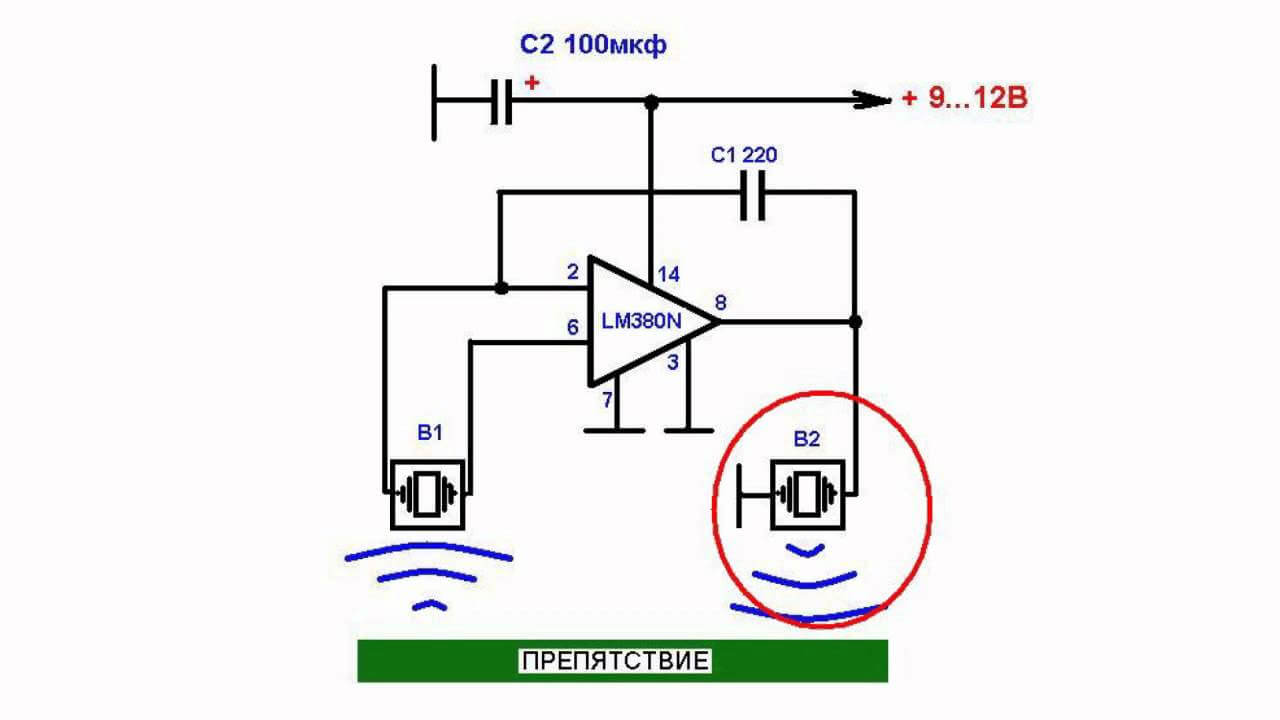
There are devices for open walkways that respond to environmental changes. These include photo relay, capacitive (field sensors), thermal (PIR), sound relays. To fix the intersection of a certain section, control the obstacles, the presence of movement of any object in the overlap zone, use photos or sound echo devices.
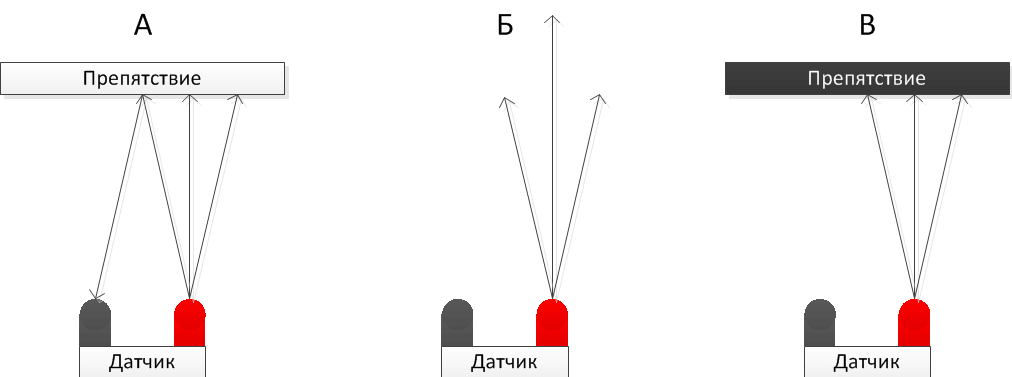
The principle of operation of such sensors is based on the formation of a pulse and its fixation after reflection from the object. When an object enters such a zone, the characteristic of the reflected signal changes, and the detector generates a control signal at the output.
For clarity, a schematic diagram of the operation of the photo relay and sound relay is presented:
Optical sensors use infrared LEDs as a transmitting device, and phototransistors as a receiver. Sound sensors operate in the ultrasonic range, so their operation seems to be noiseless for our ear, however, each of them contains a small emitter and trap.
For example, it’s great to equip a backlit mirror with a motion detector. The inclusion of lighting will occur only at the moment when the person will be directly next to him. Do not want to do this mirror light on your own?
Assembly diagrams
Microwave
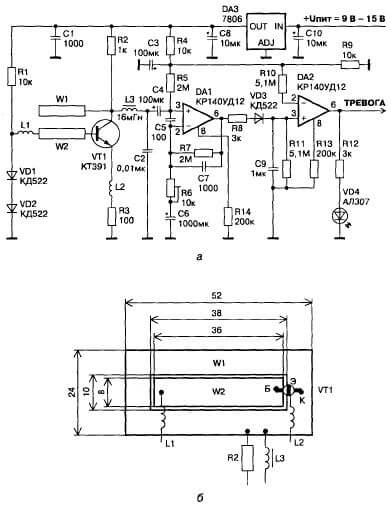
To control open spaces and control the presence of objects in the desired zone, there is a capacitive relay. The principle of operation of this device is to measure the magnitude of the absorption of radio waves. Everyone observed or was a participant in this effect when, approaching a working radio receiver, the frequency at which it operates, strayed and interference appeared.
Let's talk about how to make a microwave type motion sensor. The heart of this detector is a radio microwave generator and a special antenna.
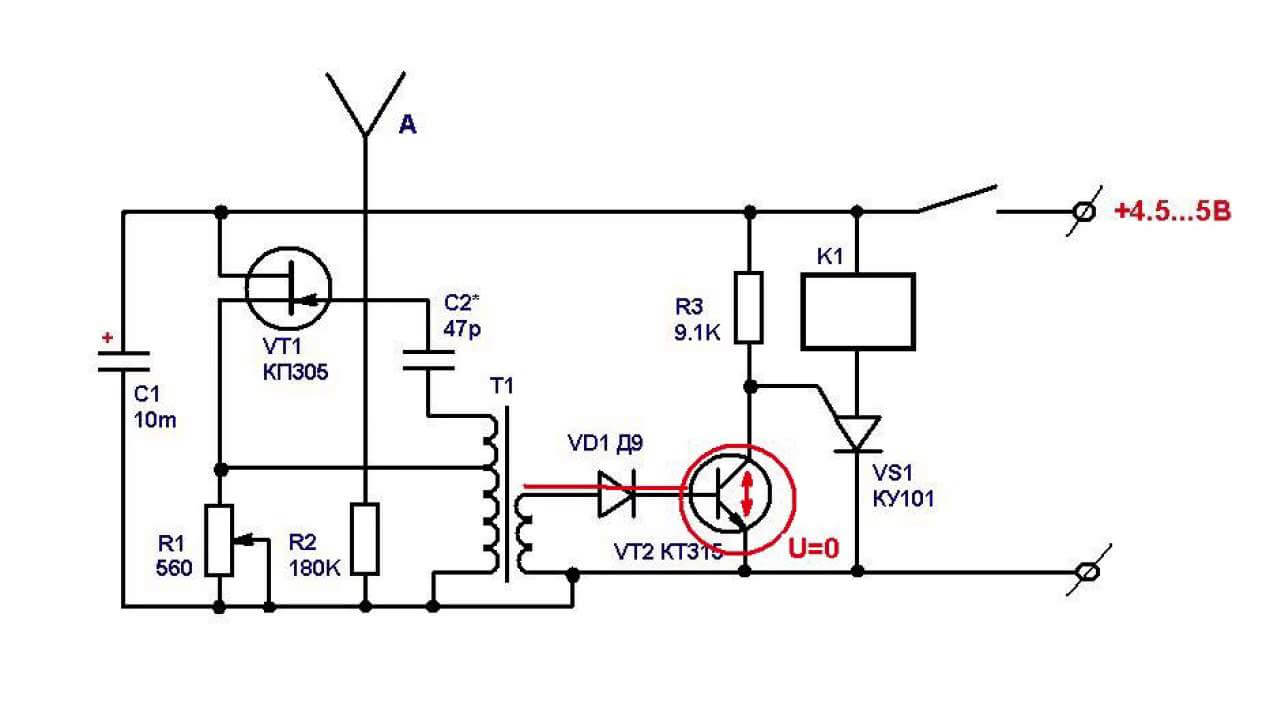 This schematic diagram shows a simple way to make a microwave motion sensor. Transistor VT1 is a high-frequency generator and part-time radio receiver. The detector diode rectifies the voltage by applying bias to the base of transistor VT2. The windings of the transformer T1 are tuned to a different frequency. In the initial state, when the external capacitance does not act on the antenna, the signal amplitudes are mutually compensated and there is no voltage on the detector VD1. When the frequency changes, their amplitudes are added and detected by the diode. Transistor VT2 starts to open. As a comparator for a clear working out of the “on” and “off” states, the thyristor VS1 is used, which controls a 12-volt power relay.
Below is an effective diagram of the presence relay on available components, which will help to assemble a motion detector with your own hands or just come in handy to familiarize yourself with the device.
Thermal
Thermal DD (PIR) is the most common sensory device in the business sector. This is explained by cheap components, a simple assembly scheme, the absence of additional complex settings, and a wide temperature range of operation.
A ready-made device can be purchased at any electrical goods store. Often this sensor is equipped with lamps, alarm devices and other controllers. However, now we will tell you how to make a thermal motion sensor at home. A simple pattern for repeating is as follows:
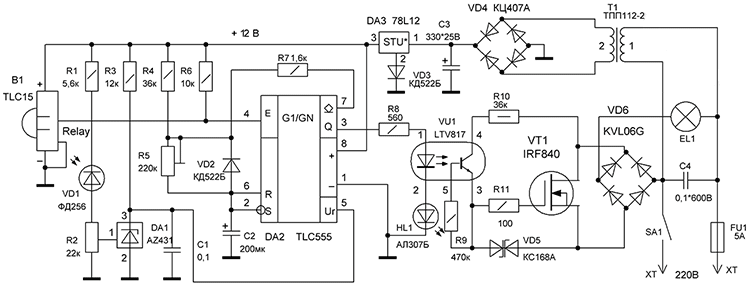 A special thermal sensor B1 and a photo element VD1 make up an automated lighting control complex. The device starts to work only after dusk, the threshold can be set by resistor R2. The sensor connects the load when a moving person enters the control zone. The built-in timer for shutdown can be set with the R5 knob.
Homemade module for Arduino
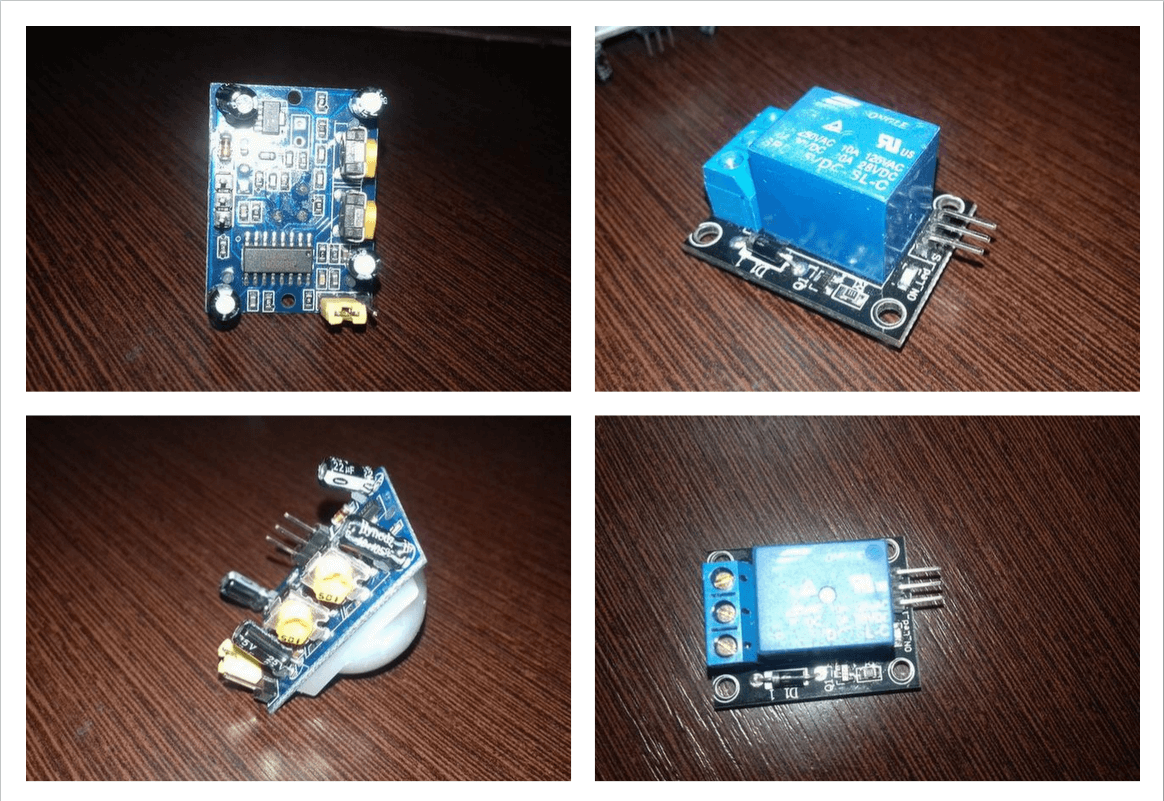
An inexpensive sensor can be made from special ready-made boards for the radio designer. So you can get a pretty miniature device. For assembly, we need a motion sensor module for Arduino microcontrollers and a single-channel relay module.
On each board, a three-pin connector is soldered, VCC +5 volts, GND -5 volts, OUT output on the detector and IN input on the relay board. In order to make the device yourself, you need to supply 5 Volts (plus and minus) to the circuit board from the power source, for example, from charging for phones, and connect out and in together. Connections can be made using connectors, but it will be more reliable to solder everything. You can follow the diagram below. A miniature transistor, as a rule, is already built into the relay module, so you do not need to install it additionally.
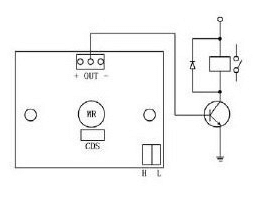 When a person moves, the module sends a signal to the relay, and it opens. Please note that there are high and low level relays. It must be selected based on what signal the sensor emits at the output. The finished detector can be placed in the housing and disguised in the right place. In addition, we recommend watching a video that clearly demonstrates how to assemble home-made motion sensors at home. If you have any questions, you can always ask them in the comments.
Now you know how to make a motion sensor with your own hands. We hope that the provided diagrams and videos helped you build your homemade sensor!
It will be useful to read:

