How to install and connect track lights
System Overview
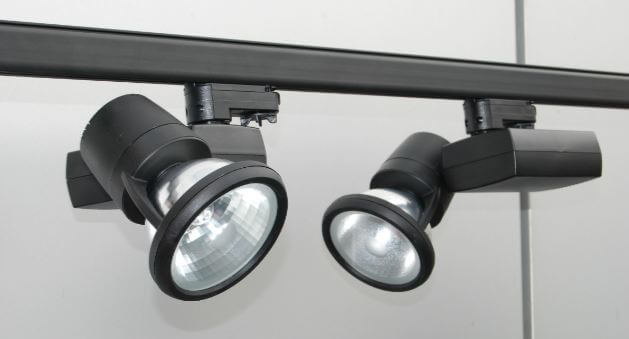
The track light is a fixture fixed to busbarwhose contacts go to the busbars of the track. Among its main advantages are:
- relatively simple and quick installation with connection;
- the ability to quickly replace or install the lamp in another place;
- the ability to connect to independent electrical groups.
The disadvantages of such lighting devices include their rather high cost.
Track lighting system is considered an excellent option, allowing not only to make the interior stylish, but also to minimize "digging" in the wires. Its design has a minimalist design, pleasing with various color shades.
The track light can be mounted in several ways. Mounting on a wall or mounting on a ceiling surface (for example, on a suspended ceiling) is considered the most common.
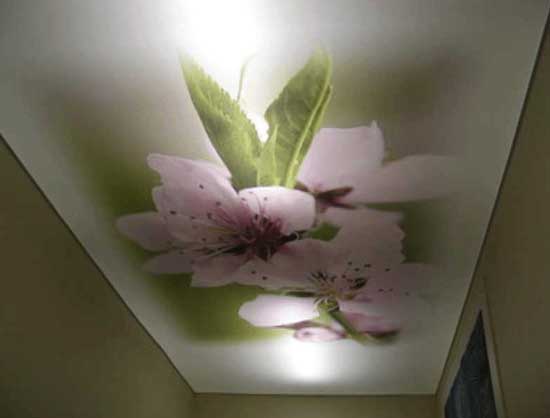
Thanks to cables or chains, the track system can also be brought to the stretch ceiling (as shown in the photo below). Alternatively, you can install such a backlight under the ceiling to illuminate it from the inside.
A nice nuance is that you can install a track lamp even at the end of the finishing stage of the repair work. For this, the services of specialists are not required at all - you can connect the system with your own hands.
By the way, the price for the work of the master who will install the fixtures on the tracks will be at least 900 per meter. So is it not better to save money and independently mount and connect to the network?
Mounting Features
Installation and connection of track lighting systems is a fairly simple process that can be done with your own hands.
The lamp has easy installation thanks to the busbar trunking. In this case, it is necessary to determine in advance the mount used for this. Indeed, in order to install a track spotlight, for example, on a suspended ceiling, certain brackets will be required, and the connection of fixtures to a stretch ceiling will require special chains or cables.
Installation of this lighting system can be divided into the following stages:
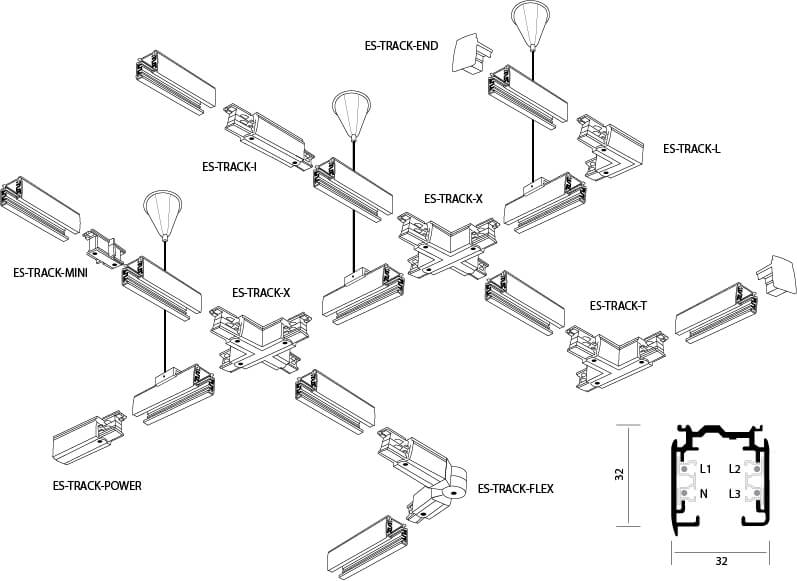
Mounting the busbar itself. There are several nuances here.When assembling the suspension system, the busbar will have to be mounted on the floor. Installation of an invoice or integrated track system is possible immediately on the ceiling. For cutting busbars, which can be from 1 to 4 meters long, you can use a conventional hacksaw. Installing a lighting “base” may require the use of internal joints or turning angles (depending on the linearity of the structure). The elements are interconnected by a simple click, as shown in the diagram below.
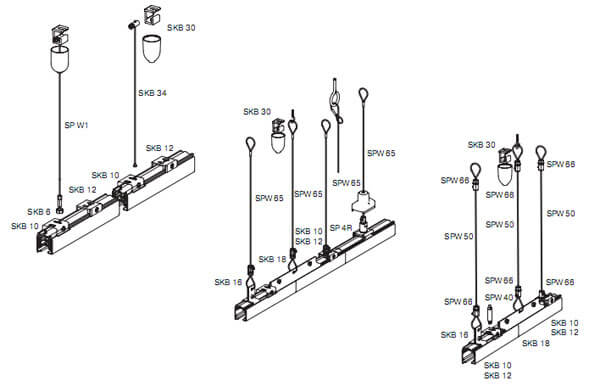
If the installation of the busbar involves the use of cables, then you should take care of special brackets that serve as connectors of the busbar with cables. The cables can be from 1 to 5 meters long, cutting them and adjusting is not difficult. Connecting an overhead track requires screwing the busbar to the ceiling using self-tapping screws into pre-made connectors with a frequency of 20 cm.
Connection of searchlights. Connecting the track light to an already assembled busbar trunk is quite easy. This process consists in snapping the searchlights themselves into the busbar with their subsequent fastening at the base near the busbar rail by means of rotary elements. The lamp (on the adapter) is equipped with a switch (wheel or rotary element), which must be used if the lamp does not light up when the system is turned on. Thanks to this mechanism, the searchlight is connected to one specific supply phase (only in 3-phase busbars).
You can also find out how to connect a lighting fixture on a track in these videos:
If you plan to install a controlled busbar trunking that involves the use of LED track lamps with control, the installation of such a system will be similar to conventional 3-phase and 1-phase busbars. However, connecting controlled track lighting requires a controller output. It is recommended to connect it to the system of touch control of the level of illumination and color temperature of light.
Track spotlight can be a complement in ready-made systems. In this case, it is only necessary to combine the busbars of 2 lamps by connecting them in series with subsequent connection to the mains. The connection diagram of such a system assumes the correct distribution of the load level between the fixtures.
That's all I wanted to tell you about installing and connecting track lights with your own hands. As you can see, installation is not difficult!
It will be interesting to read:

