How to mark the walls and ceiling for wiring?
Preparatory work
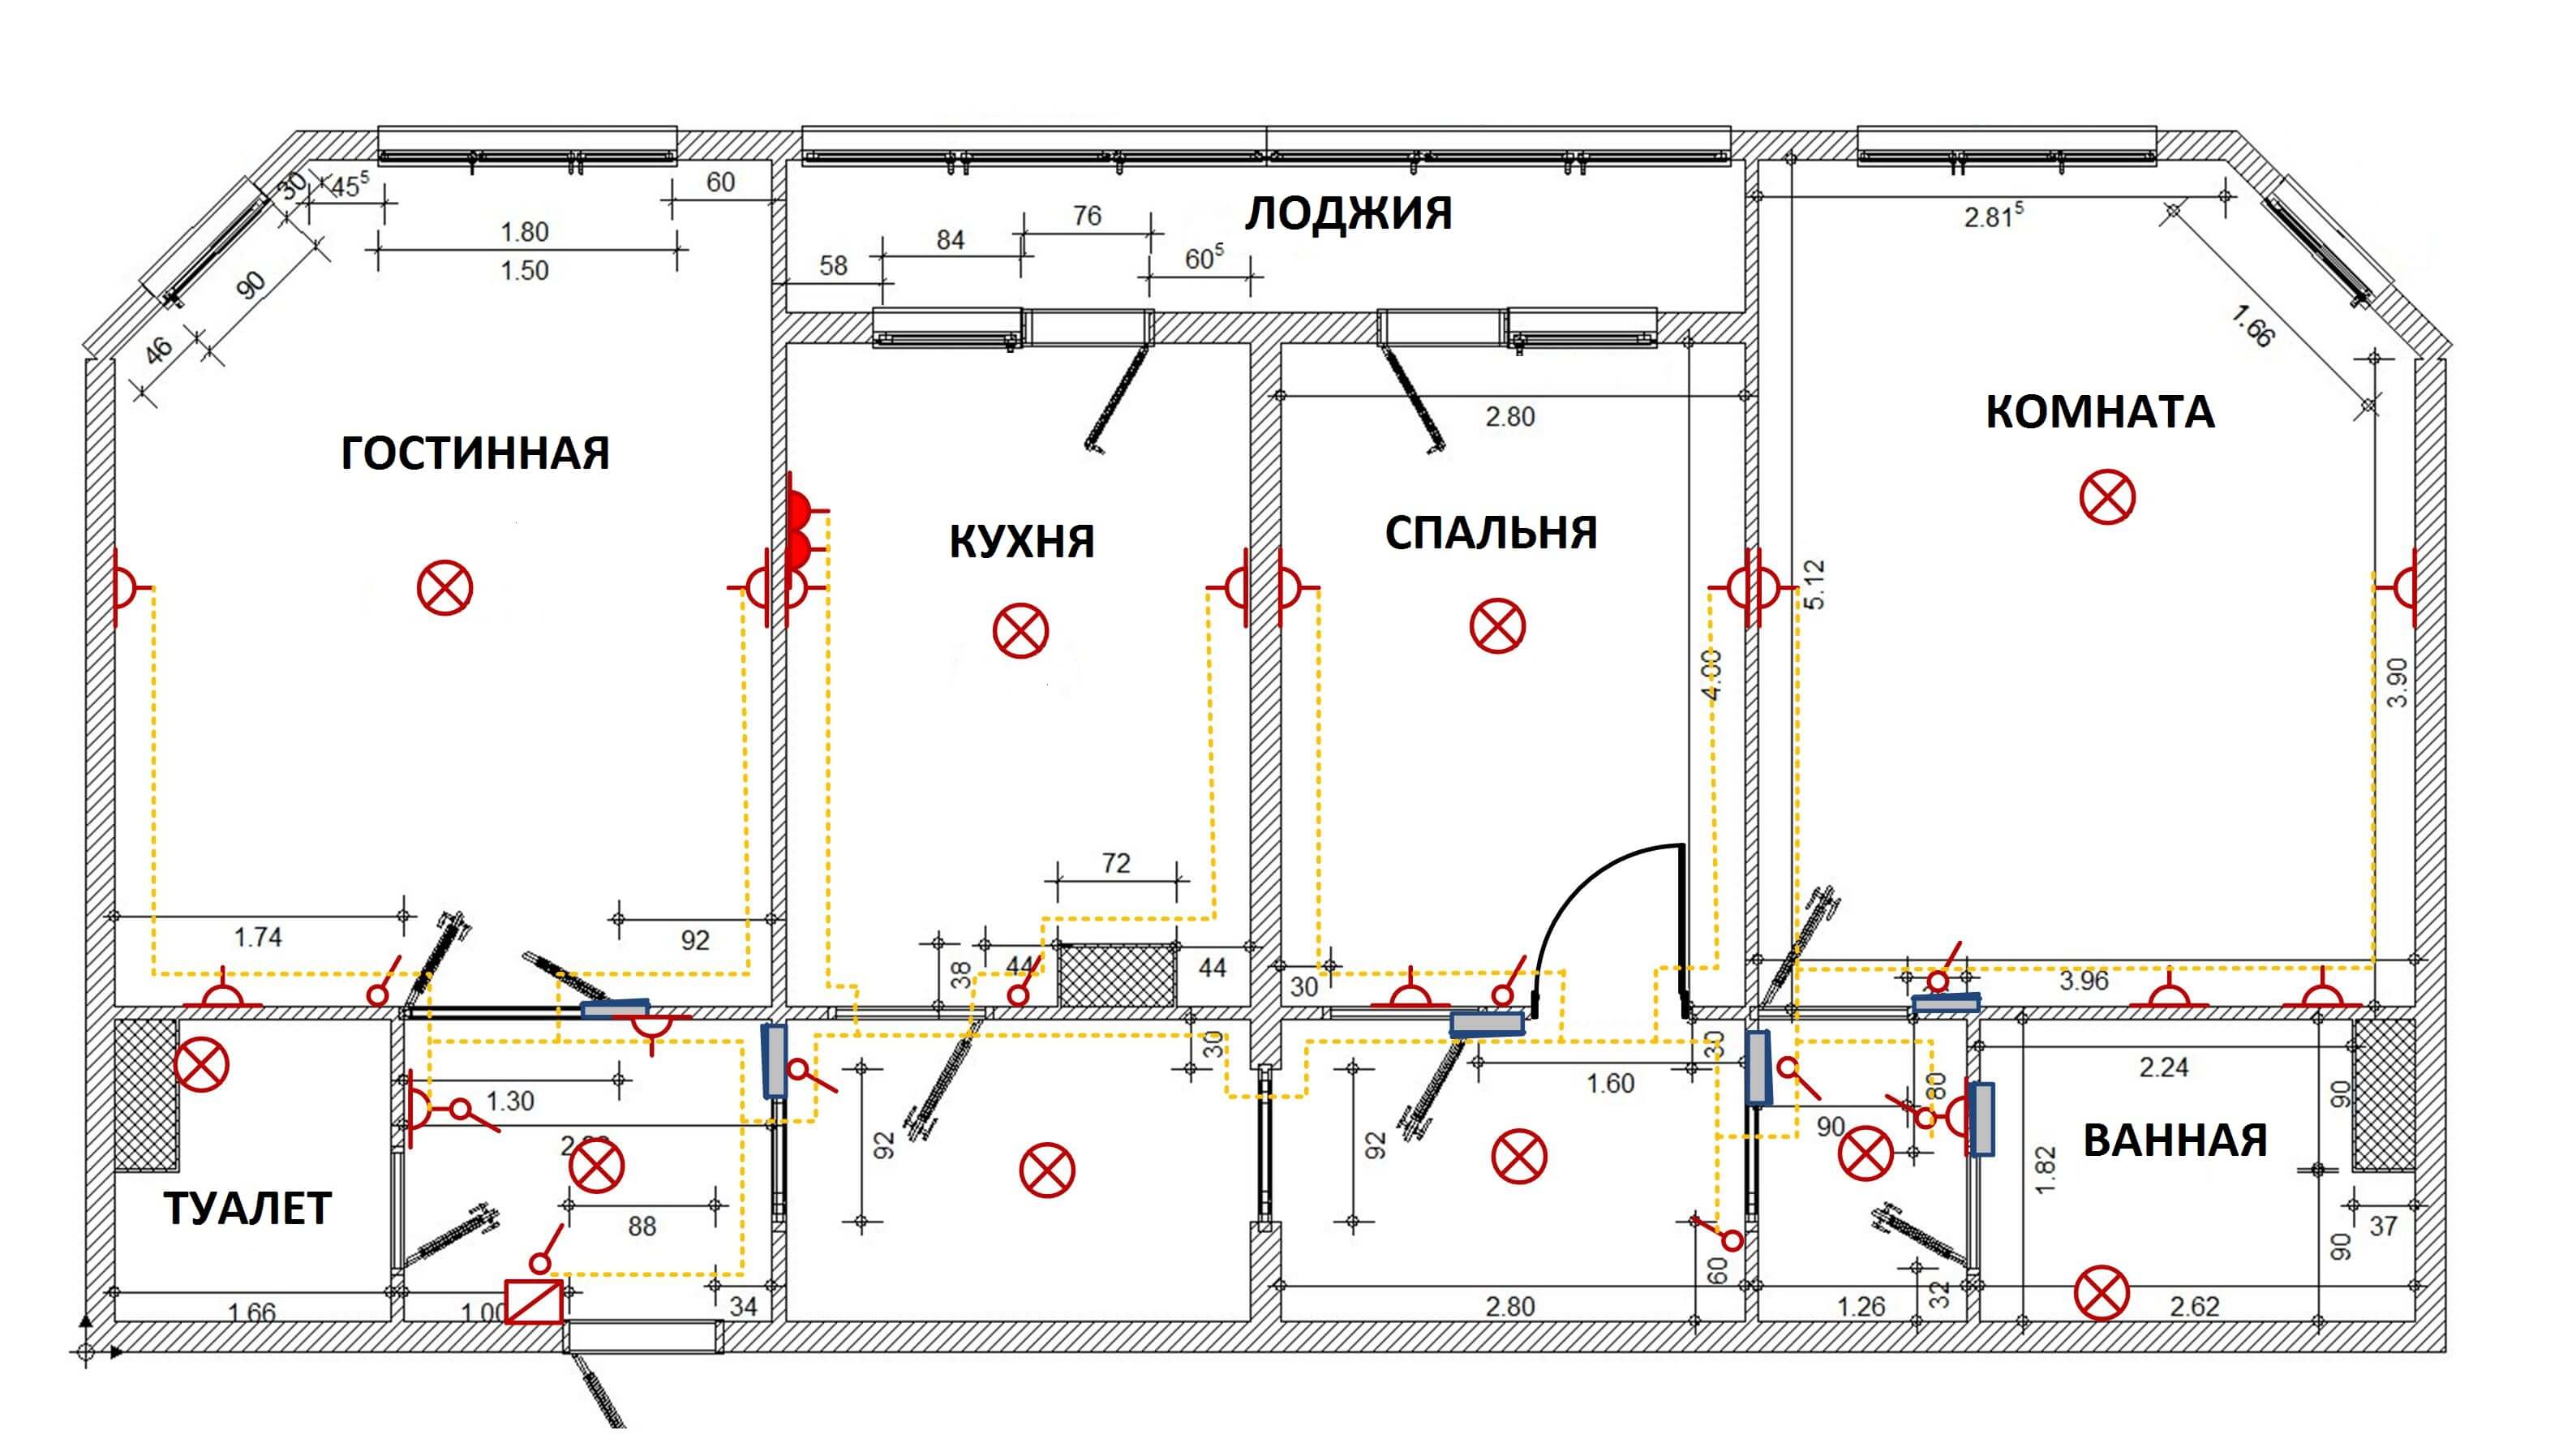
The first step is to prepare the tools and documentation on the basis of which the electricity will be marked in the rooms. As for documents, a prerequisite is the availability wiring diagrams in the house. Based on this project, you will understand where what is located and, in fact, where the electric cable route will go. The electric circuit looks like this:
We draw your attention to the fact that the exact location of the lamps, sockets, switches, as well as all stationary electrical appliances must be indicated in the diagram.
In addition to this, you will need tools, thanks to which the wiring is marked. The most affordable way to purchase a special marking cord is as follows:
In addition to the cord, you will need a marker, bubble level, plumb line, tape measure and ruler. If you often do construction work, then it is advisable to purchase a laser level, thanks to which the marking of walls and ceiling will be greatly simplified.
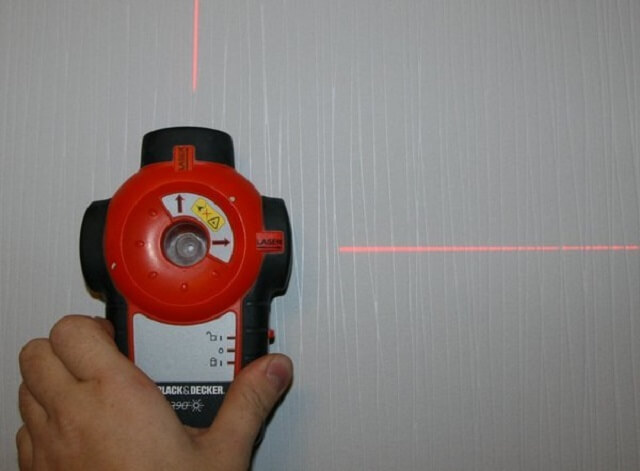
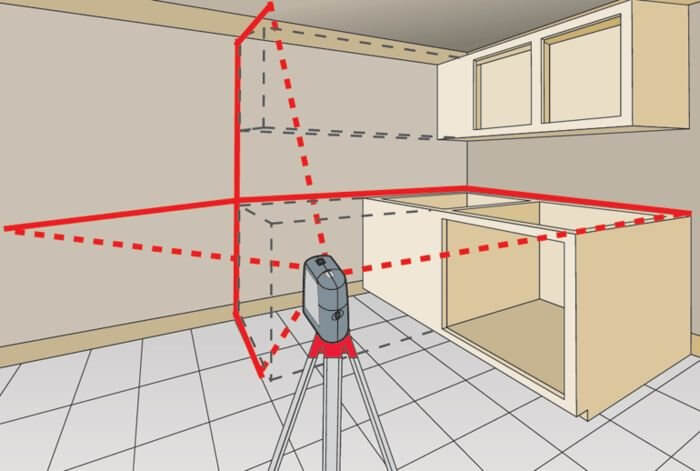
A more expensive pleasure is a laser level, with which you can mark the walls and ceiling for electrical wiring both in the vertical and horizontal planes. The only thing is that the cost of such a level will be quite high, so for a single installation of an electrician it makes no sense to purchase this device. In this case, we recommend do laser level do it yourself.
In addition, you will definitely need a stable stepladder to mark the ceiling and walls at the top.
What is important to consider
Before marking for wiring, consider one very important nuance - if the repair in the house is just beginning, and you want to mark the location of the cable lines, there may be a significant error in the future for the following reasons:
- Raising the floor. For example, after wiring you decide to additionally do electric underfloor heating using a heating cable. In this case, the floor will rise no less than 10 cm (taking into account the tiles). If you have already made a plug for the outlet at a height of 30 cm (the minimum height that is recommended), then after installing the underfloor heating, this height will be reduced to 20 cm.
- Lowering the ceiling. The opposite situation - after you brought out the wire for connecting the chandelier (as a rule, 15 cm is left in stock), it is decided to make a stretch ceiling.Bottom line - you have to increase the wire to connect the chandelier, which is not very good.
In addition to these two frequent situations, sometimes a decision is made to align the walls with the rough finish with drywall or move the refrigerator to another place. All this must be taken into account before marking the wiring in the apartment, because corrections can be very laborious in the future.
How to mark walls and ceiling
So we came to the most interesting place - how to make markup for wiring with your own hands. We bring to your attention the technology of marking work on the ceiling and walls.
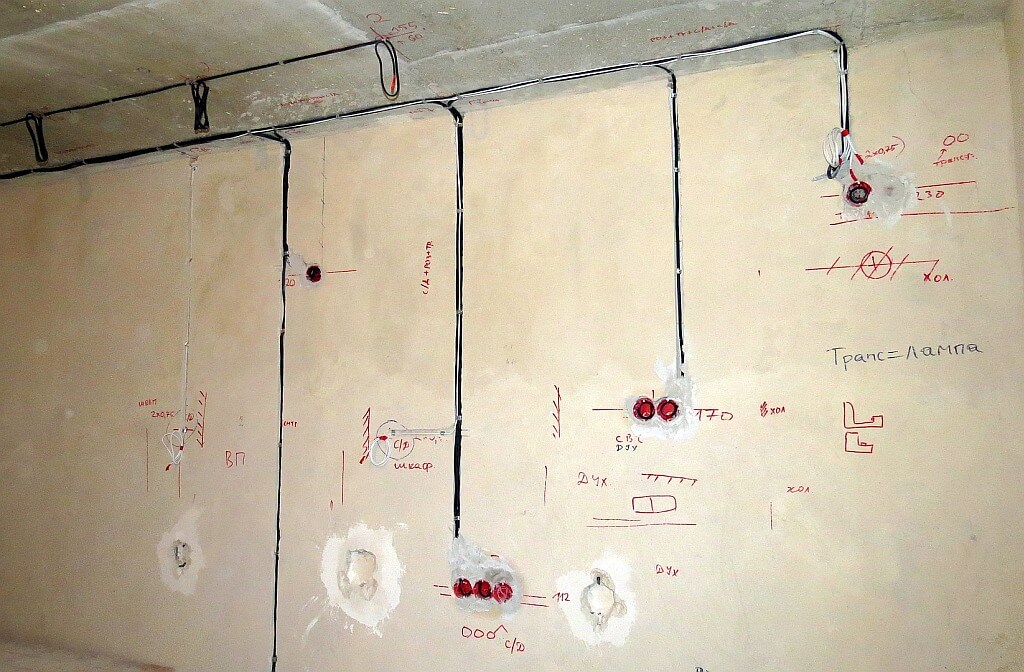
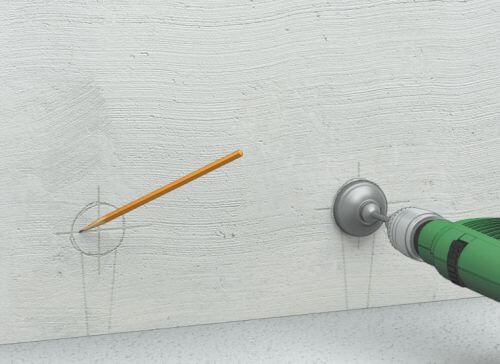
First, you need to draw on the walls without particular accuracy where and what will be installed. This will give a general idea and show where you need to lead the cable. Mark the installation locations of all outlets, junction boxes, switches and stationary equipment (refrigerator, stove, electric boiler, etc.). You can see an example in the photo:
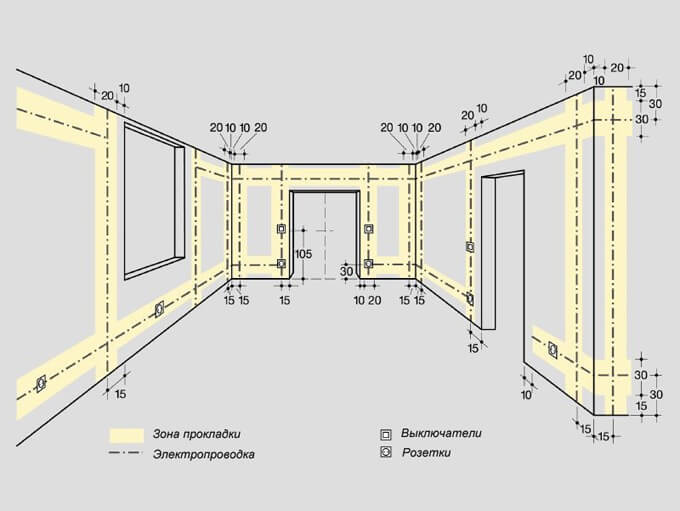
You need to start work with a distribution panel, from which the wiring path will be routed to all rooms. First of all, note where the cable will enter the apartment (or a private house), as well as how the cable from the electrical panel will pass to the rooms. Usually the track runs from above, 20 cm from the ceiling, but in some cases a lower line is also possible (20 cm from the floor). The main normalized distances that you should be guided by are provided in the diagram:
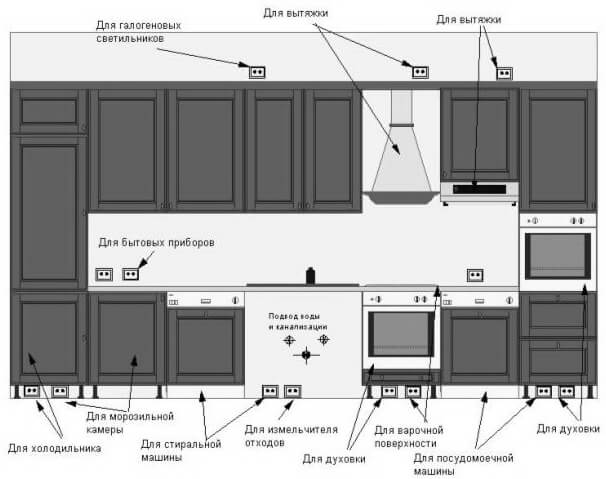
We also recommend that you familiarize yourself with the most suitable installation locations. kitchen outlets:
To draw an even horizontal line along the walls, it is recommended to use a building level and a marking cord. It is better to act with a partner, he will be uncomfortable. One person fixes the cord at the starting point, and the second pulls it to the end. Then the cord should be pulled 30-40 cm away from the wall and released. As a result, there should be a clear trace, which is the marking of the wiring. To get a straight line instead of a level, you can simply take the distance from the ceiling at the start and end point.
To lower the track down (to sockets and switches), you need to draw a vertical line. For this, it is best to use a plumb line. Fix the free end of the rope at the top, and lower the plumb down to the installation site of the electric point. On it, you can mark the walls for wiring in a vertical plane. The only caveat - make sure that the plumb line does not interfere (for example, surface roughness).
In this case, marking the walls with a laser level will be much easier, because a bubble level is already mounted in it, which will show how smoothly the line passes.
It should be noted that the marking for fasteners should be done relative to the center of the installation, and if you need to mark the area for mounting brackets, there should be two lines.
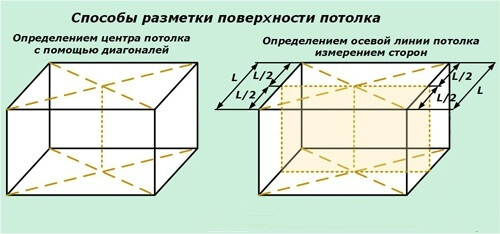
When the marking of the walls for electrical wiring is completed, it is necessary to go to the ceiling. Well, if you are going install chandelier, and one. In this case, draw the diagonals, and the place of their intersection will be the center of the room. For convenience, you can draw diagonals on the floor, and then use the plumb line to calculate where the center of the ceiling will be (raise the plumb line to the ceiling and adjust the placement so that the weight is directly above the diagonal intersection). The marking of the diagonals is easiest to do with a colored cord.
If you want to install several ceiling lights, you will first have to make an axial line. To do this, the room is divided in half, and then diagonals in the formed rectangles are already drawn. An example is shown in the diagram to the right.
About, how to place lights on the ceiling, we told in the corresponding article in which we provided the most popular device layouts.
Finally, we recommend watching a video in which the procedure is clearly shown:
That's the whole technology of marking the wiring in the apartment and house. As you can see, there is nothing complicated, the main thing is to take into account the recommendations provided and act with a partner.
It will be useful to read:

