3 ideas for building a passing light switch
Alteration of the two-key switch
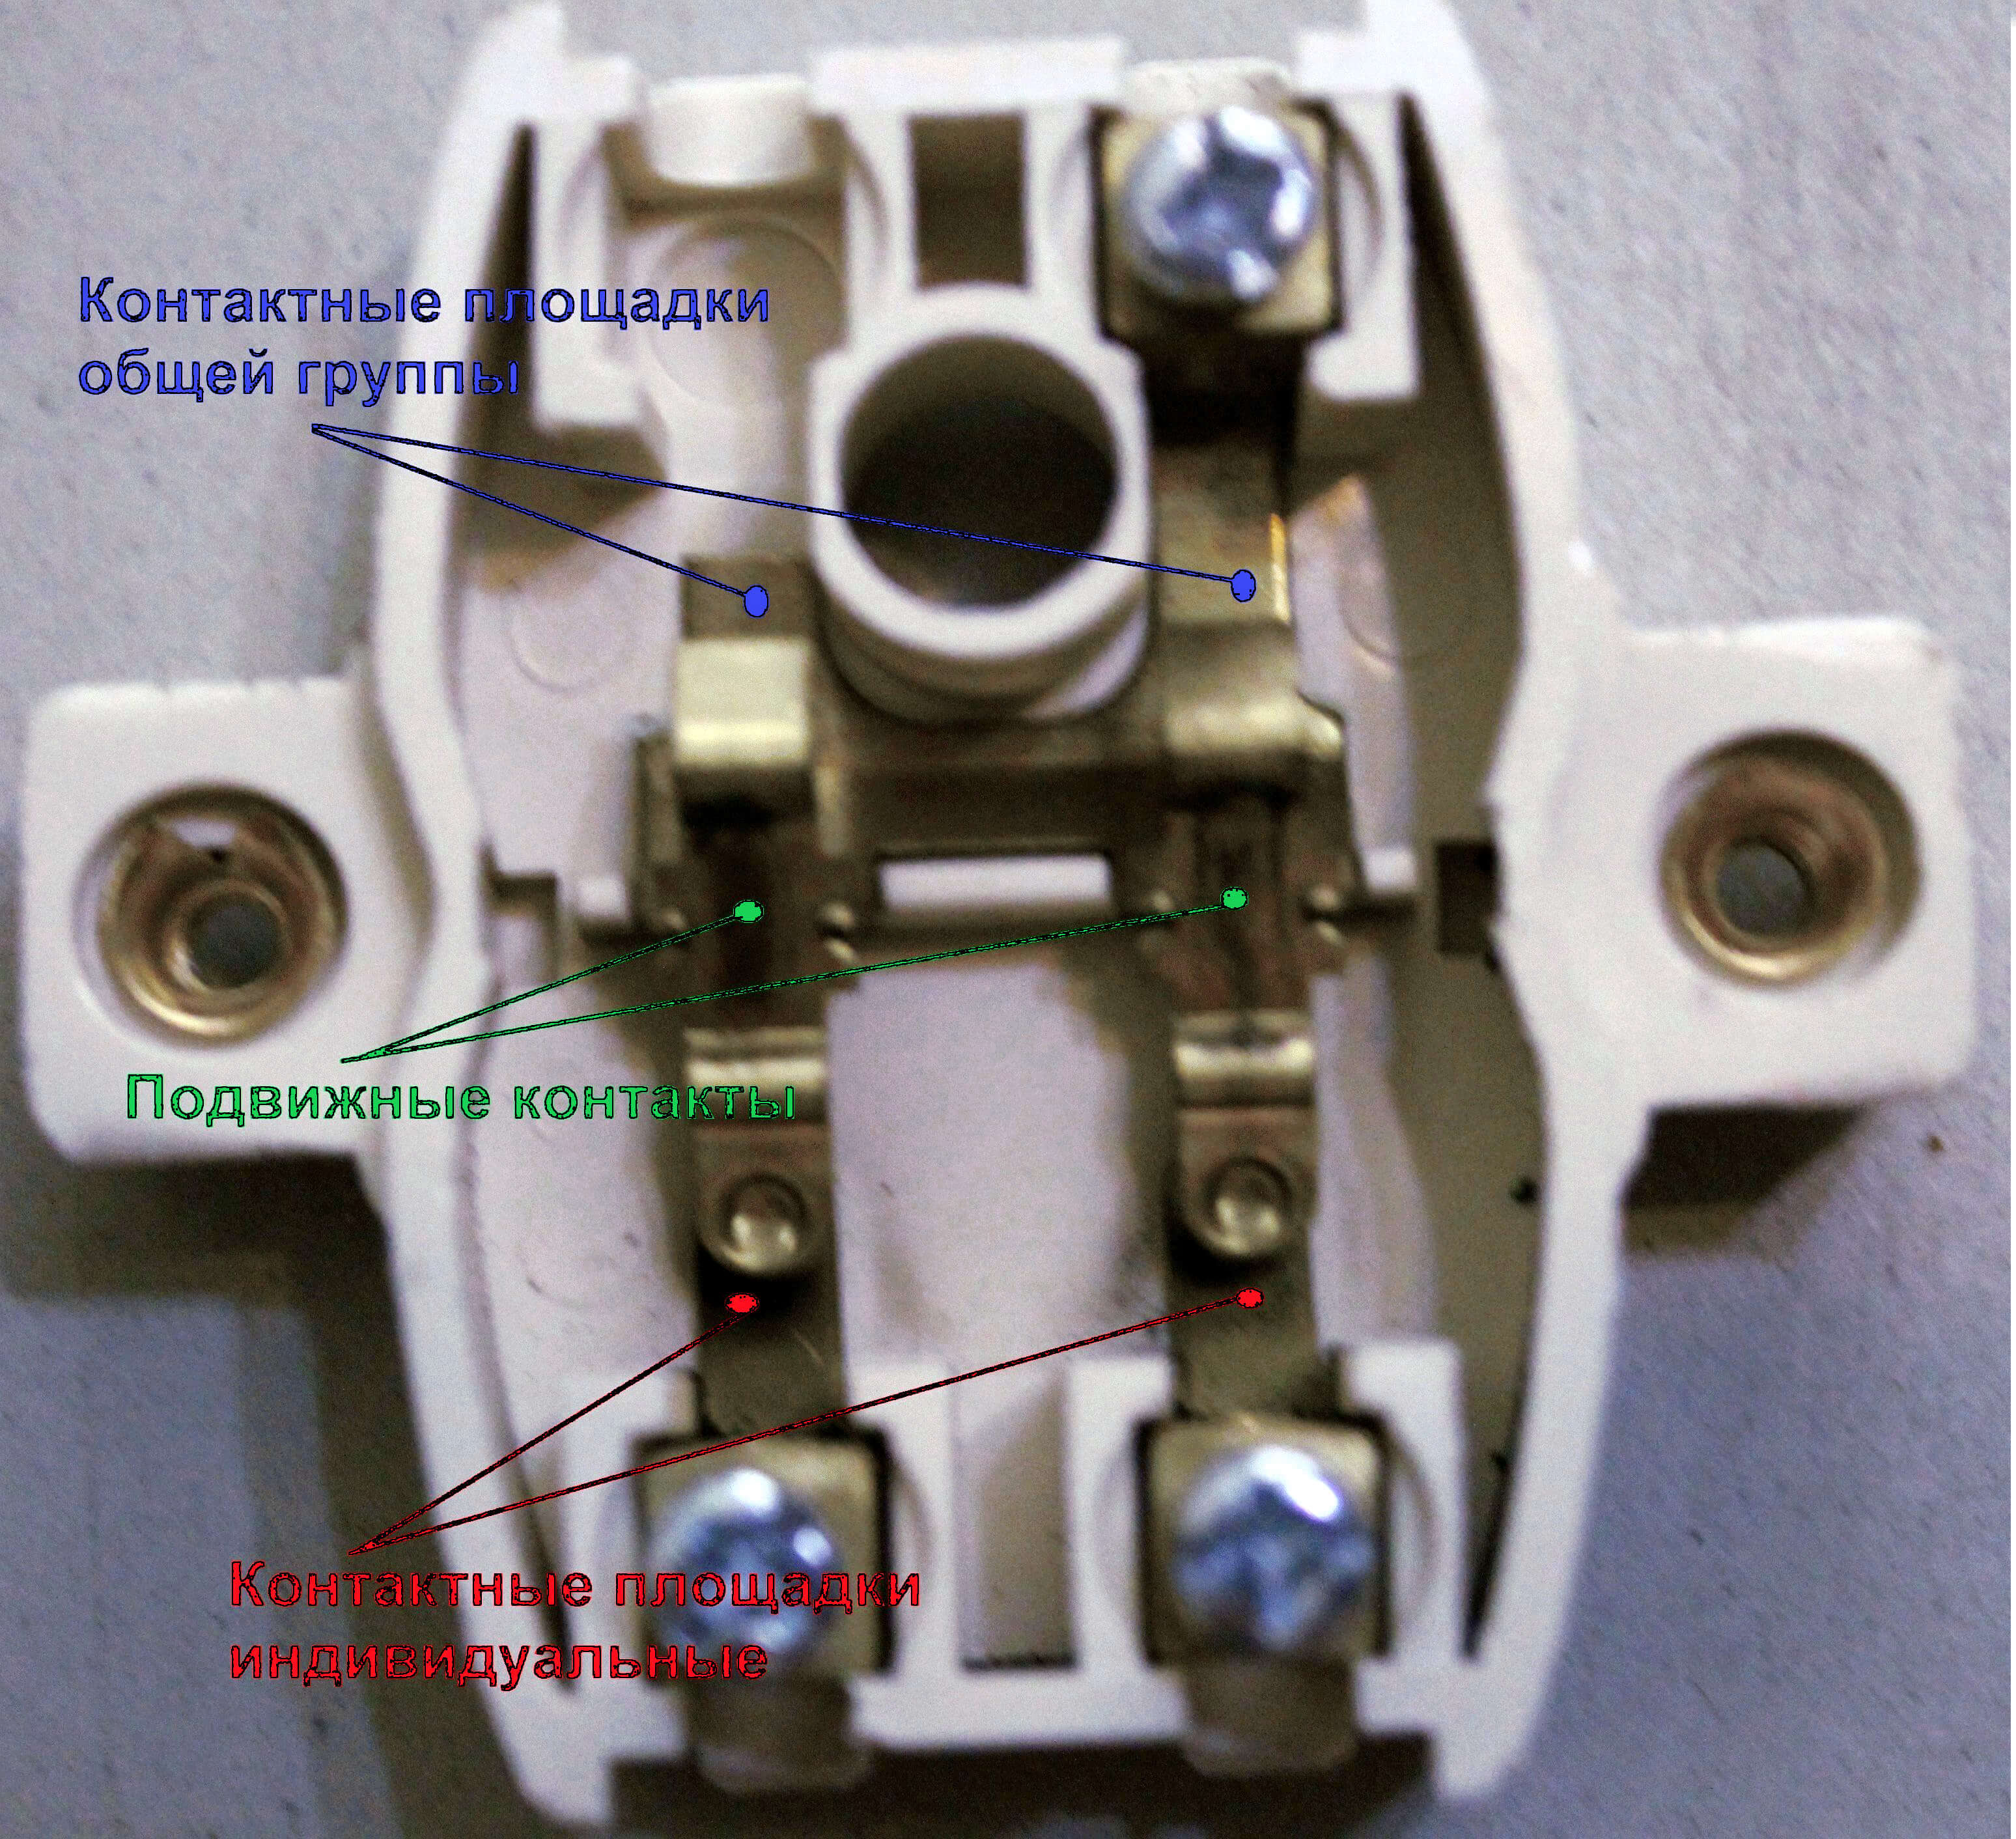
To begin with, carefully disassemble the device, remove the pads, pry the mechanism cover and remove it. Then, we make sure that the design allows you to move the contact with the clamp, and the beam will also work well upside down by 180 degrees. This moment is the main disadvantage of this design. The fact is that there are a lot of manufacturers of electricians, and everyone makes the design in their own way, therefore, before buying immediately a batch of switches, it is better to practice and check the stability of work on one instance.
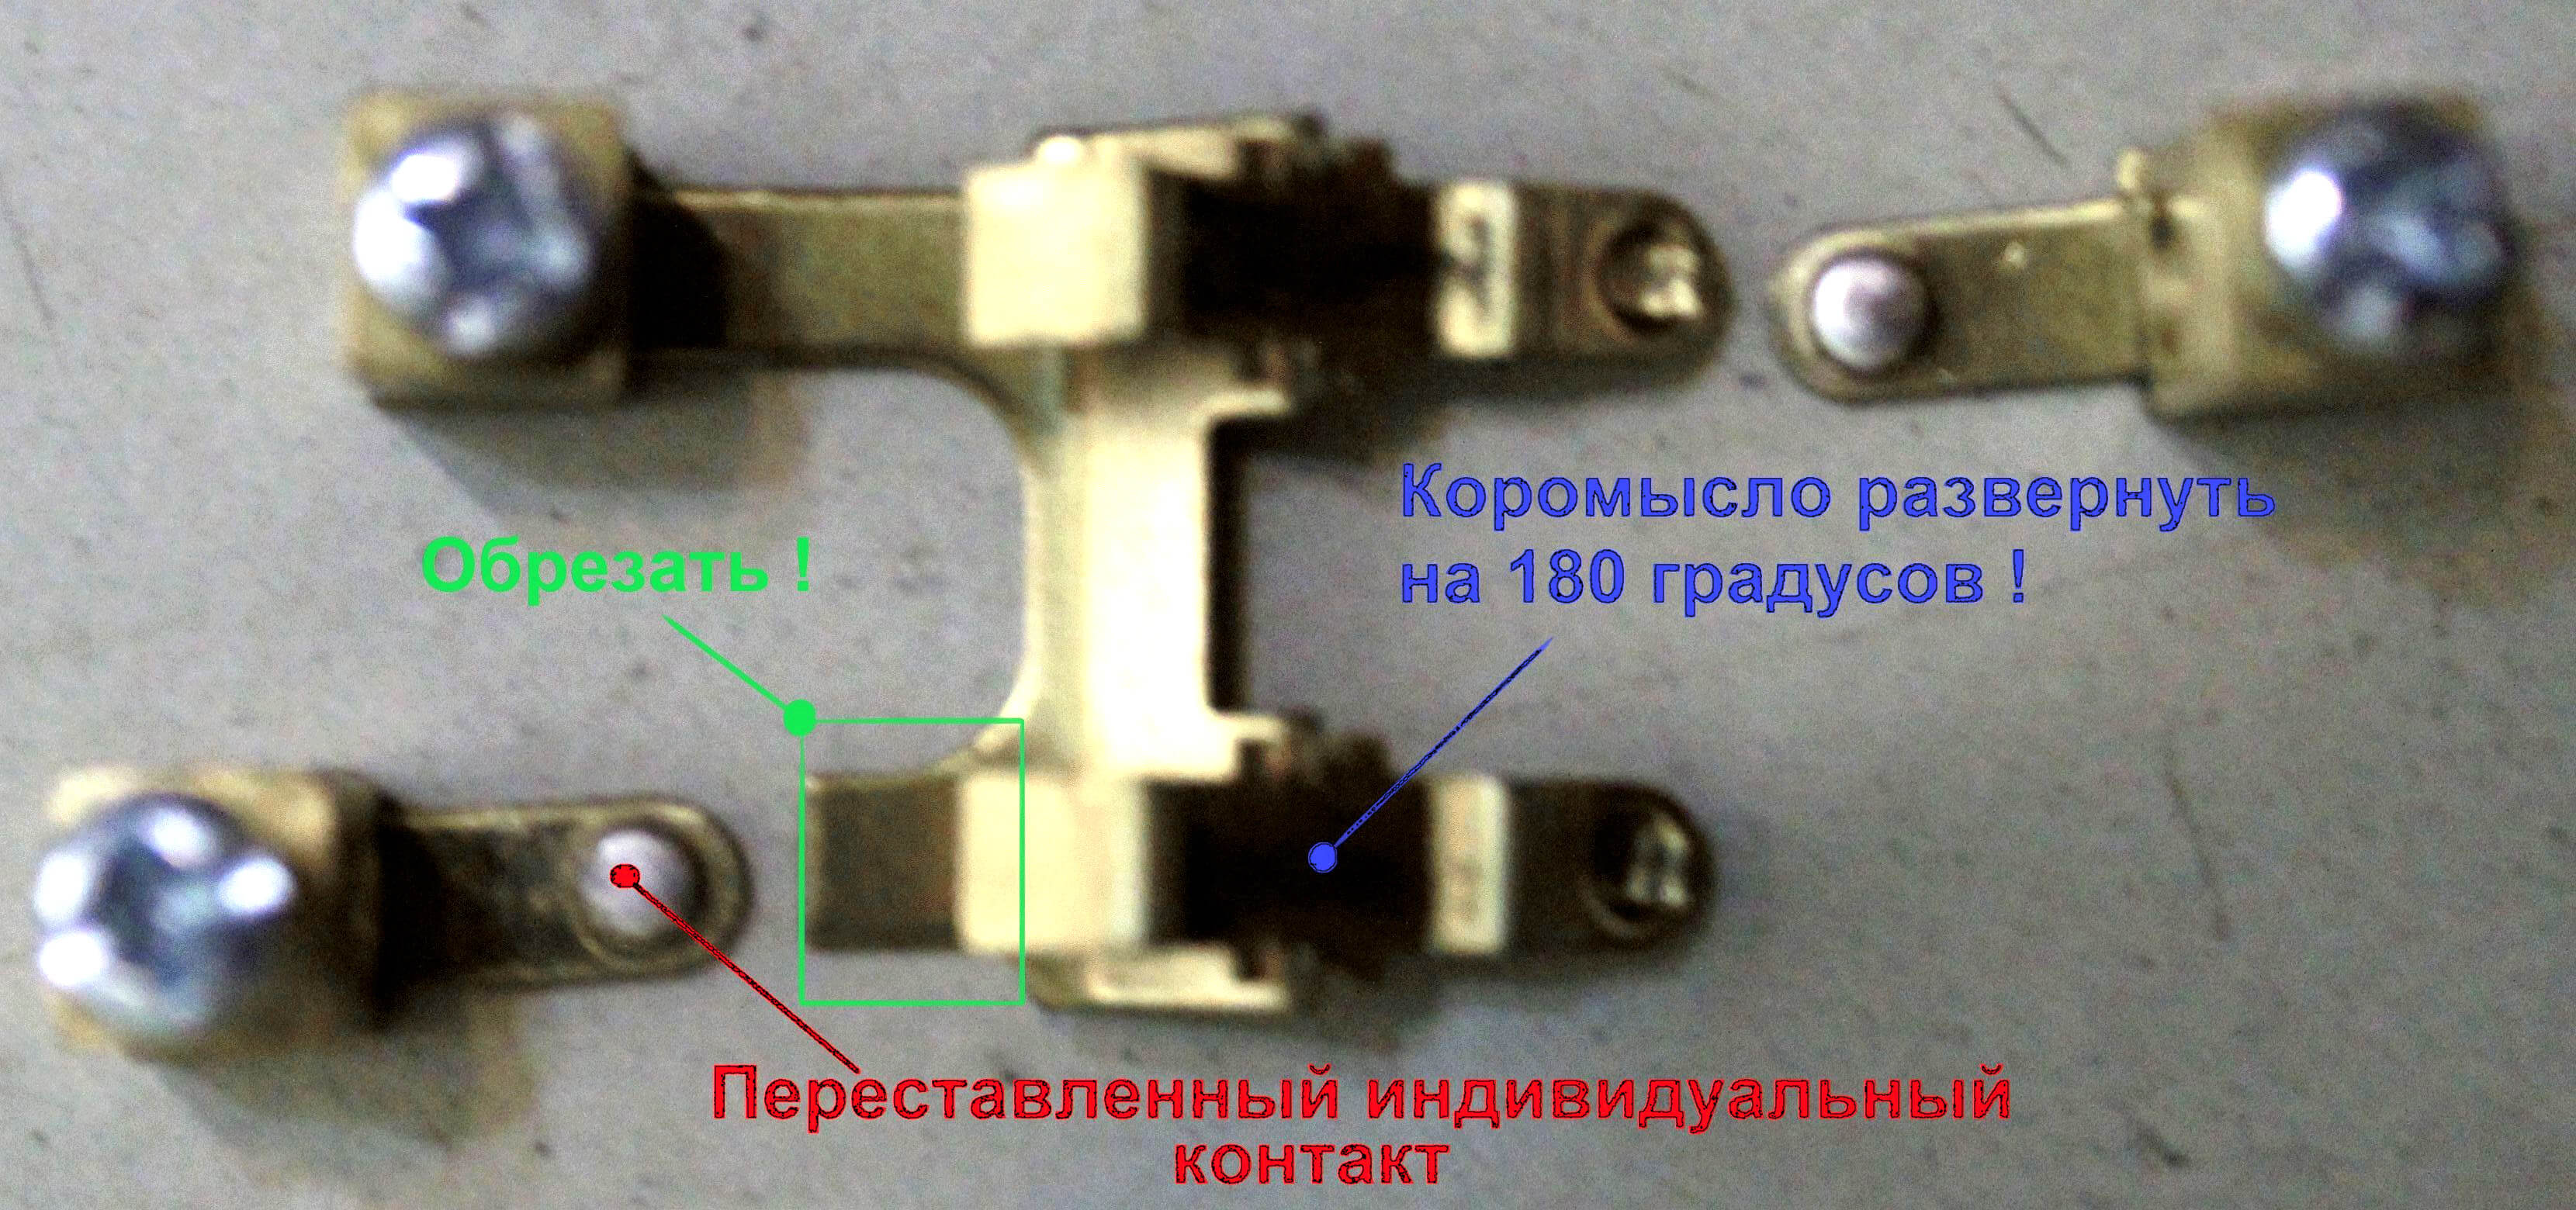
It is necessary to perform some actions on the factory product: cut off part of the contacts, rearrange them, and deploy the rocker to get it, as in the photo below:
Now carefully collect the resulting mechanism and check its performance. Two keys must be combined into one large so that the contacts switch synchronously. You can do this with superglue, if you do everything carefully, then the junction of the two halves will not be visible. For better adhesion, you can lightly scrub the bonded surfaces with fine-grained sandpaper.
The video below clearly shows one of the rework options:
Using Push Button Switches
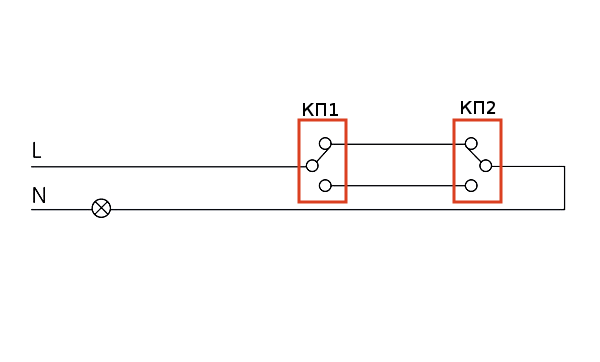
The second idea is to use push-button switches for two positions, the contacts of which are not designed for heavy loads, which should be taken into account when designing the circuit, instead of bushings. It is necessary to purchase switches to two ON-ON positions, which operate as follows:
- one group is included, another is not;
- the second group is on, the first is de-energized.
Using this pair of buttons, you can organize a loop-through light control circuit. But the fact is that this design does not possess some properties of the standard circuit.You can turn off the lighting from one end, but you can turn it back on only from the same button. However, this is a great option for the corridor. You can turn on the light with switch KP1, go down the corridor, turn it off with KP2, and vice versa. But when KP2 is moved to a position where there is no light, turning it on with KP1 will fail.
You must also remember that such buttons are usually not designed for high currents, so carefully study their characteristics before buying.
Also, instead of push-button switches, it is possible to use toggle switches, then the connection diagram does not differ from the above.
We take the intermediate relay as a basis
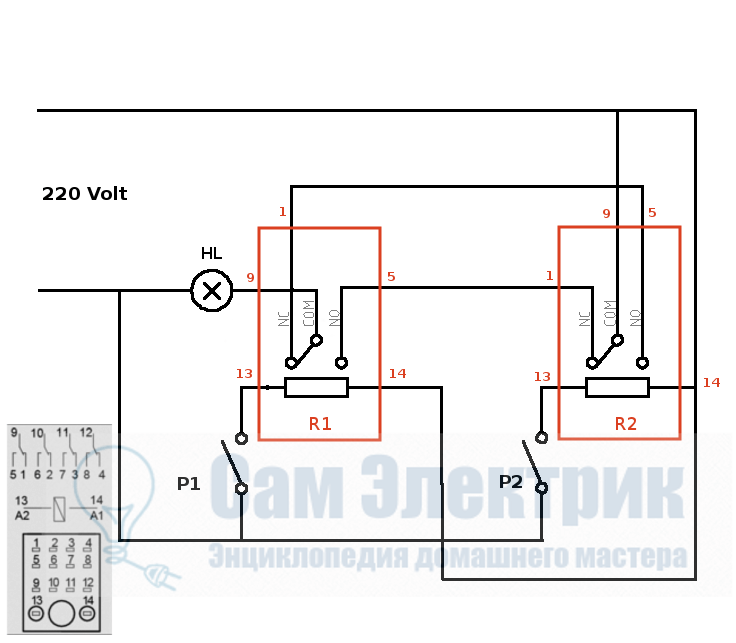
The last option we proposed is the use of conventional single-key switches in conjunction with intermediate relays. However, there may be some nuances. The fact is that this method of assembling a passage switch implies the continuous operation of one of the relays, and this is an additional energy consumption and a weak point of the system. In addition, the relay has a limited resource, and it is necessary to place them in easily accessible and fireproof places so that it can be easily replaced with a new one in case of failure.
As a key, the contacts of through relay NC 1-9, NO 5-9 are used. To turn the relay coil on and off, the usual P1-P2 single-key switches are connected to contacts A1-13, A2-14, and there is a tiny load on them - relay coils.
We hope this article inspired you to build your own light control system and it became clear to you how to make a light switch from a normal one, and what nuances you may encounter during the work.
We also recommend reading:

