Tips for connecting RGB tapes from 5 to 20 meters
If you decide to do in the house hidden ceiling lights multicolor ribbon, you need to know how to properly connect it to the network. Unlike the one-color model, which is connected only to the power supply, here you also need to additionally purchase a controller and amplifier. We will tell you further how to connect an RGB LED strip from 5 to 20 meters!
The main elements of the system
In order to connect an RGB tape with your own hands, you first need to determine its length. Based on this, suitable devices for the lighting system are already selected and a suitable connection scheme is created. As for devices, the main ones are the RGB controller, power supply and amplifier. We consider in detail the purpose of each element in the chain.
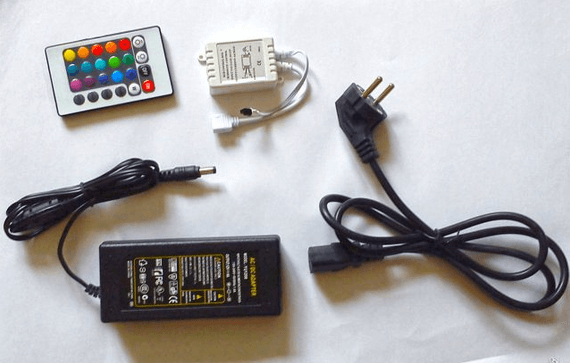
A power supply is needed to convert 220 volts from the network to 12/24 V, from which the light source itself works. The purpose of the controller is to control the color of the LEDs (you can visually see its operation in the video, which we will provide below). An amplifier is needed in order to connect more than 5 meters of RGB LED strip at the same time. Also included is a remote control on which you can select a certain level of glow and the color of the diodes.
We sorted out the components of the system, now I would like to tell you about what may be the connection schemes for a multi-color ribbon.
Popular wiring diagrams
So, the first and most simple connection scheme from one RGB tape to 5 meters is as follows: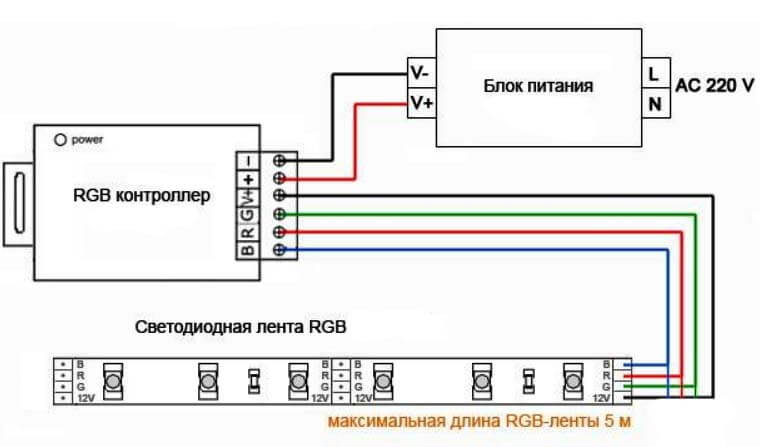
As you can see, everything is quite simple: the RGB tape is connected to the controller, which in turn is connected to the power supply. The PSU works from a 220 V network. If you need to connect two segments of 5 meters each, then it is better to additionally buy an RGB amplifier and another power supply, which is added to the network as follows: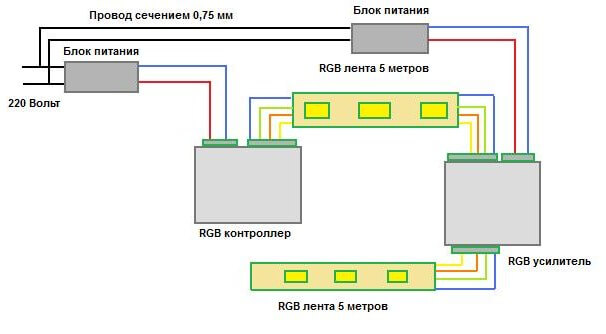
There should also not be any special problems, the main thing is to observe the letter and color marking wires during installation. A very important nuance - do not connect 10 meters of RGB LED strip in series, because in this case, the second segment will not shine so brightly. Be sure to make parallel connections, even if the controller has enough power to operate two segments without an amplifier.
If you decide make lighting in the apartment a multi-color ribbon with a length of more than 10 meters, here again you need to use a parallel connection. When choosing the power of the amplifier with a margin, it remains to connect 15 meters in parallel without an additional second amplifier.
The last option, which is also popular in home lighting, is to connect an RGB LED strip 20 meters long (4 segments).This option is ideal for creating hidden ceiling lights around the perimeter of a large room, for example, a hall. In order for you to clearly see the correct wiring, we provide you with a video example:
We showed you all the popular connection schemes. It remains only to tell the essence of electrical work, which we will provide in the form of step-by-step instructions below.
Step-by-step installation instructions
In order to independently connect the RGB LED strip in the apartment, you need to perform the following steps:
1. Prepare the surface. In the place where you decided to install the LED lighting, level the surface and degrease it with solvent. If you decide to fix the tape on a metal surface, additionally protect it with electrical insulating material.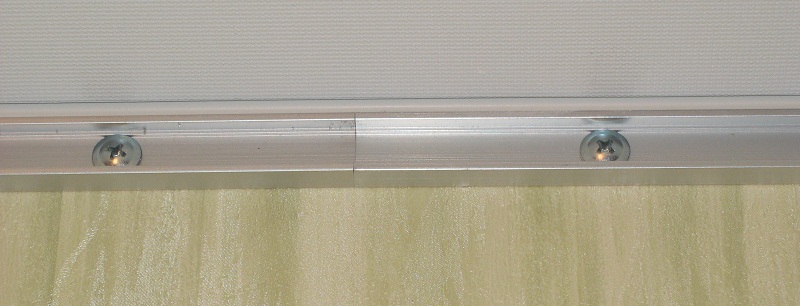
2. Glue the tape. One of the sides of the lamp is self-adhesive, so remove the film and gently stick the material in the selected place. Remember that the bending radius should not exceed 2 cm, otherwise the system may be damaged. If you need to cut a certain section of material for connection, do it in the appropriate places that are indicated by the manufacturer (as shown in the photo). Also about how to cut led strip, we told in the corresponding article. To connect two segments of the RGB tape, use a soldering iron or special connectors.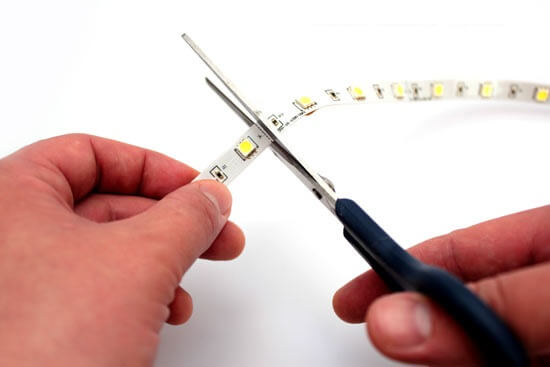
3. Assemble the chain. According to the scheme, connect the multi-color tape to the controller, amplifier and power supply yourself. The power supply is connected to the network easily, with an ordinary electric plug. To connect the PSU to the controller, you need to connect the black wire to the “V-” connector, and the red wire to “V +”. The wires from the tape are attached to the controller as follows: red to the “R” connector, green to “G”, and blue to “B”. The remaining wire (it can be any color) must be connected to the terminal marked "V +"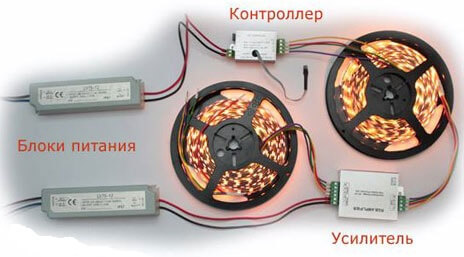
4. Connect the backlight to the 220 Volt network and test with the remote control.
You can see a visual overview of all stages of installation in the video example:
That's the whole manual for connecting RGB LED strip with your own hands! As you can see, there is nothing difficult, the main thing is to choose the power of devices and the circuit according to which the circuit will be assembled. If you accidentally mix up the wires going from the lamp to the controller, nothing bad will happen, just the system will not work as it should (for example, blue will shine instead of red). In this case, just make the correct connection and test the finished system again.
Similar materials:




I want to make color music the total number of diode tapes is 20 m red and 20 m white! How to do it