Step-by-step instructions for connecting an LED strip
One color
Connecting a single-color LED strip is not difficult. All that is needed is to purchase the constituent elements of the backlight, cut off the required length of the LED strip, solder it to the power supply and insulate the exposed contacts. Now we will take a closer look at each of the connection steps.
Choose a connection scheme
To independently connect the LED strip to the 220 volt network, you must first select the connection scheme for all elements. If you decide to make a backlight using at the same time no more than 5 meters of the product, then it is enough to connect the tape with a 220 to 12 V power supply, and connect the power supply to the home network through a cord with a plug.
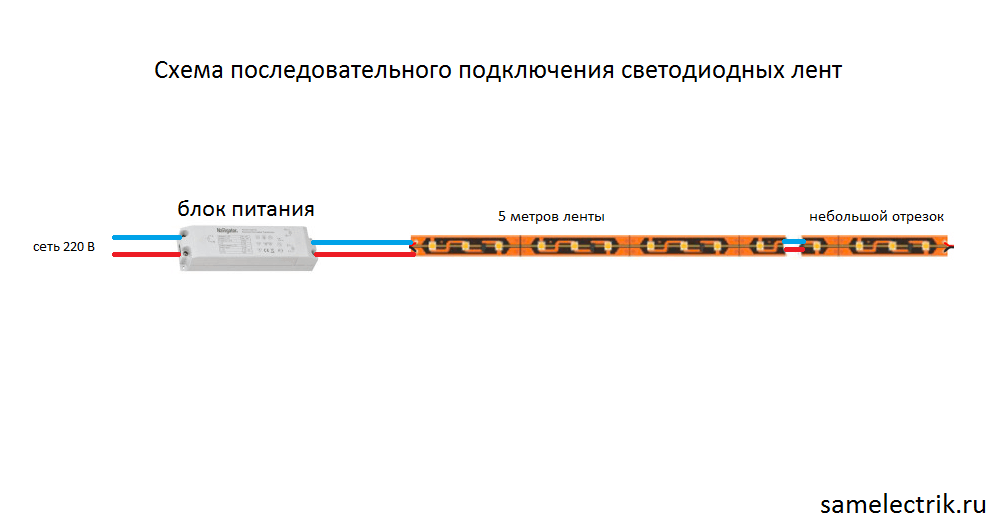
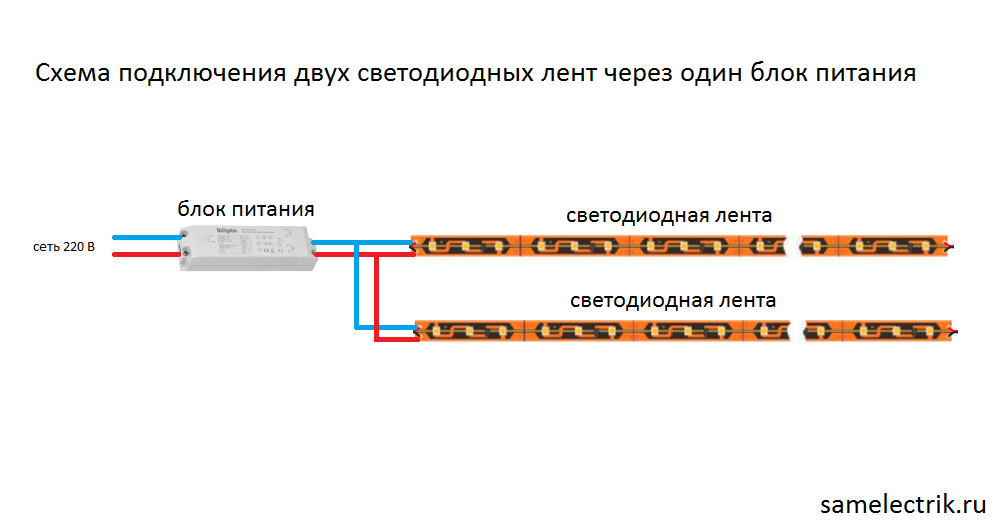
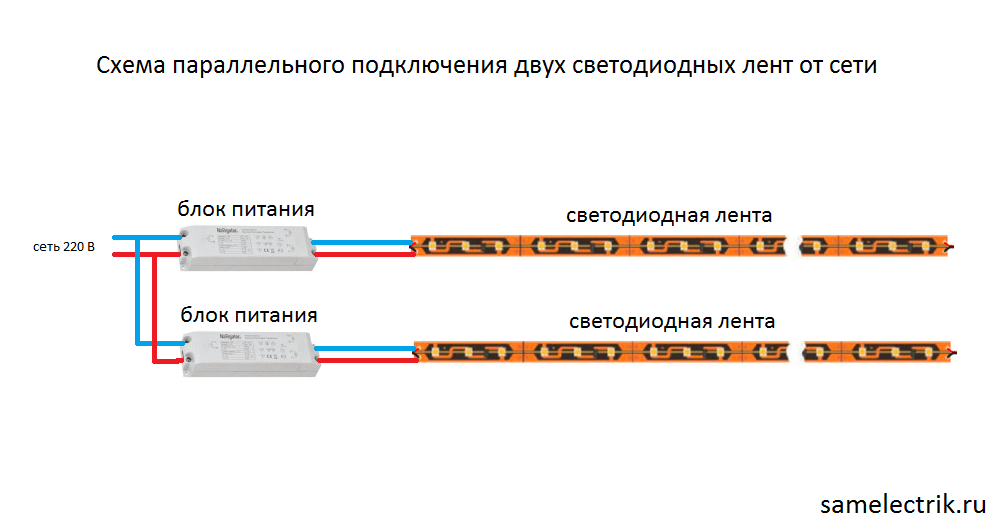
However, it often happens that you need to connect more than 5 meters of LED strip - 10, 15 or even 20 meters. In this case, it is forbidden to connect all segments in series, because overheating of the first 5-meter section will occur and at the same time, the voltage in subsequent sections will drop significantly. Such a connection will shorten the life of the LED backlight. All the most popular LED strip wiring diagrams We examined in detail in the corresponding article. For an example we will provide them again.
Consistently (allowed if you need to add a small segment):
Parallel:
With two power supplies (if the tape is long):
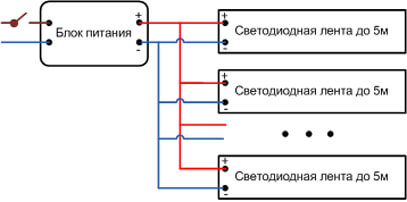
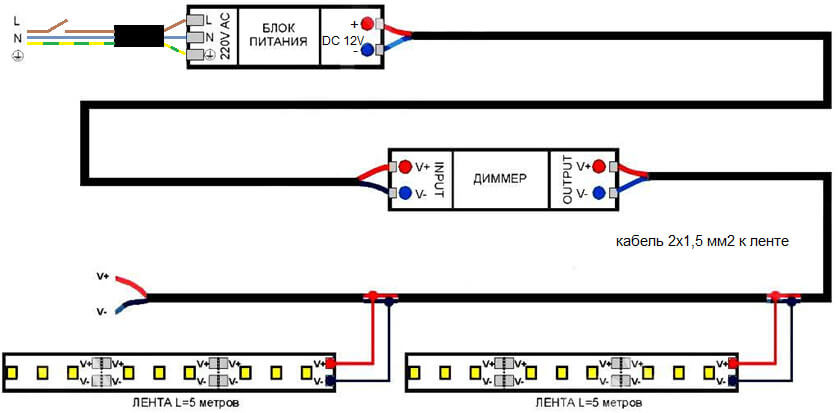
We draw your attention to the fact that you can connect the LED strip through the switch or Dimmer, which is very convenient when creating additional lighting in the kitchen or another room. In this case, the light switch is connected in front of the power supply to the phase gap, as shown in the diagram below:
The dimmer must be connected after the power supply, as shown in this example:
We figured out the schemes for connecting LEDs to a 220v network, now we turn to the very process of connecting circuit elements.
We connect accessories
In the simplest example, we have a 220 / 12v power supply and 5 meters of single-color LED strip. To connect all the elements to 220 volts, you need to perform the following steps:
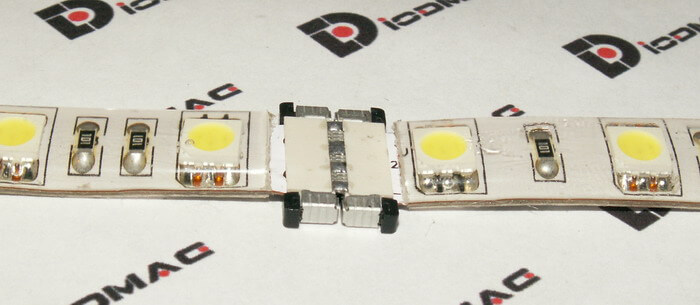
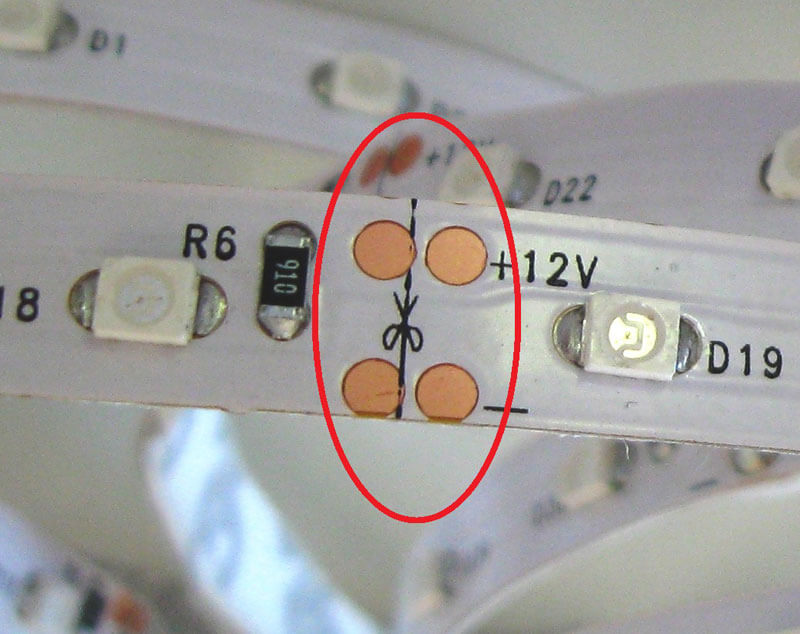
- Cut the appropriate length of the product. About, how to cut the LED strip, we already told. The conductor must be cut in strictly designated places indicated by the dashed line or the scissors icon, as shown in the photo below:
- Prepare wires for connection. If the length is not more than 5 meters, you can safely choose a wire with a cross section of 1.5 mm2. For long tape lengths, we recommend calculate wire cross-section by power and currentto select the appropriate value.
- Prepare a soldering iron, rosin and solder.
- Degrease the pads of the LED conductor using cotton wool and alcohol.
- Strip wires for connecting the product 2-3 mm for soldering.
- Run tinning wires and soldering pads.
- Solder the wiring to the LED strip. It is best to use tin-lead solder for soldering. It is important not to confuse the cores in color, otherwise the LEDs will not light up. The black or blue wire must be connected to the “-” terminal, and the red wire to the “+” terminal.

- Insulate the soldering point using a heat shrink tubing. By the way, instead of heat shrinkage, you can also use a glue gun that will reliably protect exposed contacts.

- Connect the wires from the tape to the power supply, also guided by the color coding.
- Connect the cable from the 220 volt network to the terminals L, N and PE. Do not forget to turn off the electricity in the house or apartment before this.
The disadvantage of such adapters is that over time the contact will deteriorate, which cannot be said about a more reliable soldering wires. You can see how to connect the LED strip using connectors and soldering in the video below:
Multicolor
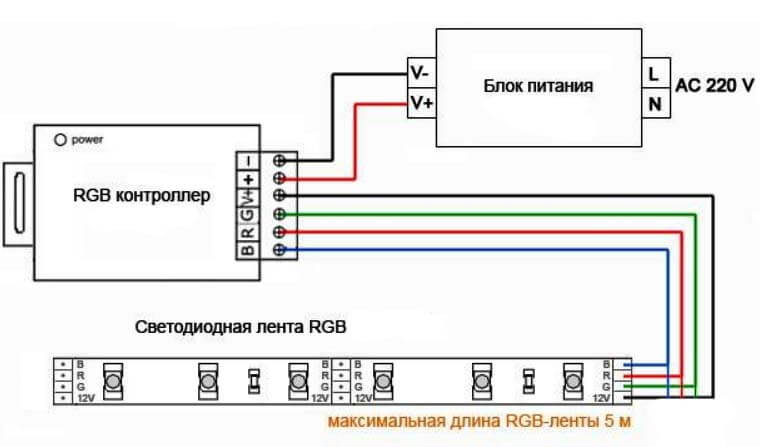
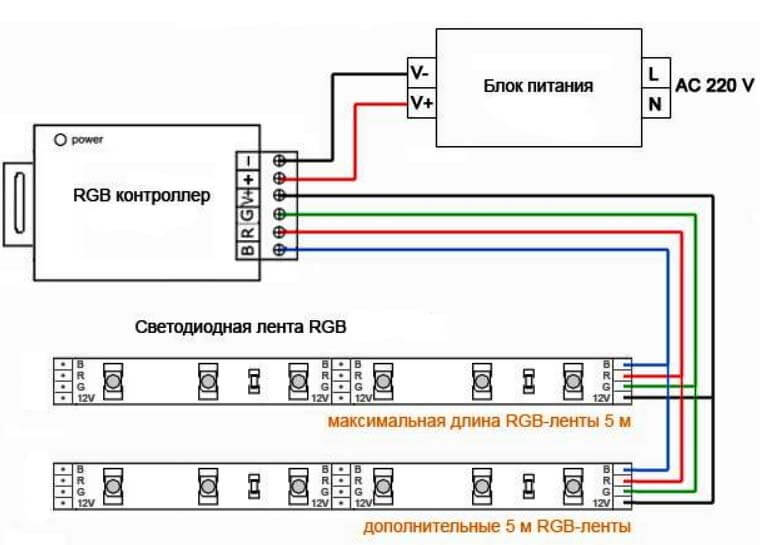
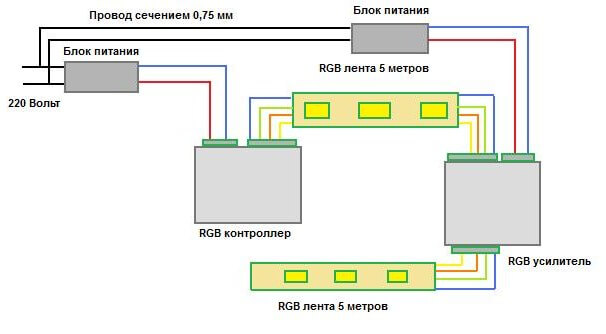
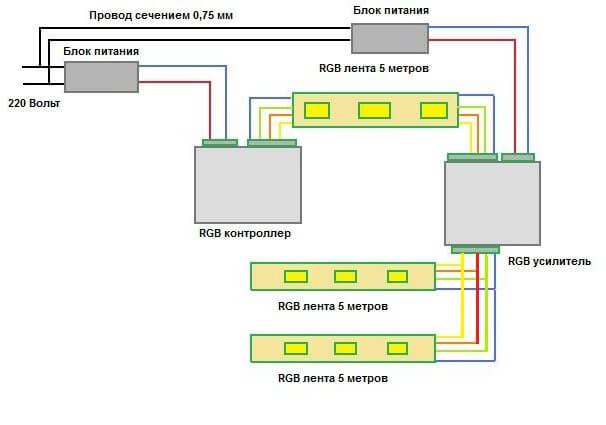
If you want to connect a color RGB tape at home, the connection technology will not change too much. A controller will be added to the circuit with a multi-color device, without which the circuit will not be able to work, and there will also be 4 contacts on the output instead of two. RGB Ribbon Connection Schemes we also considered, we provide them once again to your attention.
Standard way:
Parallel connection:
Using an amplifier:
Two power supplies:
Otherwise, the connection instructions are similar to the previous one - the wires are soldered, the bare contacts are isolated, after which the correct connection of all elements of the circuit is checked! You can clearly see how to connect a multi-colored RGB tape to the network with your own hands, in the video below:
That's all we wanted to tell you about how to connect the LED strip to 220 volts with our own hands. As you can see, the instructions for connecting the multi-color and single-color models are not very different, the main thing is to correctly connect the wires by color.

