How to make street lighting in the country - 5 steps to success
Do-it-yourself installation of street lighting is a complex of labor-intensive measures that even an electrician-beginner can do.
The main stages of installation:
- Workplace preparation
- Wiring Method Definitions
- Selection of street lights
- Calculation of cable and other elements electrical wiring
- Schema creation
- Installation of lamp posts
- Connection of light sources
- Installation of automation
To begin with, we will consider the main types of lamps, support structures and methods of laying wires, after which we will provide you with detailed instructions on how to make street lighting in a private house or in the country with your own hands.
- It's important to know
- What kind of lighting is there?
- What are the fixtures?
- Cable Management Methods
- Types of supports
- Electric installation work
- Step 1 - Preparation
- Step 2 - Calculation of wiring elements
- Step 3 - Creating a Scheme
- Step 4 - Installing the Feet
- Step 5 - Connecting the fixtures
- Do I need automation?
It's important to know
What kind of lighting is there?
Today, street lighting can perform decorative and technical functions.
In the first case sources of light are installed throughout the garden, decorating various small architectural forms, ponds and flower beds in the country. Such street lanterns can emit flood light of various colors of the rainbow.
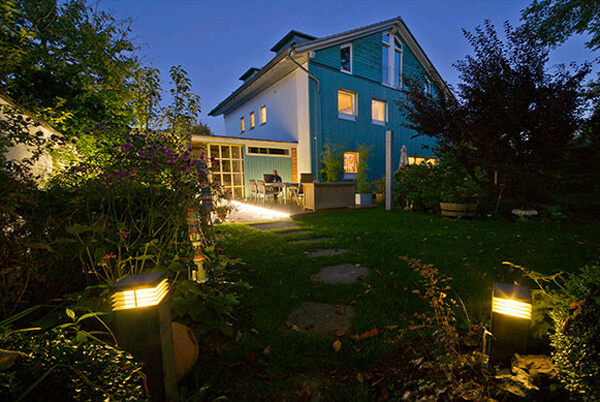
Technical lighting on site is responsible for safety. Lanterns of this group are installed along the garden paths, at the entrance to the house, into the yard. Also, fixtures can illuminate the facades of buildings and the fence, as shown in the photo.
What are the fixtures?
Lamps in the modern world can not be counted. For street lighting in the country and in a private house, the following products are most often used:
- lanterns on poles;
- wall lights;
- pendant lamps;
- searchlights;
- LED strip
- lamps on short legs.
- Wall lamp
- Low pillars
- Solar powered lights
Which option to choose is up to you. The main thing is that it is efficient and at the same time saves electricity. Immediately recommend viewing the assembly instructions. homemade led spotlight for giving:
Cable Management Methods
From the main switchboard in the yard should go several groups of wires. One - to the house, the second - for street lighting of a personal plot, the rest - for power supply of garden buildings (garage, utility unit, bathhouse). From the shield to the lighting fixtures, the cable can be laid in two ways: underground and air.
The first option is more preferable, because in this case, the landscape design of the cottage will not be spoiled by cables laid on the lawn and along garden paths. In addition, this method of laying is safer, because wiring will be protected from mechanical damage.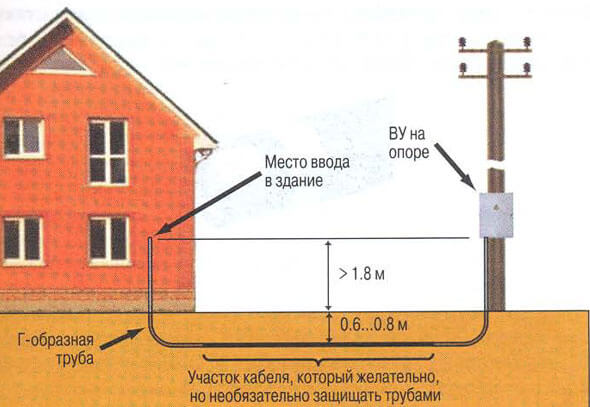
The air method is used where it will be more appropriate: under the roof of the house, between high poles, etc. Its disadvantage is the tendency to damage, as well as a shorter service life. At the same time, aerial cable laying in the country is less time-consuming and much cheaper.
Types of supports
Since most street lights are mounted on poles, we should also talk about these structures. Today, there are reinforced concrete, wooden, metal and even plastic lampposts. The material of their manufacture depends on the conditions of use and the type of lamp.
In addition, it should be noted that the street lighting poles can be represented by vertical posts, wall brackets and even a tension cable. Here, again, it all depends on where and how the lamp will be installed in the country. The only thing I would like to recommend: choose supports with high-quality fastenings and a tight place for laying the wire. Such products will significantly increase the life of the lighting in the garden.
Electric installation work
So, we’ve figured out the basic information, now we’ll consider the do-it-yourself street lighting installation technology. The instruction will be presented from the place installation of electrical wiring in the house will be implemented, which means that the counter and the machines will already be standing.
Step 1 - Preparation
First of all, it is necessary to prepare a place for the installation of supports. For this place, the laying of wires is removed from garden debris, all the necessary tools are prepared, and materials are purchased.
All we need from tools and materials is:
- Kolovorot;
- bayonet shovel;
- Master OK;
- container for stirring the solution;
- sand;
- cement;
- pure water;
- plywood and wooden blocks for formwork.
All these materials are necessary in order to dig a trench and fill the foundation.
Step 2 - Calculation of wiring elements
Now you need to make a calculation of street lighting - to determine the exact number and power of all lamps, cable length / cross-section, as well as the power of circuit breakers and RCDs.
About, how to calculate cable cross-section We spoke. We also spoke in detail about the calculation of power in the article: installation of lighting in the apartment.
As for the types of street lamps, we recommend giving preference to the following products:
- lighting of garden paths - solar-powered lights;
- porch of the house - lights on brackets installed on the front side of the building;
- fencing - light from lamps on poles;
- in the garden - decorative lanterns on the legs and in the form of garden figures.
Step 3 - Creating a Scheme
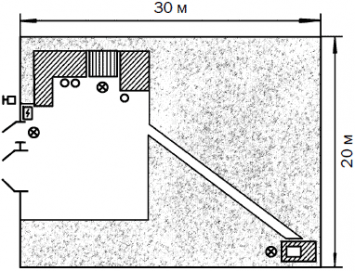
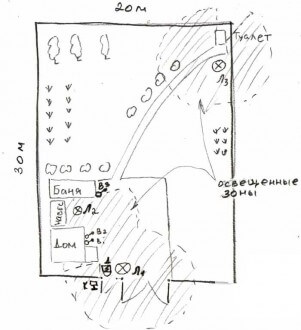
After determining the number and type of fixtures, it is necessary to make a scheme of street lighting in a summer cottage. To do this, it is best to use the plan of the cottage, which indicates the area of the yard, all garden buildings and communications. All you need to do is copy the plan and put your scheme on a copy.
Requirements and recommendations for designing a do-it-yourself outdoor lighting scheme:
- Underground cable routing should be carried out at a depth of 0.7 meters. Moreover, the distance from the buildings should be 0.6 m; from the pipeline - 0.5 m; from parallel cables - not less than 0.3 m (better than 0.5 m).
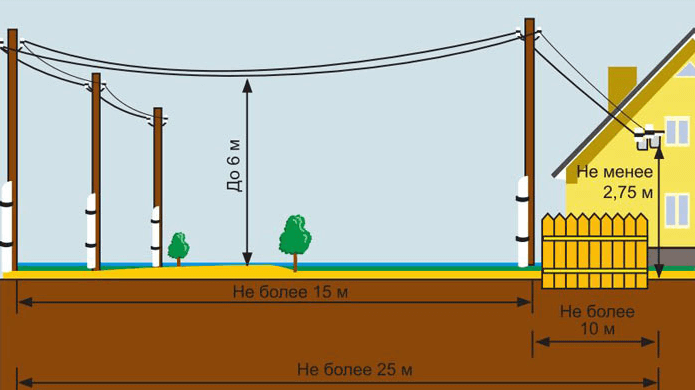
- Aerial cable laying should be carried out at a height of 6 m from the roadway and 3 m from garden paths.
- The light from street lamps should not “beat” through the windows and enter the territory of neighbors (suddenly they will be against).
- Radii of illumination should not intersect at several fixtures, it is better to move them a little apart, so as not to overpay money for electricity.
- It is best to use LED lights, they are more durable and not too much damaged by the environment. In addition, they have high efficiency and light output.
- All light switches must be connected in places protected from rain. If this does not work, protect the product on the street with a plastic container.
- Try to use copper wires, they are not so prone to mechanical damage.
- Required make ground all lighting fixtures.
Step 4 - Installing the Feet
First you need to install street lighting poles. If they are represented by wall structures - drill holes in the wall for the anchor and fasten the support.
We draw your attention to the fact that the installation of supports must be carried out using the building level. Any skew can negatively affect the efficiency and durability of the territory illumination.
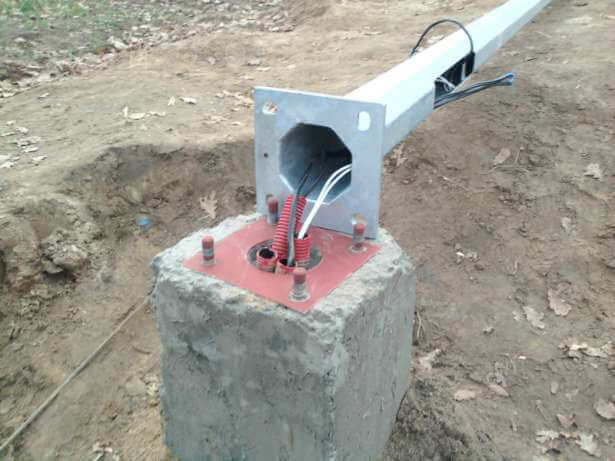 For the installation of vertical posts for lamps, it is necessary to fill the foundation. To do this, a well breaks out (with the help of a scoop), sand is poured into the bottom and carefully compacted. Next, a wooden formwork is installed, inside which a plastic pipe is placed (it will leave a hole in order to lead the underground cable to the lamp through the foundation). The ends of the pipe are sealed so that the solution does not get inside. The formwork is poured with concrete mortar, and until it is frozen, an anchor is mounted vertically vertically in the center for fixing the column. When the cement has completely set, you can proceed to the installation of the support and installation of street lighting fixtures.
Step 5 - Connecting the fixtures
Approaching the final part, you need to install lights on the poles, connect them to the wiring, and connect light switcheswhere necessary. The best thing connect wires with the help of terminals, which must be insulated with a heat shrink tube or other waterproofing product. When all the fixtures are installed in their places, a control check of all connections, zero resistance with phase and the inclusion of electricity is carried out. In theory, everything should work out and by the evening you can enjoy your work. As you can see, making street lighting with your own hands is quite realistic and not very difficult.
Do I need automation?
Automatic control of street lighting is increasingly being used in private homes and summer cottages. This is not only convenient, but also allows you to significantly save energy. With manual control, as a rule, in the evening you turn on the light on the street, and when you wake up, turn it off. At the same time, lanterns are used all night only to scare ill-wishers from the cottages.
Today are popular motion sensors and automatic photorelay - light sensors. These devices allow you to turn on the light when moving within the range of the sensor, as well as when dark. In simple words, if no one enters the yard, the sensor will not work. When motion is detected, the light throughout the section will turn on. So you can control the security on the site and at the same time save electricity.Light sensor turns on when it is dark. Again, it’s very convenient, because if you leave a private house, the light will automatically turn on and off.
That's all I wanted to tell you about how to make street lighting with your own hands. We hope that the provided step-by-step instruction was useful and new for you.
Similar materials:

