Electrical wiring in a one-room apartment - 2 standard schemes
In order to make a wiring diagram in a one-room apartment with your own hands, you must have the following materials:
- photocopy of the floor plan (it is better to apply the placement of all elements on it);
- stationery (simple pencil, ruler, etc.);
- building tape measure.
First of all, we determine location of outlets, switches and all electrical appliances. After that, we mark the route of the wires on the walls, as well as the installation location of all components. Next, we check the correct placement of all outlets and switches.
Very often, after electrical work, it turns out that some outlet is covered by furniture or Appliances. This is fraught with the fact that you have to redo all the work, or purchase unreliable extension cords. Therefore, it is best to carry out a control check after marking the walls, which does not take so much time.
If everything is correct, transfer the entire project to paper.
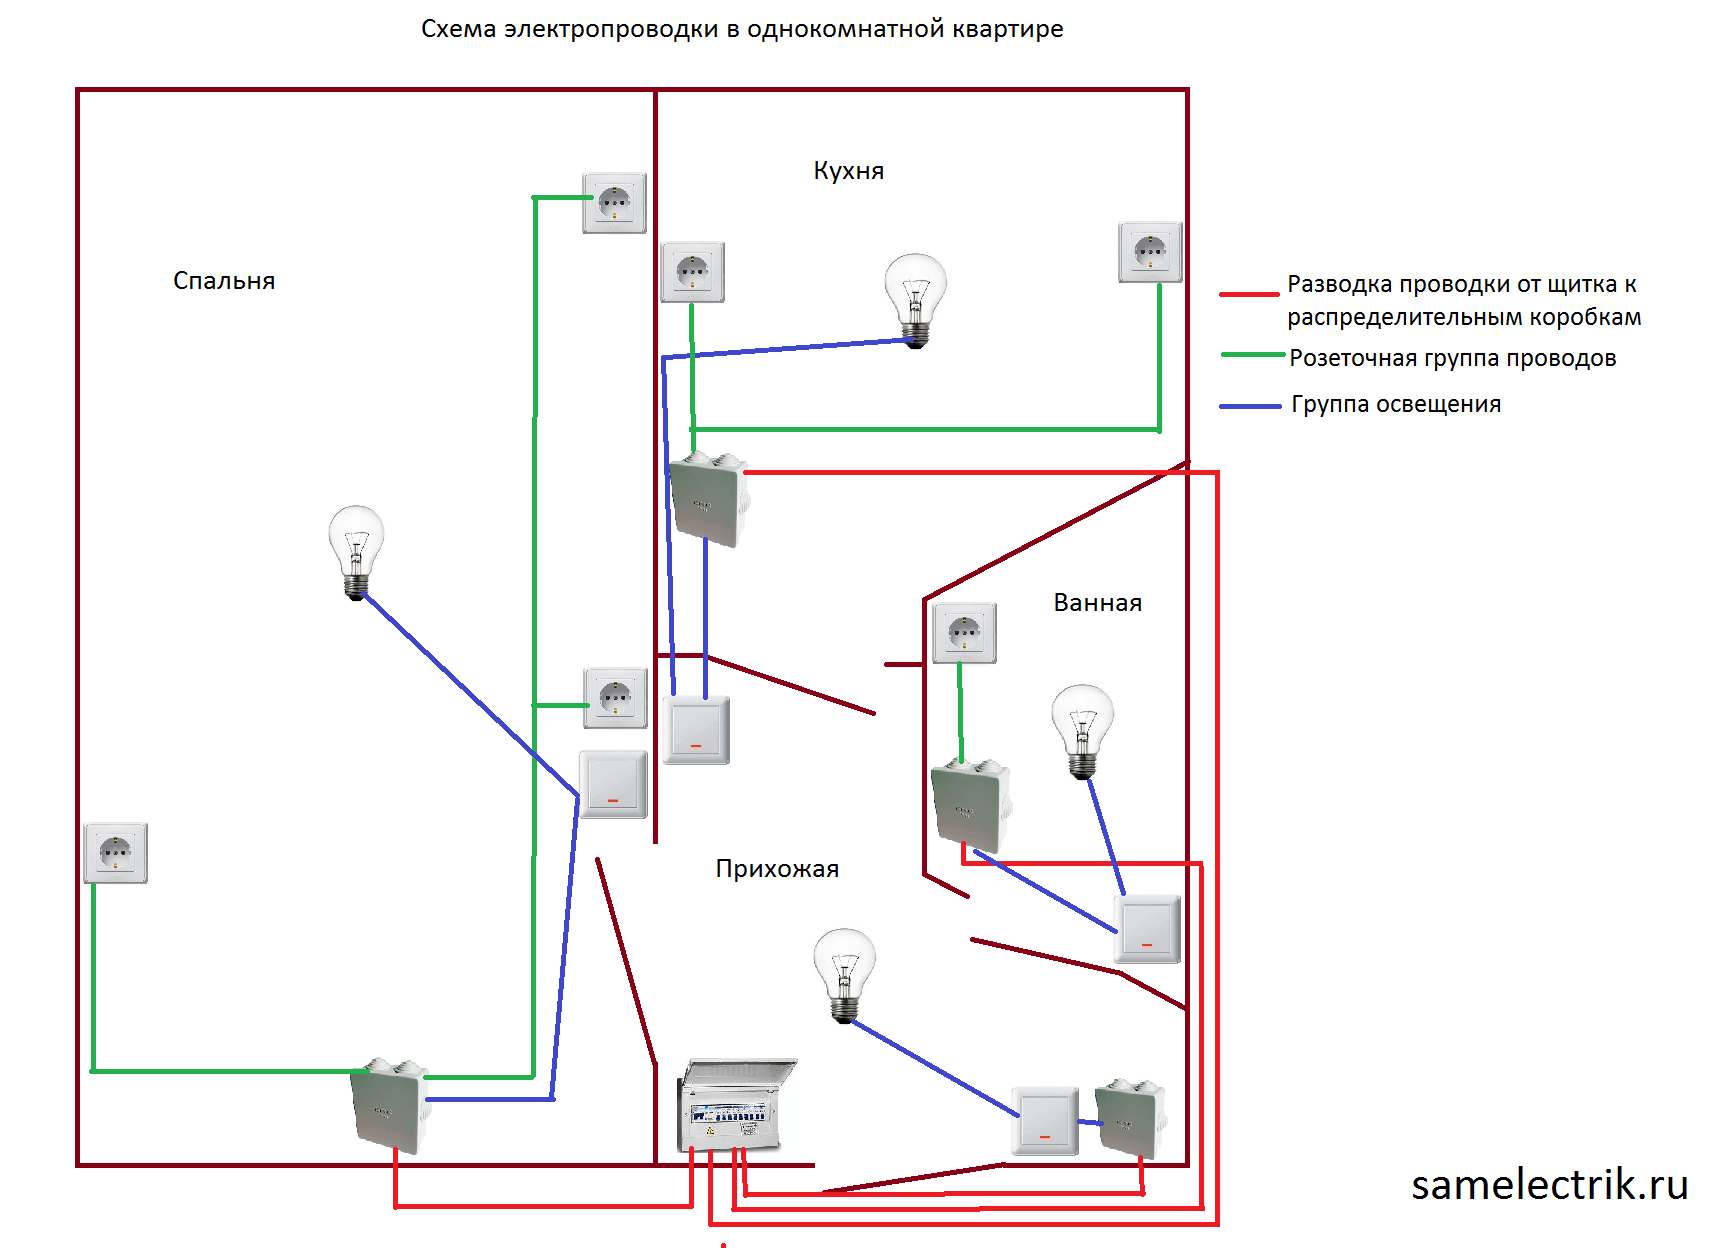
To your attention an example of a typical wiring diagram in a one-room apartment of a panel house (Khrushchev):
We draw your attention to the fact that on an examplewire color marking not complied with, all colors were chosen to visually distinguish power lines.
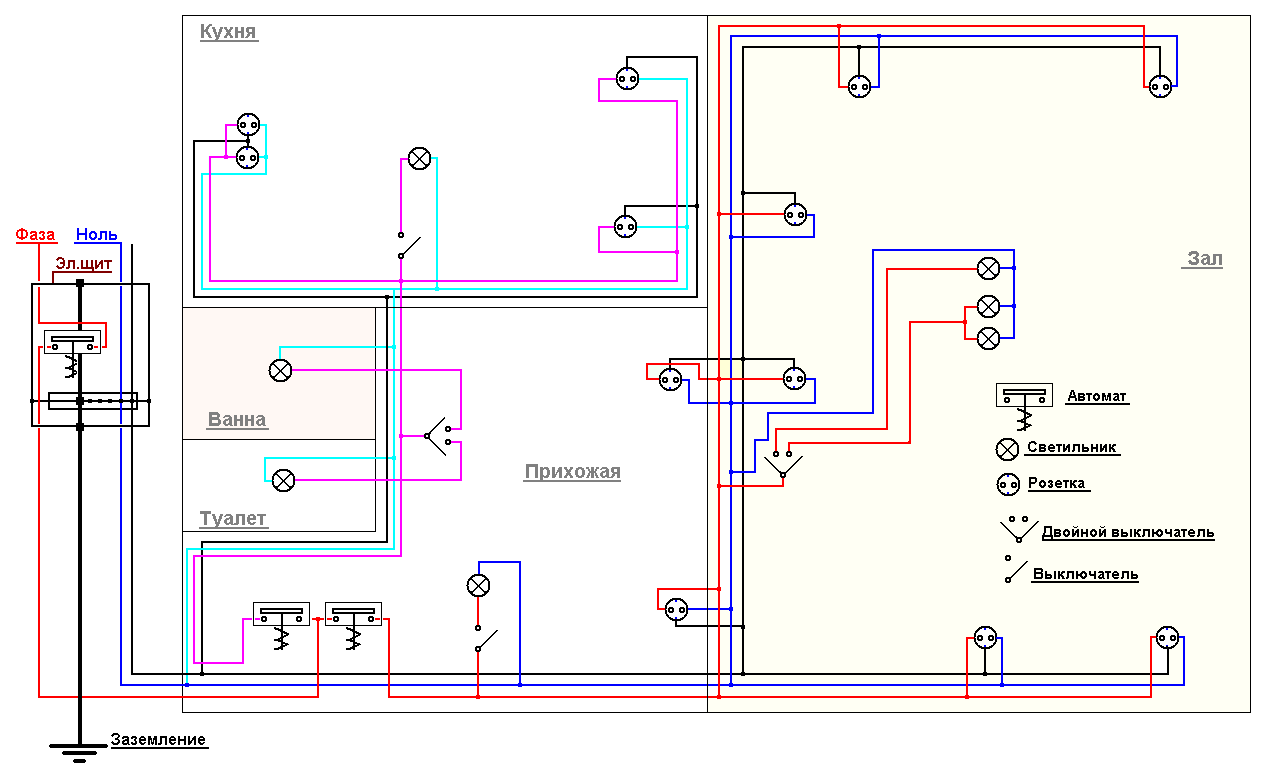
We also provide another wiring option in a one-room apartment:
It is also important when drawing up the cable wiring diagram for rooms to additionally draw up a shield diagram. For example, you can use the following assembly option:
If the apartment is old, without grounding, the circuit will be as follows:
Finally, we recommend watching a useful video on the topic:
Similar materials:


