How to connect a circuit breaker in the shield?
Typical installation errors
Most often with electrical wiring, and in particular, connecting the machine, the following errors are allowed:
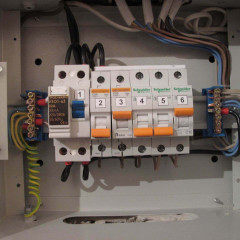
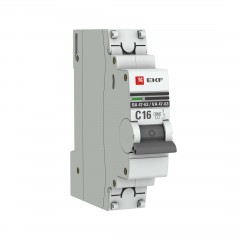
- The power cable is wound from below. Despite the fact that this option of wiring is not prohibited by the rules of the PUE, we still do not recommend connecting the circuit breaker from below, especially since the circuit on which the fixed contact is installed is at the top (as shown in the photo below) .
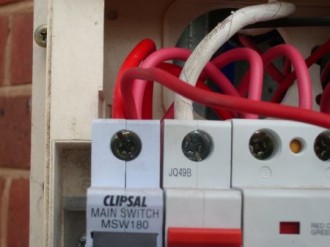
- The contacts are too tightly clamped by the fixing screw. You do not need to allow this, because as a result you can not only damage the cable core, but also deform the product body.
- Conductors do not connect properly. A prerequisite is that the phase must be connected under the phase, zero under zero (if a bipolar switch is used). Immediately recommend that you familiarize yourself with the material: wire color marking.
- Instead of one two-pole machine, two single-pole machines are used. This is strictly prohibited, as phase and zero must be disconnected at the same time.
- When fixing the core, insulation enters the seat. Be sure to strip the wire as much as the model passport requires. If you press down the insulation with a screw, the contact of the conductor will weaken, as a result of which the core will be heated and further adverse effects will occur. For this event, we recommend using a special stripping tool.
- Wrong choice of circuit breaker, in particular the product is not able to withstand incoming loads. In this case, you need to start correctly calculate cable cross-section and according to the design characteristics, select the appropriate model.
- When calculating a suitable circuit breaker, the value is rounded up. For example, you calculated that the current load on the product is 19 amperes. By the simplest logic, novice electricians go to the store and acquire a device of the closest value - 20 Amps for connecting. This is a huge mistake, because the calculated value is nominal, and it turns out that the protection will be triggered with a slight overload of the wiring. It is better to purchase a switch with an indicator of 16 Amps, so the wiring will last longer.
Another important point on the subject of which there is a lot of discussion - is it possible to connect the machine to the electricity meter or is it done only after it? The answer is, you can, and even need to, the main thing is to buy a special box, which is sealed by representatives of energy sales. Installing an introductory machine in front of the meter will allow for the safe replacement of an electricity control device in both a private house and an apartment.
Here, in fact, there are rules for installing and connecting an electric machine with your own hands. Now let's move on to the main topic of the article.
Main process
So, in the initial position, we have an electric panel in which the products will be installed, as well as all the wires (input and output to consumers).
Consider the instructions for dummies on the example of connecting a two-pole circuit breaker in the shield:
- The first step is to turn off the electricity and check its presence with a multimeter or indicator screwdriver. Instructions for use of the multimeter we provided readers!
- The machine is mounted on a special DIN-rail and latched with a latch. You can do without din rail, but it is less convenient.
- Veins of water and outgoing conductors are stripped by 8-10 mm.
- In the upper two clamps you need to connect the input zero and phase (do not forget about the recommendations mentioned above).
- Accordingly, outgoing zero and phase (those that go to electrical appliances, sockets and switches) are fixed in the two lower holes.
- After that place wire connections must be checked manually for reliability. To do this, you need to carefully take the conductor and move it in different directions. If the core remains in place, the connection is reliable, otherwise be sure to tighten the screw again.
- After all the electrical installation, the robot is energized and the product is checked for operability.
That's the whole instruction for connecting a circuit breaker in a single-phase circuit. As you can see, there is nothing complicated, you just need to be careful. We also recommend that you familiarize yourself with the video tutorial in which the connection process is discussed in more detail:
Wiring diagrams
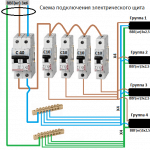
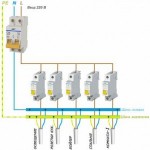
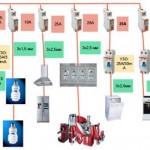
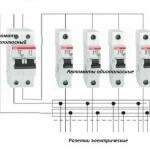
We also recommend that you familiarize yourself with the circuit breaker installation diagrams:
The video shows in more detail the connection diagrams of a single-pole, two-pole, three-pole and four-pole machine:
That's all I wanted to tell you about this issue. We hope that now you have fully learned how to connect the circuit breaker to the network yourself and what errors should not be made.
Similar materials:

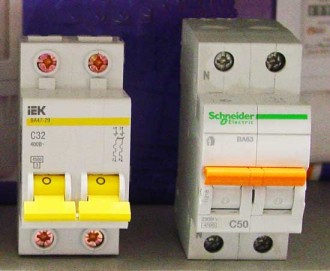



Automatic machines abb S200 - can be connected from the bottom (comb)?
Sometimes the circuits do not correspond to the actual location of the fixed contact.
Here is a partial discrepancy: due to the design features of this machine, the fixed contact is at the bottom in the N-pole.
In addition, there is an electromagnetic release at the N-pole, which is not typical for 1P + N machines.
And the circuit drawn on this old FAZ does not correspond at all to the filling of this machine.
He has three contacts - a movable bridge and two fixed connected to the clamps (as in the breakers with a double gap). Another of its features is two arrester.
Most often, the following errors are made when installing electrical wiring, and in particular, connecting an automatic machine: Regarding 7 errors, I don’t know how anyone but personally I choose 1 circuit breaker at face value. And then a wire or cable!