Instructions for connecting a instantaneous water heater
If in your apartment or private house there are frequent cases of disconnection of hot water, then you can get out of the situation by installing and connecting an electric instantaneous water heater yourself. This device is a miniature version of the boiler and has an absolutely identical principle of operation - cold water passes through the heater, heated and fed to the desired tap. Next, we will consider a step-by-step technology for connecting a instantaneous water heater to the mains and water supply.
Step 1 - Getting Ready for Installation
The first step is to check your own wiring and determine whether it can withstand the loads from this device. Today, there are products on the market with power from 2 to several tens of kilowatts. If in the first case the device can be easily plugged into a power outlet, then a full power heater may need to be fully replacement of wiring in the apartment. Also, replacement is required if the wiring without grounding is too old, which is often found in the country. If you have recently made repairs and completely changed the power line, it will be enough to bring a separate cable for connection from the junction box, which we will talk about a little lower.
In addition, it will be necessary to prepare a tool for installing the housing on the wall: an electric drill, a hammer, stripping toolscrewdriver and set of open-end wrenches.
From materials for connecting an electric instantaneous water heater to the network and water supply, be sure to prepare an FUM tape suitable for amperage RCD, a three-core copper wire of suitable cross-section or an outlet with grounding, a tee for metal-plastic pipes of a suitable diameter and a metal-braided hose (it may not be necessary).
As for the diameter of the wire, here we recommend that you independently produce calculation of cable cross-section by power and currentto select the most suitable value for the current load.
Immediately you can watch a visual video instruction on connecting a instantaneous water heater to a 220 Volt network:
Step 2 - Fasten the housing to the wall
Everything is simple here - we select a suitable installation location for an electric instantaneous water heater and drill holes for its fastening. Usually, either brackets or special hinges are included. The only, but very important condition - the device must be fixed perfectly evenly in all planes. Even a slight skew can cause the heater to fail (the heating element will not be completely covered with water and will burn out after a while).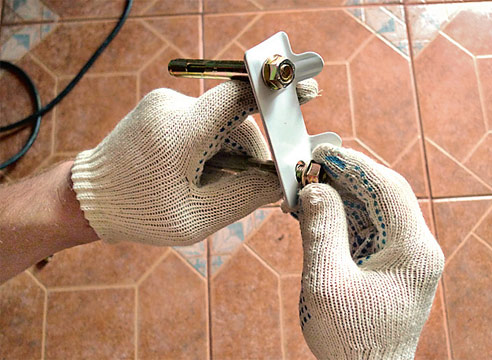
Most often, instantaneous water heaters are installed in the kitchen (for washing dishes) or in the bathroom (for bathing). In the first case, due to the small dimensions of the device, it can be installed under the sink, and in the second case, under the sink, which will also save free space. In any case, drilling is indispensable, so prepare the correct drill bit - for concrete for tiles or for wood for mounting on a wooden wall.
Step 3 - Connect to Power
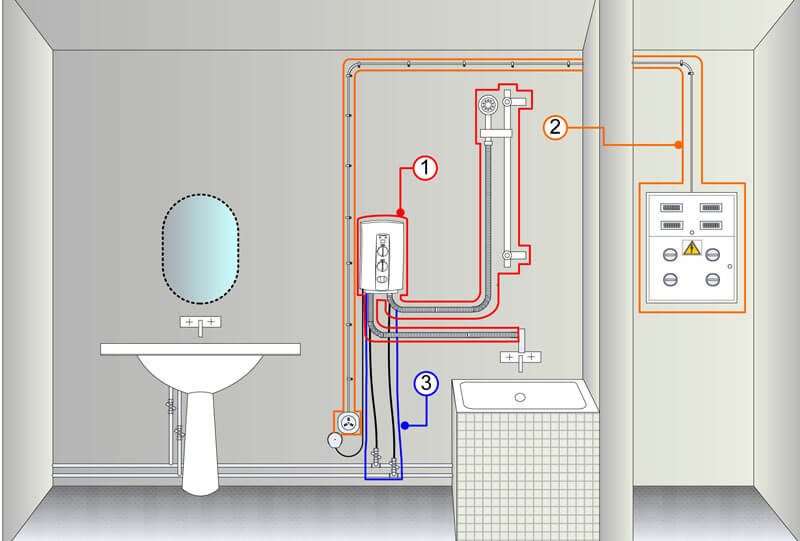
Connecting an electric instantaneous water heater to the network with your own hands is not difficult. You need to remove the protective shield yourself and insert all three wires into the terminal block, as shown in the photo. Be sure to follow color marking wires and according to the designation, connect all cores to the required connectors.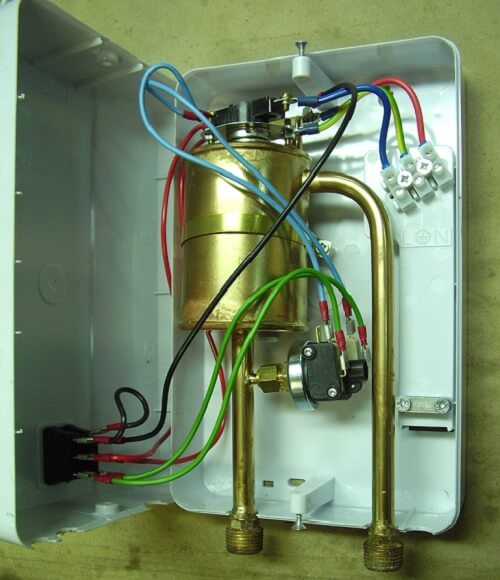
It is forbidden to carry out installation if there is no grounding in the room, as You are dealing with a dangerous connection: water + electricity. The slightest current leak may be the last for you, if the connection of the ground wire is not provided. In addition, it is necessary to additionally protect the unit by connecting it through an RCD, which just works when a leakage current is detected. You must connect the RCD to the switchboard so that it controls the entire line going to your instantaneous water heater.
Step 4 - Connecting to the Water System
Everything is no less simple here - at the exit from the case there are two holes. The first is necessary to connect cold water, the second - to output hot. Connecting the hoses is not difficult, it is much more important to correctly determine the point of "feeding".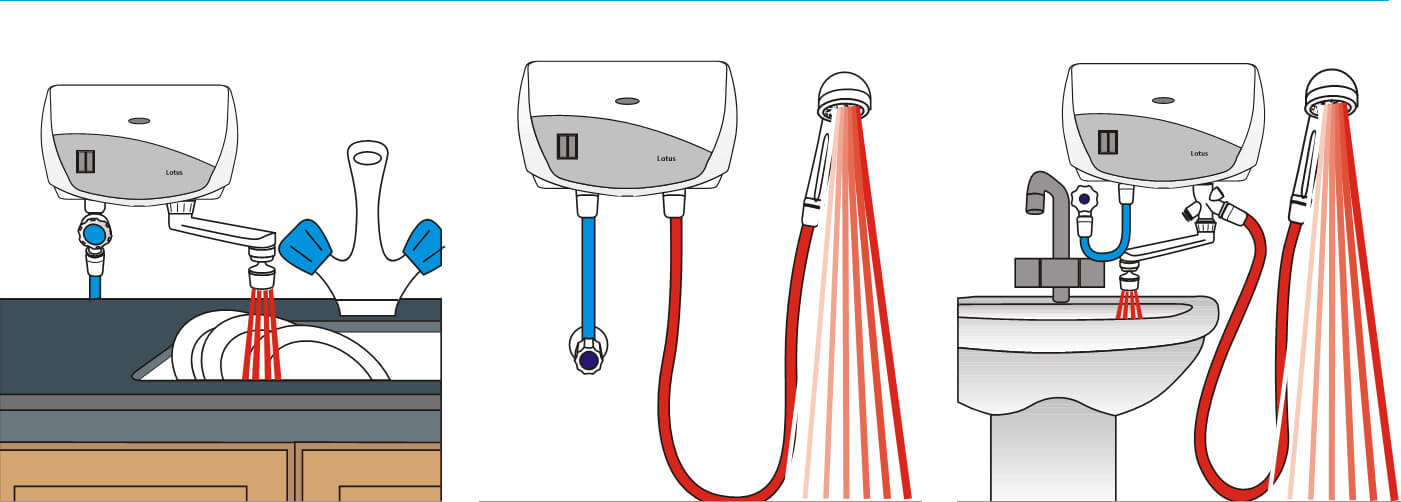
If you decide to install an electric instantaneous water heater for a while in the bathroom, it is better to connect it to the shower hose (in the shower), simply by fixing the nozzle to the mixer, as shown in the photo.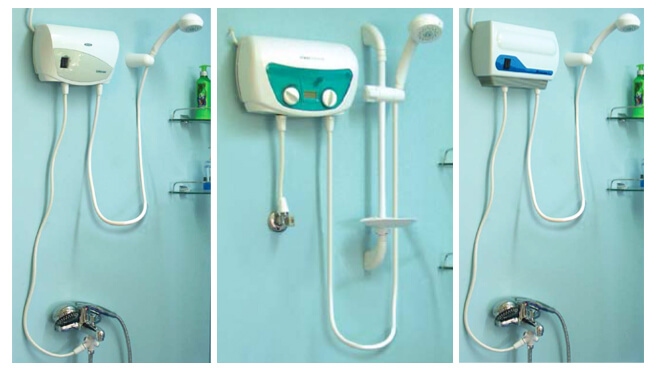
If you want to use the device for continuous heating of water, connect directly to the water pipes, through a tee with a stopcock and a metal-braided hose. In this case, it will be possible to shut off water for the duration of the repair so that replacement of spare parts is convenient.
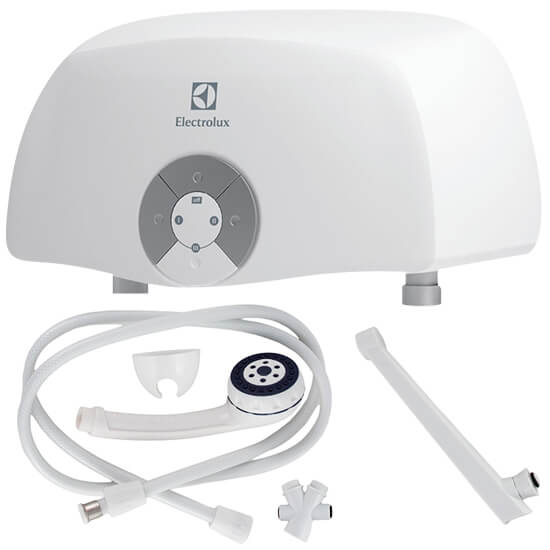
We draw your attention to the fact that it is necessary to connect a shower head, which comes with the kit, to the outlet of hot water from the heater. The fact is that this nozzle has special thin nozzles that do not impede the heating of water. If you choose your own nozzle with large nozzles, the water flow may increase and the water heater will not have time to do its job.
What to consider when operating
Well, the last thing I would like to say is to operate the device correctly. Many who installed this type of water heater complained about its failure over time, referring to the poor quality of the product. In fact, the problem is not in the quality of the purchase, but in the carelessness of the one who uses it. The problem is that even the instructions highlight the recommendation for using a heater - when disconnecting, first turn off the device itself, and then water. And vice versa - when you turn on, first open cold water, and then connect the equipment to the network. With this operation, the likelihood that the heater will burn is minimized.
That's the whole technology of installing and connecting an electric instantaneous water heater with your own hands. As you can see, there is nothing complicated and even an electric kettle can handle such installation!
Also read:




Why is the phase wire in the block of the instantaneous water heater shown in blue? , and zero is shown in red. specially or mistake? it’s wrong.