We make conductive glue at home
Manufacturing process
First of all, you should prepare the following materials:
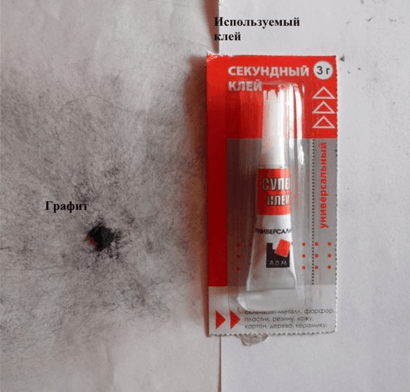
- a tube of superglue - “Moment” or “Second” or even varnish AI 156 or colorless “NTs”;
- soft simple pencil (both M2 and M4 are suitable);
- pliers.
After that, we proceed to the manufacture of conductive glue at home. Sharpen the pencil and break off part of the stylus. Mash the core yourself on a piece of paper to get graphite powder, as in the photo below:
Further, if you decide to make a conductive varnish from superglue, carefully unroll the tube from the back, which is tightly twisted into a tube. Now you need to fill the powder yourself through the unpacked back side of the tube (the ratio should be 1 to 1 by prescription). To make the consistency uniform, stir it with a match or a needle. When the home-made glue is ready, wrap the tube, as the manufacturer did, and to secure, tighten the twist with pliers. The tool for restoring tracks on the board is ready, you can proceed to use it.
We also recommend that you watch the video instruction, which shows how to make conductive glue yourself using a graphite rod and AI 156 varnish:
Where can I use the mixture?
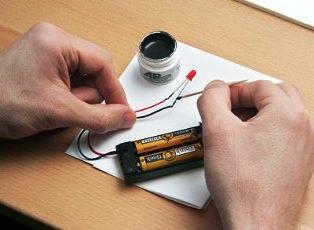
Homemade conductive glue, as we said, is recommended to be done in order to restore the tracks on the board, for example, with repair the remote control from the TV or the keyboard. Very often, radio amateurs recommend making such a consistency in order to reconnect the circuit boards where it is not possible to use a soldering iron. Such a mixture can be useful to motorists in repairing the rear window heating, if the contact has broken off.
That is all we wanted to tell you about this issue. We hope you now know how to make conductive glue with your own hands and why home electricians and hams need it!


Great site