How to install a dishwasher - step by step instructions
Step 1 - Preparing Tools and Materials
The first thing to do after buying the equipment is to prepare a set of all the necessary tools for connecting the dishwasher to the utilities. In addition, you should determine what consumables are required for installation work in order to buy them in advance. For standard conditions, that is, when metal-plastic pipes with a diameter of ¾ inch and a power network with grounding are bred around the house, the set of materials will be as follows:
- a waste siphon with two fittings (what if you want to install a dishwasher in the room along with a washing machine);
- ник inch diameter tee;
- ¾ inch shut-off valve;
- deep filter (significantly extend the life of the dishwasher);
- FUM tape;
- ground outlet;
- a wire of suitable cross-section and length (if there is no outlet nearby, and you will have to draw a new line from the junction box in the room).
Also, to connect a dishwasher with your own hands, you may need longer hoses for water and drain. Very often, short hoses come with the unit, which may be missing to the connection point. Here, you yourself must initially measure the necessary length of communications from the installation site to the connection points and compare with the length of the materials included in the kit.
As for tools, you will need the following list:
- electric drill;
- straight and curly screwdriver;
- sharp knife;
- scissors for plastic pipes;
- short construction level;
- two adjustable wrenches;
- indicator screwdriver (determine phase if missing wire color marking).
Having prepared the entire set of tools, you can proceed to choosing the right place for installing and connecting a dishwasher in a private house.
Step 2 - Choosing the Right Place
This stage, most likely, you have already fully thought out before you go and buy the goods. If you have not decided on a placement yet, we recommend that you consider the following nuances:
- The built-in option should correspond to the dimensions of the kitchen furniture. For the dishwasher, there is a special section of the kitchen set that allows you to install the dishwasher under the countertop, hob or even a sink. You can also place the case in the closet, if it is convenient for you.
- The distance to the sewage system must not exceed the mark of 1.5 meters, otherwise the equipment pump may fail prematurely. If the dishwasher is far from the sink and can only be installed from the edge of the kitchen, or for some reason the sewage system does not go into the kitchen, think about placing the appliances in the bathroom.
- Choose a location so that an outlet is already installed nearby. In this case, connecting the dishwasher to the mains will be much easier.
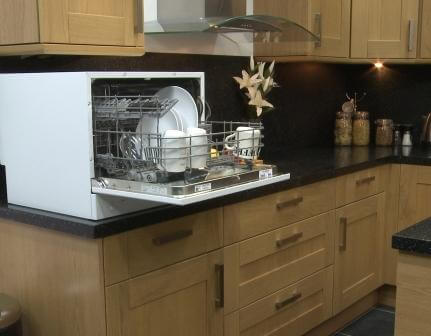
- If the model is a desktop type (as shown in the picture), you can not think over the drain system. It is enough to fix the hose in the sink (in the kitchen without it in any way). By the way, in this case, you can do without a siphon, in addition, the pump on the drain will be completely unloaded (the water will leave by gravity), which will significantly extend its service life. Installing a dishwasher on the countertop is much easier and is suitable for a small kitchen or if the furniture in the kitchen is old (does not fit modern standards).
Having determined the appropriate place, you can proceed to connect the dishwasher to the sewer, water supply and mains. Consider each of the steps in more detail.
Step 3 - Connect the water
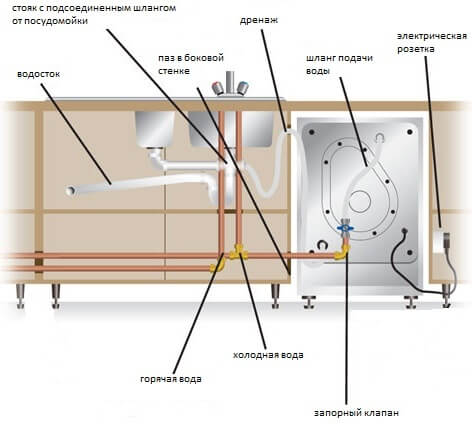
This stage is one of the most time-consuming and most time is spent on it. First you need to shut off the water in the system, because You will “embed” the tee into the metal-plastic pipe.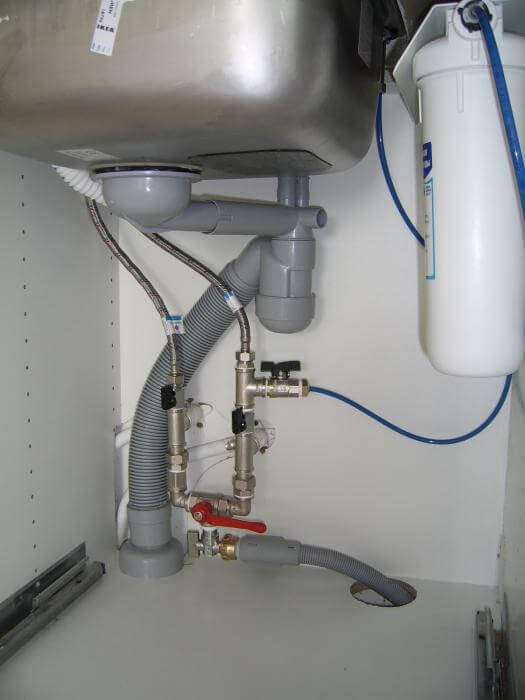
Connect the dishwasher to the water supply as follows:
- We find the connection point of the flexible hose of the mixer to the plastic pipe and disconnect it.
- We install a tee, after winding the tape on the threaded connections of the FUM.
- We wind on top on a tee a flexible hose of the mixer
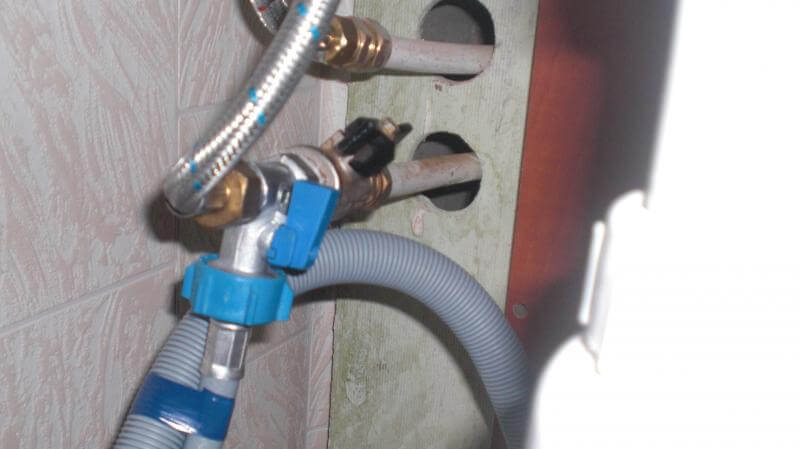
- We connect a fine filter to the tap, and after it we have a shut-off valve (do not forget to wind the cartridge on the thread).
- We connect to the tap with a hose from the equipment itself.
We draw your attention to the fact that only cold water should be used for water supply. Connecting the dishwasher to hot water is prohibited. its quality is several times worse and at the same time more electricity is spent on heating warm water than in the case of cold!
If you have no running water in the country, you can still install a dishwasher. In this case, you will need to put a tank of clean water in the attic. For the functioning of some models of technology, a pressure of 0.1 MPa (indicated in the passport) is sufficient, which will be created when water is supplied from a height of 2-3 meters. As you can see, you can connect the dishwasher yourself even without running water, there would be a desire. This option is often used in villages where the supply of HVS is unstable.
Step 4 - Letting Down
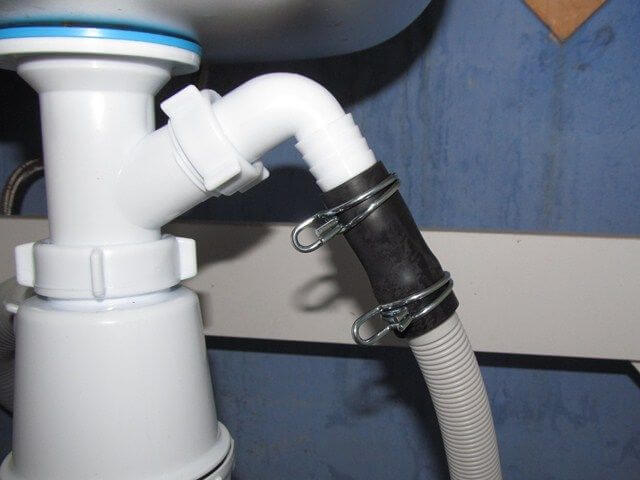
Everything is much simpler here. The best option would be to install a siphon under the sink, as in this case, unpleasant odors from the sewer will not spread throughout the kitchen.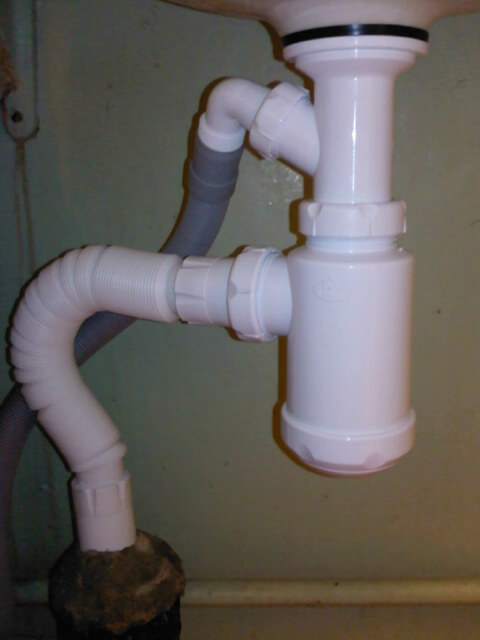
All you need is to connect the drain circuit to the siphon, making sure that the hose is at an angle. The greater the slope, the more efficiently the water will merge (by gravity). We draw your attention to a very important nuance - at the top, in the place where the drain is connected to the siphon, it is necessary to create a bend that will prevent water from the sink from entering the drain of the dishwasher (in the photo below you can see this bend).
Step 5 - Power Up
As we have already said, power must be supplied from an outlet located next to the equipment.The socket for connecting the dishwasher to the network must be rated at least 16A and at the same time have a grounding contact.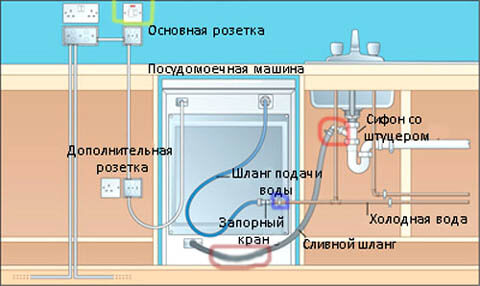
Since the power of the dishwasher is quite high, the wiring must withstand passing loads. To do this, you need to take care of a suitable section of the electrical wiring. Best done cable section calculation, on the basis of which to choose the most suitable option. It is believed that for the safe operation of this type of technology it is necessary to use a diameter of copper cores of at least 2 mm. Electricity must be from the junction box or the switchboard itself. Be sure to protect the line circuit breaker at 16A. Connecting the dishwasher without grounding is not allowed for reasons of electrical safety. If a washing machine is already connected to the outlet, you do not need to additionally load it with a dishwasher, as in this case, when two devices are operating, a current overload of the outlet may occur.
Step 6 - Final work
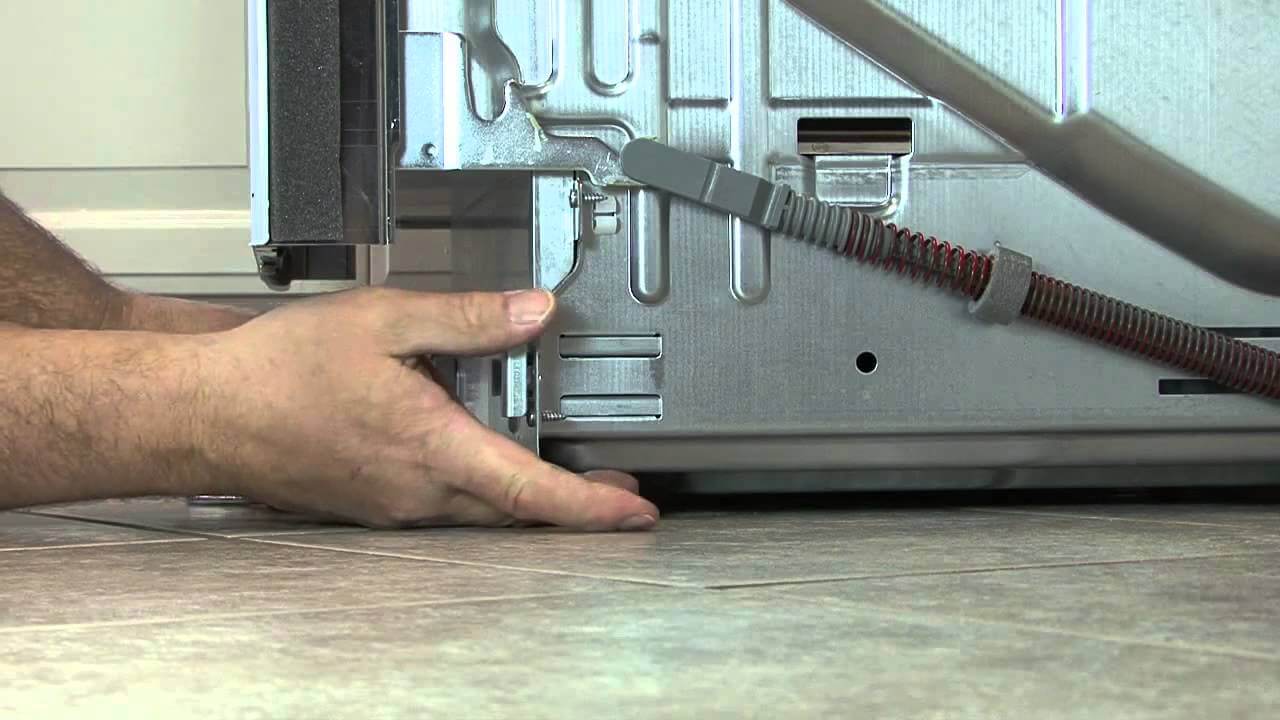
When you manage to connect all communications, it remains only to align the equipment in level and carry out a control check of installation work. As for the level, everything is pretty simple - you need to adjust the legs to set the body according to the building level by adjusting the legs. Any skew will negatively affect the efficiency of use and the durability of the dishwasher.
After installing and connecting the dishwasher, it remains only to check the quality of its work. To do this, run the test mode, in which there is a washing without dishes (idle mode). You must track how quickly water is poured and drained. Also, be sure to check all butt joints so that there are no leaks.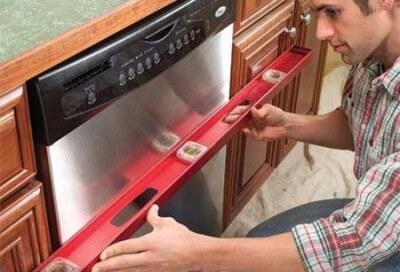
If everything is correct, then you were able to correctly install and connect the dishwasher on your own, with which we congratulate you! We recommend that you immediately see the visual video instruction, which shows the installation technology of the built-in model:
Useful Tips
To your attention are some useful tips that will not only allow you to connect the dishwasher correctly, but also extend the life of the equipment:
- Installing the drain hose in the sink is extremely unsafe, although it makes the connection process much easier. The danger is that the discharge of waste water can fall out of the sink and flood the neighbors from below.
- Electrolux technology is very demanding on installation rules. The maximum slope to one side should not exceed 2 degrees, so be sure to check this moment with the building level.
- If you decide to buy any model from Siemens, be sure to look at the dimensions of the case and check with the standards for the manufacture of furniture in which the installation will be carried out. Very often, Siemens neglects technical standards and creates non-standard dimensions, as a result of which difficulties arise when installing the dishwasher in the finished kitchen.
- In no case do not connect the grounding contact to the gas and water pipes. Grounding must be connected to the grounding bus of the apartment shield. About, how to make grounding in an apartment we told in a separate article.
- The air gap between the wall and the rear wall of the equipment should be at least 5 cm, which is quite enough for air circulation.
- The set must include connection rules and a visual diagram for a specific model. You need to rely only on her, because all conditions are purely individual, although they have much in common.
- Using surge protectors (extension cords) is not recommended, as they very often cause an accident and fire. If in no other way it turns out to bring power, it is recommended that you make an electrical extension cord. This method of connecting the dishwasher through an extension cord can be used, as an exception.
- If you decide to put a free-standing dishwasher next to the stove, refrigerator or oven, bring a separate line to each appliance from the junction box so as not to overload the outlet installed near all devices.
We also recommend that you watch a visual video instruction on the proper operation of the dishwasher:
Here is the whole instruction on how to connect the dishwasher to your own water supply, electricity and sewer. We hope that the information was useful and interesting for you. We also recommend that you familiarize yourself with major dishwasher malfunctionsso that in the future you will be familiarized with how to repair equipment at home!




“If you don’t have a water supply in your country house, you can still install a dishwasher. In this case, you will need to put a tank of clean water in the attic. For the operation of some models of equipment, a pressure of 0.1 MPa (indicated in the passport) is enough, which will be created when the water is supplied from a height of 2-3 meters. "
This is mistake. 0.1MPa = 10m water column, and 2-3m is only 0.02 - 0.03 MPa