Master class on creating an electrode boiler from improvised means
Briefly about the principle of action
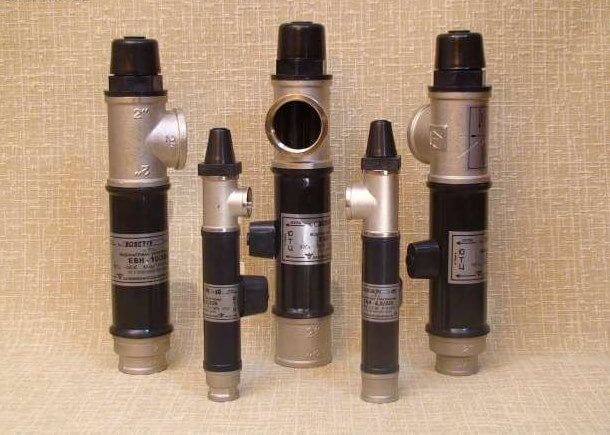
First of all, we will tell you about how this type of water heater for the heating system works. The principle of operation is quite simple - the coolant (in our case pure water) enters the container in which the electrode is installed - a thick metal rod fixed to one of the ends of the container. A phase is connected to the electrode, and a neutral conductor to the outer part of the housing. When the device is connected to a 220 Volt network with a frequency of 50 Hz, the coolant begins to randomly move from the anode to the cathode, as a result of which the water ions are heated. That is why electrode boilers can still be called ionic. As you can see, the principle of operation is really not complicated, although at the same time, the efficiency of the system is 96-98%, which is a very high indicator.
Simple homemade tools
So, first of all, we will provide you with step-by-step instructions for creating an electrode heating boiler at home, having at hand the simplest parts - a metal pipe and electrode, as shown in the photo: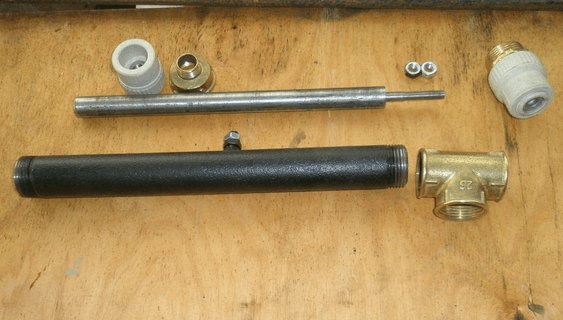
All you need for manufacturing is:
- welding machine;
- a pipe with a diameter of not more than 10 cm and a length of up to 25 cm;
- electrode (metal rod 10-12 mm is suitable);
- a tee of suitable diameter;
- a clutch that will connect to the heating system;
- an insulator for the electrode and terminals (zero, ground);
The assembly process is quite simple and consists of the following steps:
- On both sides of the pipe you need to wind the sleeve and tee, carefully tightening the product so that there are no leaks in the future.
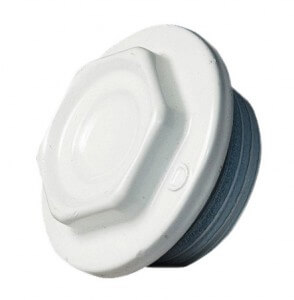
- Place the electrode on the tee side into the pipe, fixing it motionlessly inside with a dielectric insulator. In this case, you can use the plug from the bimetallic radiator (as in the photo below), the main thing is to provide insulation between the pipe and the electrode (so that they do not touch). In the plug, it is only necessary to drill a hole of a suitable diameter, insert a rod into it and fix it with a nut on the outside.
- On the pipe body, weld two bolts, M8 or M10. They are needed to connect the ground and ground terminals. The exposed connection points will also need to be insulated to protect themselves from electric shock.
- Install a homemade electrode boiler in the heating system.Since the dimensions are small, it can be hidden even under the sink in the bathroom.
- Start the coolant in the system and try the finished homemade product.
That's the whole manufacturing technology. A drawing of a simple electrode boiler should look something like this: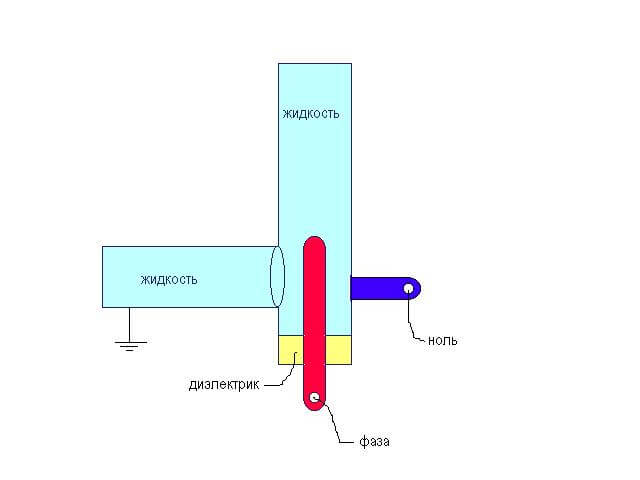
In addition, we advise you to watch a video review that describes the feedback from the owner of the electrode boiler, which has been used for over 6 years:
5-part master class
Well, if you have a good command of the welding machine, we recommend making the electrode boiler yourself, observing all the tips provided in the video course below. Such a homemade product will be safer, reliable and effective!
As you can see, you can make an electrode boiler yourself, without having to spend a penny of your own money. The main desire and we hope that this video course motivated you to do it yourself!
Similar materials:

